


With some creativity and craftsmanship, even the most lifeless household items can become reinvigorated. So, rather than chucking out your rundown furniture, why not try out these upcycling ideas that’ll give them a new lease on life? Not only will these DIY tricks save you money, but you’ll be doing your bit to save the planet, too. Upcycling means reduced air and water pollution compared to buying a new product; as a result, it’s the far more sustainable choice.
Upcycle Ideas: Your Next DIY Project
Searching for some inspiration? You’re in luck! We’ve compiled a list of our favourite upcycling ideas for you to try out at home. From old bricks to abandoned cabinets, there are endless ways to revamp and declutter your household. Let’s get stuck in and sort out your next eco-friendly DIY project.
- Upcycled Wardrobe Ideas
- Upcycled Chest Of Drawers Ideas
- Upcycled Bedside Table Ideas
- Upcycled Dressing Table Ideas
- Upcycled Mirror Frame Ideas
- Upcycled Bookcase Ideas
- Upcycled Drinks Cabinet Ideas
- Upcycled Kitchen Ideas
- Upcycled Garden Ideas
Upcycled Wardrobe Ideas
Is your old wardrobe looking a little worse for wear? Whether the paint is chipping away or the wooden doors are starting to splinter, it’s nothing that sanding, painting, and proper hardware can’t solve. Before you get stuck in, remove all clothing from the wardrobe, move it to a flat surface, and take out any fixtures you aren’t looking to replace (e.g. shelves and drawers).
When your wardrobe is fully prepared, let’s get cracking. Use a screwdriver to remove knobs, pulls or handles. If you plan on keeping the same hardware, store them in a safe place. Be sure to give your wardrobe a once over to check for any loose screws or pins.
Next, you’ll want to prepare the wardrobe for painting. Firstly, it’s crucial you clean old and worn furniture before renovating. Over the years, it will have accumulated lots of dirt and dust, so to avoid uneven coats of paint, we’ll need to wipe them down – soap, water and a sponge will do the trick. Let the wardrobe dry before proceeding with the next step.
Before painting, the wardrobe will need sanding. This is one of the most critical steps for upcycling projects. Not only does it help remove any marks and scuffs in the wood, but it also improves the way primer and paint adhere to the surface. Sanding creates lots of dust, so this needs to be done somewhere with plenty of ventilation. When you’re ready, get to work with a hand-held belt sander or some sandpaper.
Step four is to finally prime and paint your wardrobe. After stirring your primer, apply a generous coat with a foam roller to the wardrobe. It’ll take around 30 minutes for this first coat to dry. For significant colour changes, second and third coats might be necessary. Once you’ve settled on your colour of choice, coat the entire cabinet with your first layer of paint. Keep layering the paint until you’ve got the finish you want without any patches.
Once dry, replace all handles and shelving for the finished product. You’ve completely transformed your space without breaking the bank!
Upcycled Chest Of Drawers Ideas
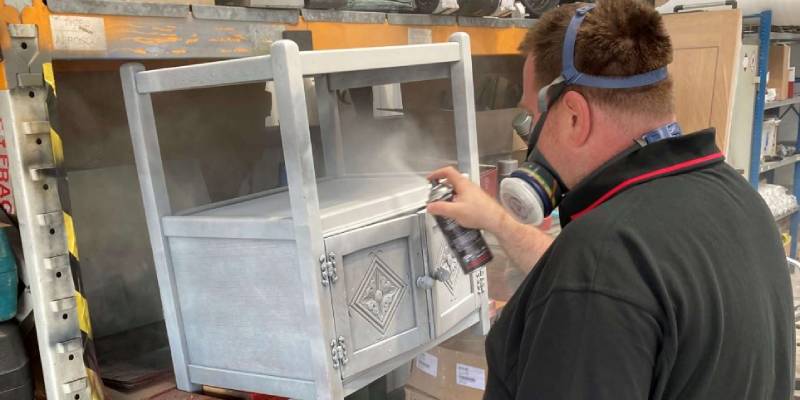
An upcycled chest of drawers can become a real statement piece in your home. The key to nailing your design is using different textured paints. Try experimenting with matt and satin finishes to make your drawers pop. You’ll get your dull chest of drawers looking brand new with some spray paint. Go with a colour palette that complements your home’s interior so your upcycled drawers fit right in.
Once you’ve settled on the colour, it’s time to think about the finishing touches. With old chests of drawers, it’s common for the handles and knobs to become dated or dysfunctional with time, so replacing them is crucial. Along with style, it’s essential to consider the practicality of your new handles. The Handle Studio offer dozens of sturdy styles that perform well whilst looking fabulous.
For the finishing touches, add a coat of varnish and decorate your new chest of drawers with some greenery. Houseplants are an excellent interior design tool to utilise wasted space and create a more welcoming feel. This selection of small houseplants from Happy Houseplants are ideal for perching on top of our refurbished cabinet.
Upcycled Bedside Table Ideas
As crazy as it sounds, your old bread bins are a trendy bedside cabinet waiting to happen. With the help of some super glue, you can repurpose two bamboo bread bins into a beautiful side table. The sliding doors make for easy access in low light, and with two back-to-back, there’s plenty of space for all of your essentials.
Start off by choosing your colourway. Whether you’re going for bold or neutral tones, use masking tape to ensure you’re as accurate as possible with your painting. The bread bin’s design is ideal for layering with different colours, so why not switch up the style on the door and frame? RAL aerosols offer hundreds of different colours, so you’re sure to find a combination that suits your home.
Once your paint has dried, you’ll need the strongest super glue you can find. This Gorilla Grab Adhesive from Gorilla Glue is ideal for this kind of project. Carefully trace it around the edge of what would previously have been the base of your bread bin. Bring the bins together so they’re perfectly aligned, and all of the connecting surfaces are flat – this is important so you don’t have any ridges on your bedside table.
After the glue has dried and the bins are bound, coat them with varnish to protect the paint and create a glossy finish. Finally, add some legs to the base that’ll suit your chosen style. If you’re feeling super sustainable, how about creating your own out of scrap metal or wood?
Upcycled Dressing Table Ideas
When done right, an upcycled dressing table can transform a bedroom. There’s plenty of room to get creative with a dressing table. From bright colours to out-there ornaments, the bolder, the better.
The upcycling process for a dressing table is very similar to that of other bedroom furniture. The key to nailing your re-design is taking extra care with your painting. Be sure to sand and prime your surfaces before layering them with multiple coats of paint.
Dressing tables are an excellent opportunity to experiment with different handles as they often come with wooden knobs as standard. So many options are available, so take some time to consider what works best with your new design.
Upcycled Mirror Frame Ideas
Old mirrors are often discarded without a second thought due to scratches or damage to the glass. However, the frames that surround these mirrors are usually in perfect condition and can be easily repurposed. From photo frames to coat hangers, there are plenty of uses for your old mirror frames. But before any of that, you’ll need to remove the glass.
Typically, glue is used to attach a mirror to its wooden backing, so it’s important we can detach the two without damaging the wood. The easiest way to do this is with a heat gun. By targeting the edges of the frame, the glue will begin to soften under the heat and dislodge the mirror.
In the absence of a heat gun, a crowbar is the next-best option. In this method, levellers should be placed between the mirror and the frame on all sides before sliding the crowbar between the gaps. You should hear the glue peeling away as you shimmy around the edge.
Once detached, you can begin re-styling the frame for its intended purpose. If it’s a shabby chic look you’ve got in mind, try out some aerosol paints at a distance to give it a more rustic finish.
Upcycled Bookcase Ideas
Before you get rid of that old wardrobe, how would it look as a bookcase? In fact, any old cabinet can easily become a bookcase by removing the doors and giving it a little TLC.
Using a screwdriver, gently remove the doors and their hinges, being careful not to damage the wooden frame. Often, the rear wall of a wardrobe isn’t very appealing, having never previously been on display. As a result, replacing it with wooden panelling is usually your best option. For the woodworkers, why not try repurposing your wardrobe doors into shelves and panelling? If not, you’ll need to pick out some shelves that fit your frame.
Pick a colour palette and paint your frame and shelves separately for maximum convenience. In the shelving unit below, the designer has paired a neutral green with a natural wooden finish for a gorgeous finish. Fill the shelves with books, ornaments and plants for a super homely end product.
Upcycled Drinks Cabinet Ideas
Looking for a way to really wow your guests? A stand-out drinks cabinet is a guaranteed crowd-pleaser. Add a pop of colour to your dining room with a statement piece that looks brand new.
Freshen up the dated wooden finish with a fresh layer of paint and add some LED lights to highlight your drinks collection. The impressive revamped cabinet will become the heartbeat of your social occasions.
Upcycled Kitchen Ideas
In many households, the kitchen is the heart of the home. So, keeping it fresh and stylish is super important. Complete kitchen renovations can be costly and overwhelming, but there are plenty of ways to transform your space on a budget.
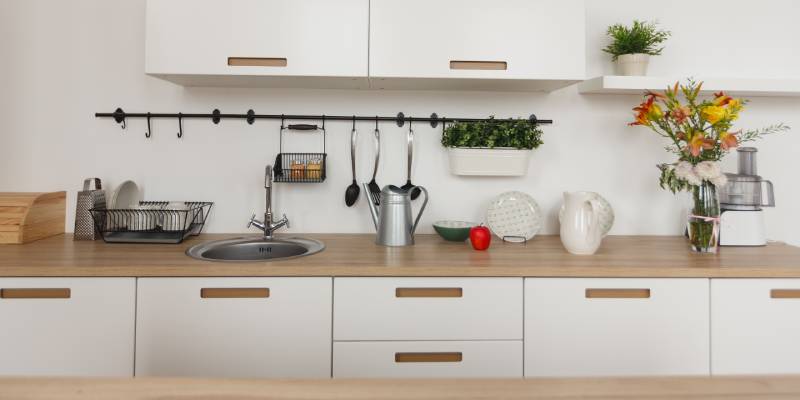
Firstly, paint is a simple way to upcycle any kitchen. A new colour can completely change the vibe of your kitchen, immediately giving it a boost. Lighter shades are usually the best way to style your kitchen, as they are far more lively and welcoming. Chuck in some soft features like cushions and throws, and it’ll rapidly become unrecognisable. Stock up on paint aerosols to make your kitchen rebrand a whole lot easier.
In addition to a fresh lick of paint, space-saving solutions often make your kitchen feel brand new as new areas that were previously wasted become available. This homeowner has repurposed a disused curtain rail into some stylish storage. From kitchen utensils to spices, plenty of items are easily accessible in a way that’s easy on the eye.
Upcycled Garden Ideas
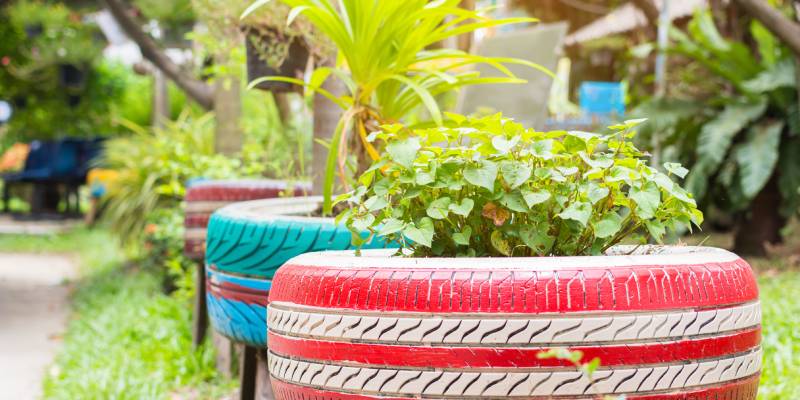
The garden is packed with upcycling potential. Whether it’s the pride of your home or needing a little love, your garden is the perfect place to experiment with different sustainable ideas. The effects of the weather can often leave your garden furniture looking slightly dated, so again, our first port of call is to freshen it up with some paint. Be sure to go bold because the garden is a place made for bright colours.
If you’ve got bricks left over from a previous DIY project, they’re great at adding a floral boost to your garden. Scoop some dirt or potting soil into the holes of the brick and add some small succulents for some low-maintenance greenery.
Looking to make use of your empty patio space? Old wooden pallets could be the solution to your problem. With a couple of layers of weather-resistant paint, these pallets become the ideal table for a summer social area. They’re sturdy and low maintenance, making them ideal for garden parties. Add some metal caster wheels to the base for ultra-convenience, and roll them in and out of your garden when needed.
Alternatively, make use of some old wooden ladders by turning them into a trellis over your garden walkway. The large gaps between rungs are perfect for winding plants to climb up and over the structure. This budget-friendly upcycling idea will have your garden looking like something straight out of a fairytale.
What Are You Waiting For?
It’s clear that when it comes to upcycling, the options are limitless. From the bedroom to the garden, your house can be transformed by simply using items you previously saw as waste. Whether you’re feeling motivated to take on your own DIY project or still need some inspiration, be sure to think twice next time before you buy new.
Be sure to stock up on all of the paint you’ll need from DC Paint Solutions so you’re not taking on your projects under-equipped. From primers to lacquers, we’re your one-stop shop for spray painting essentials.


