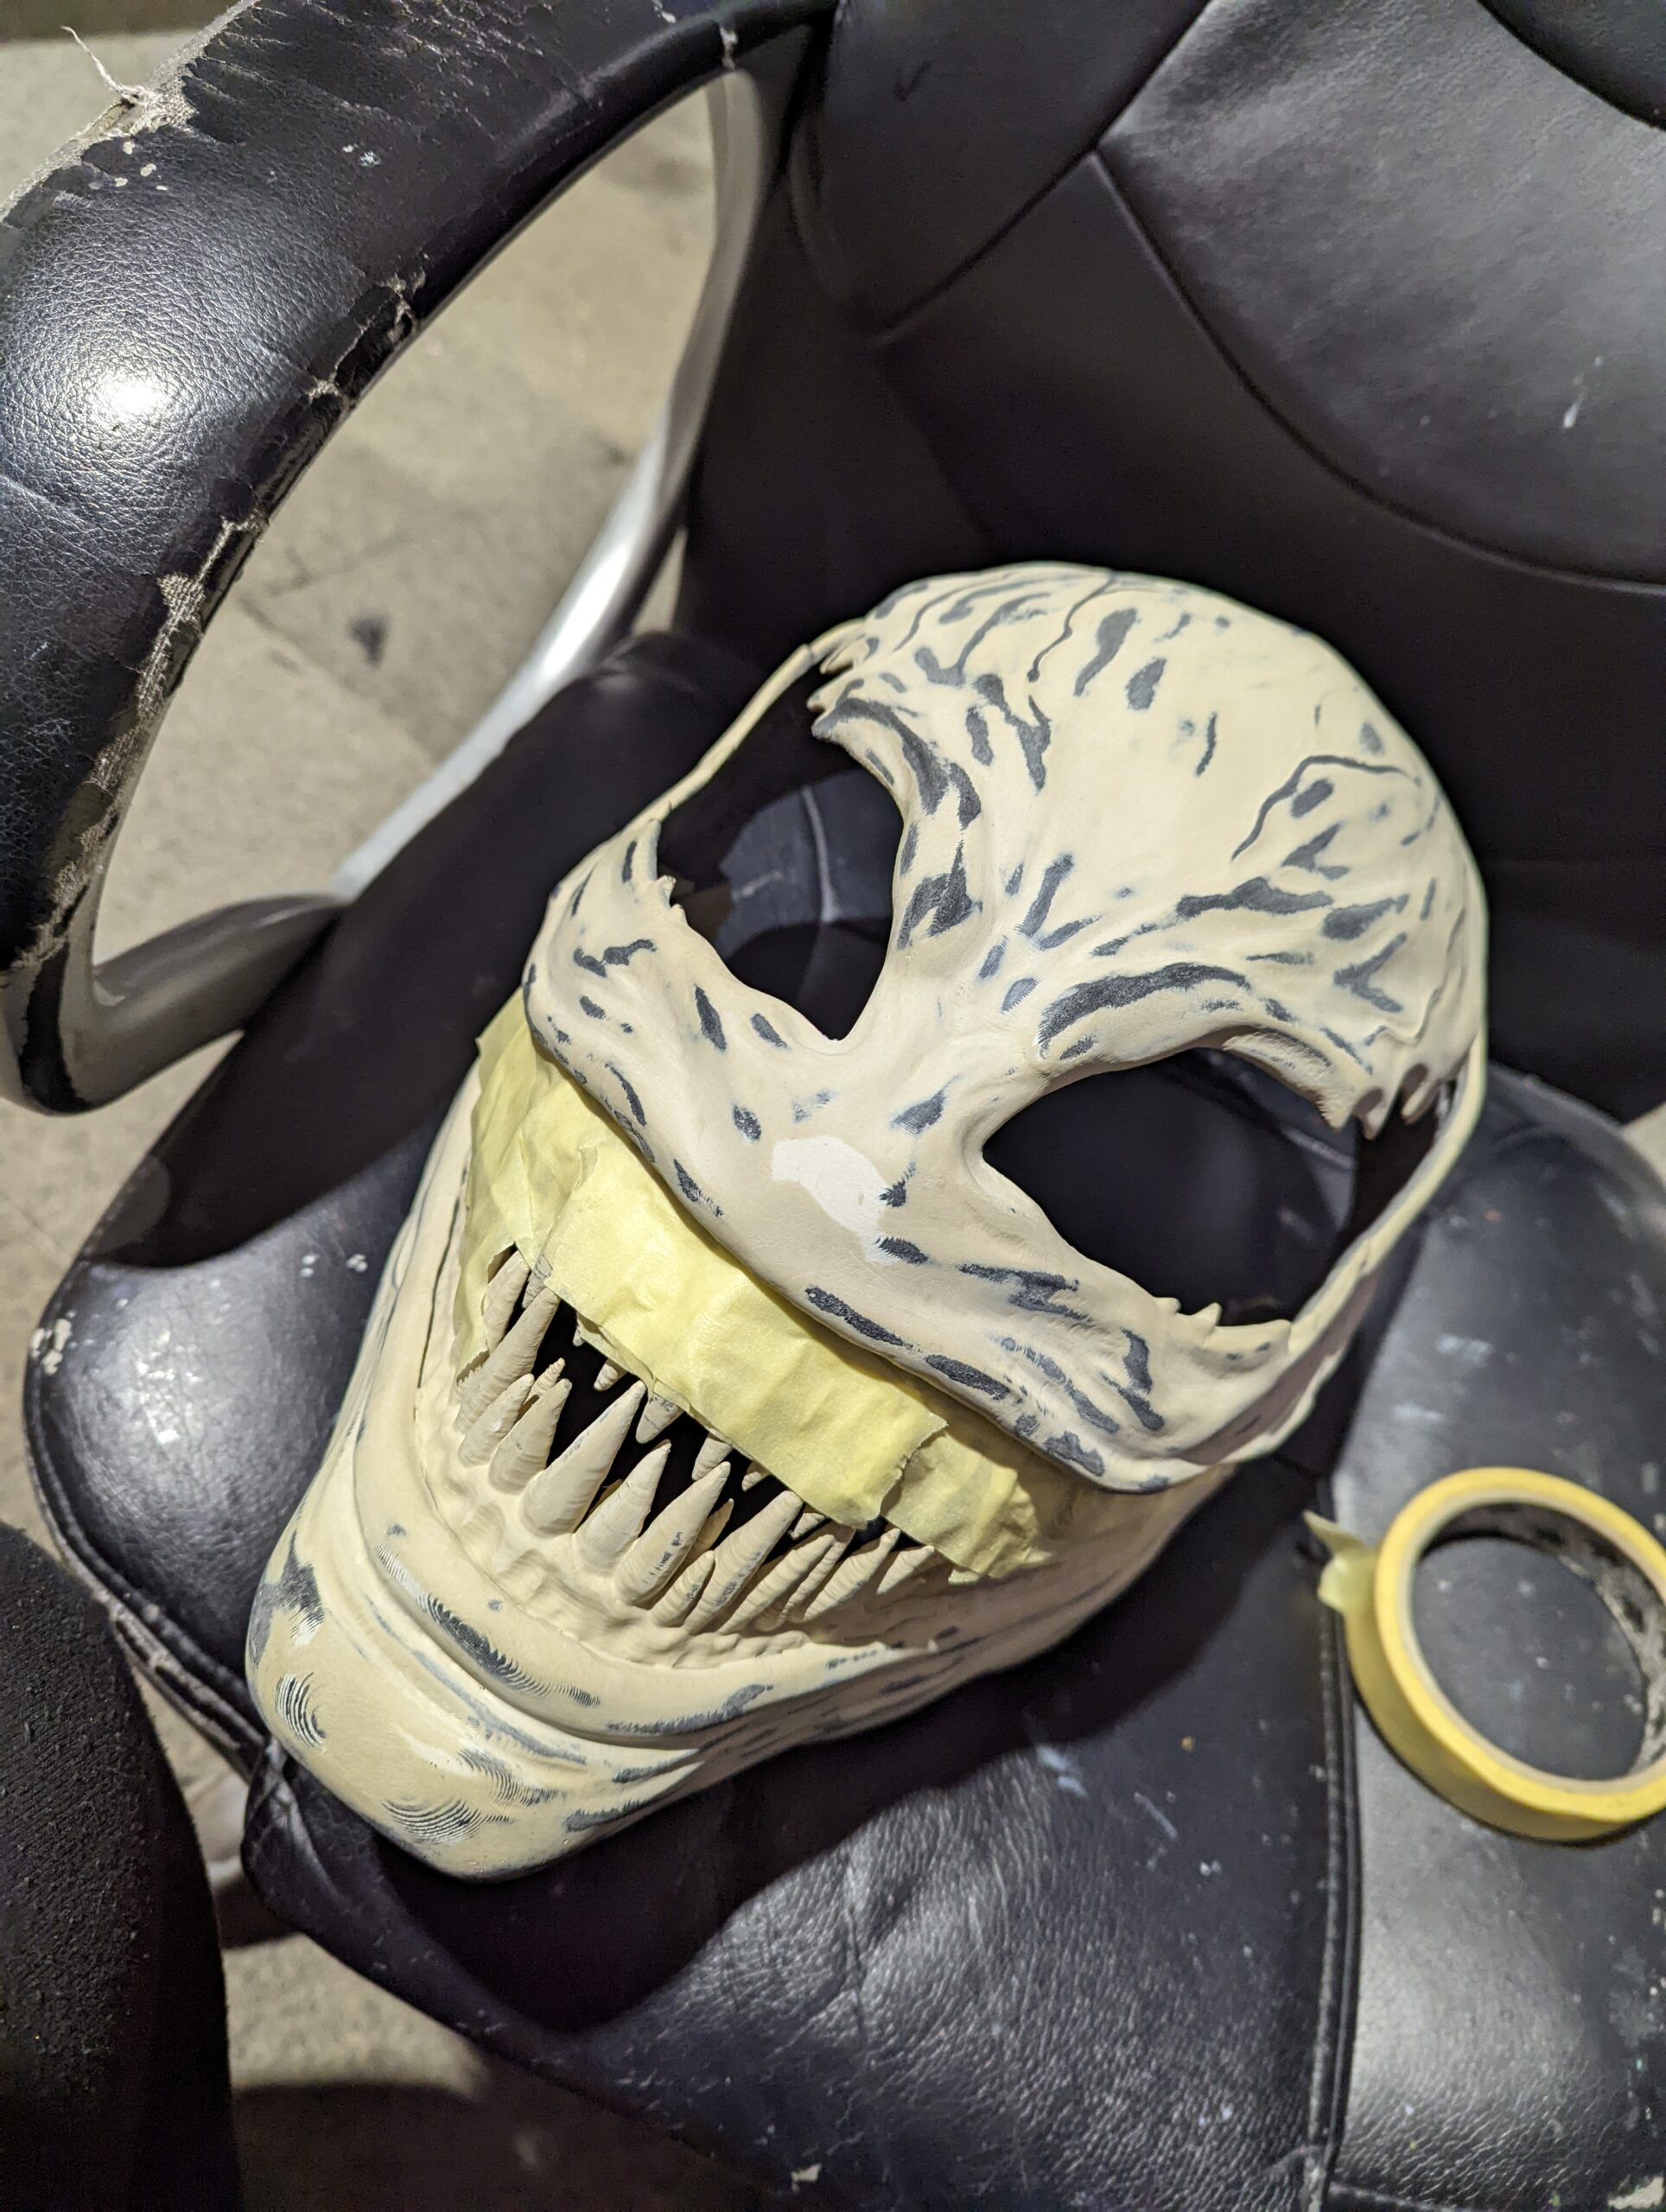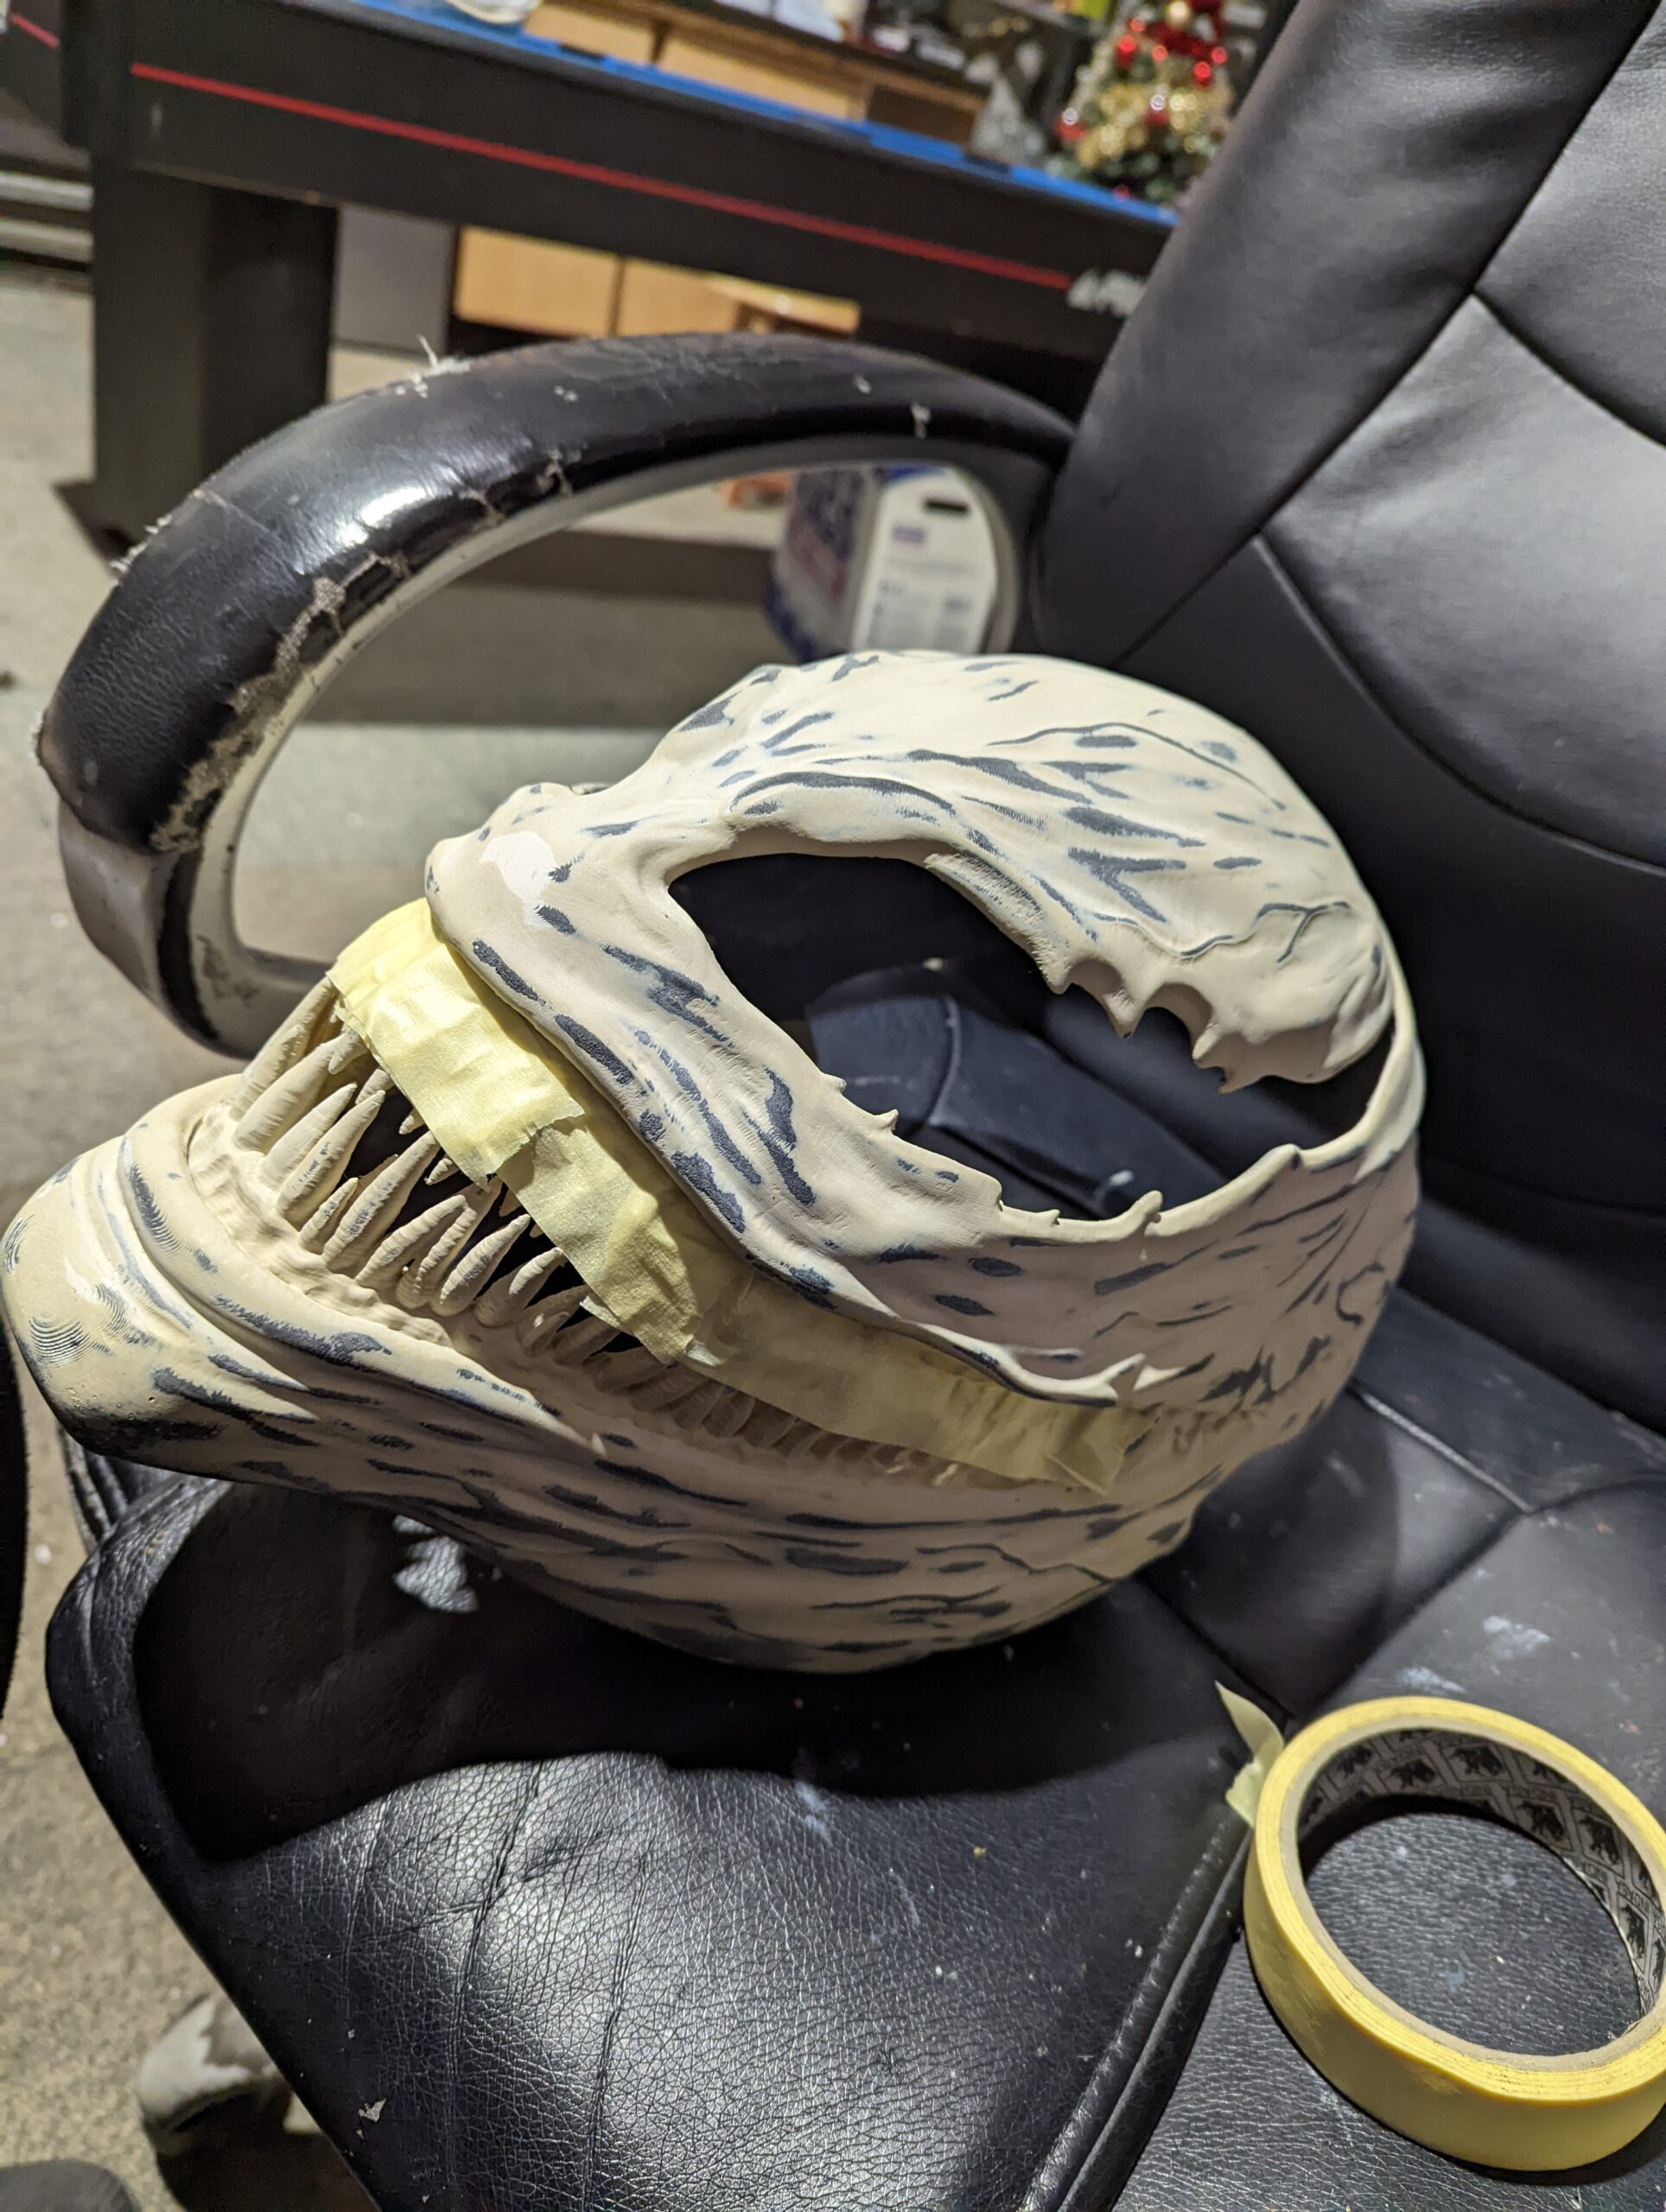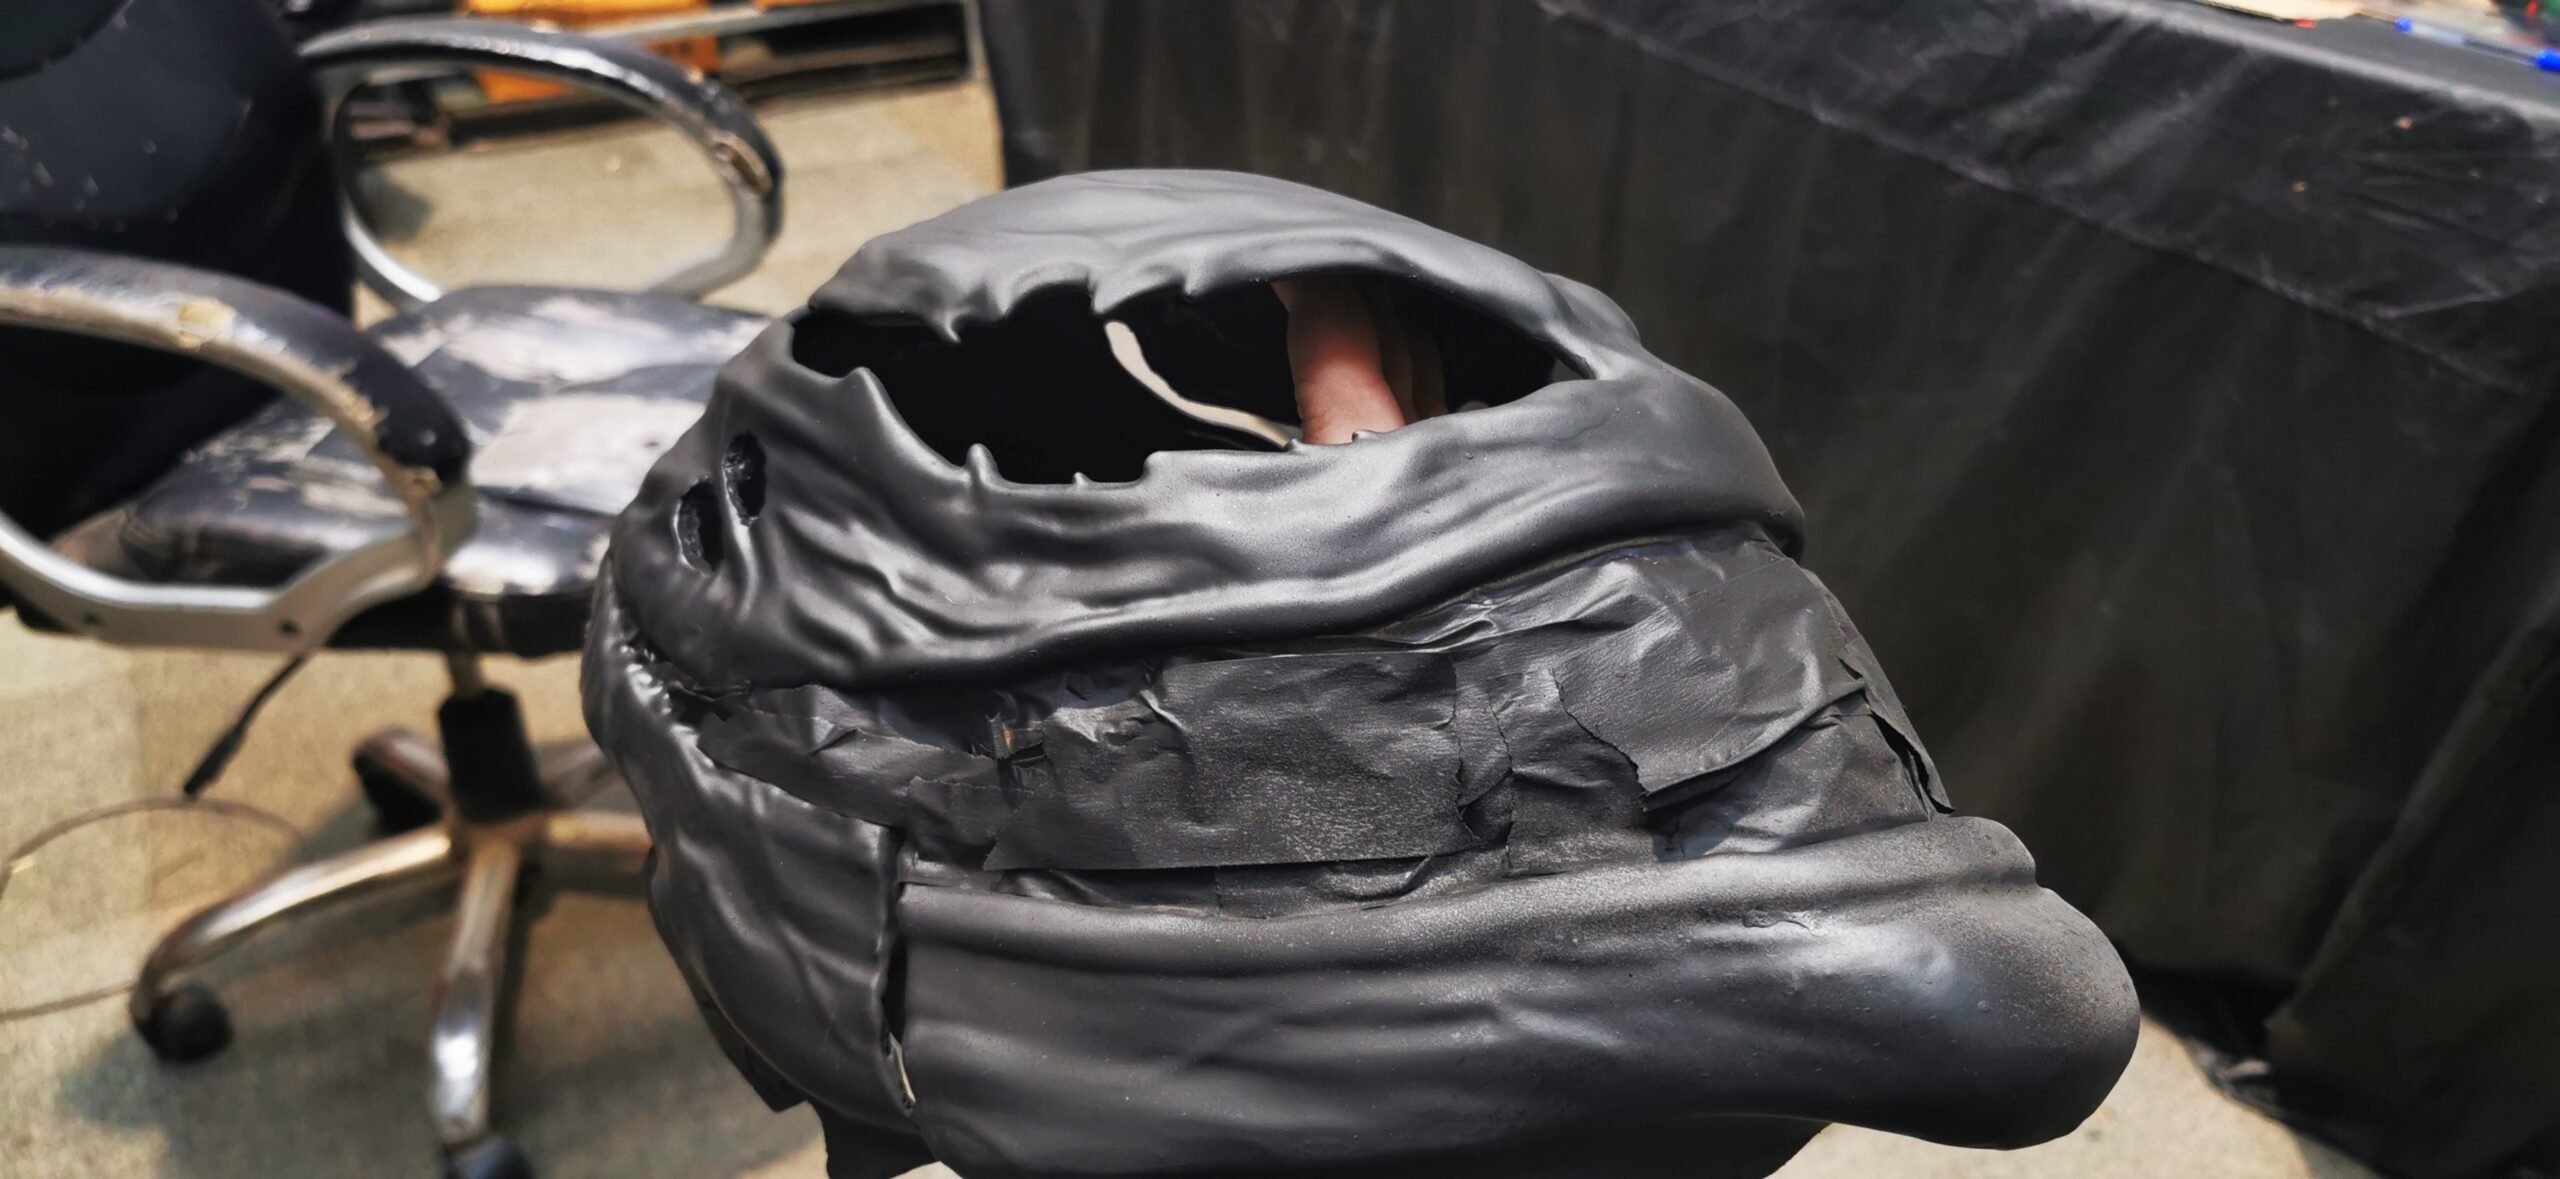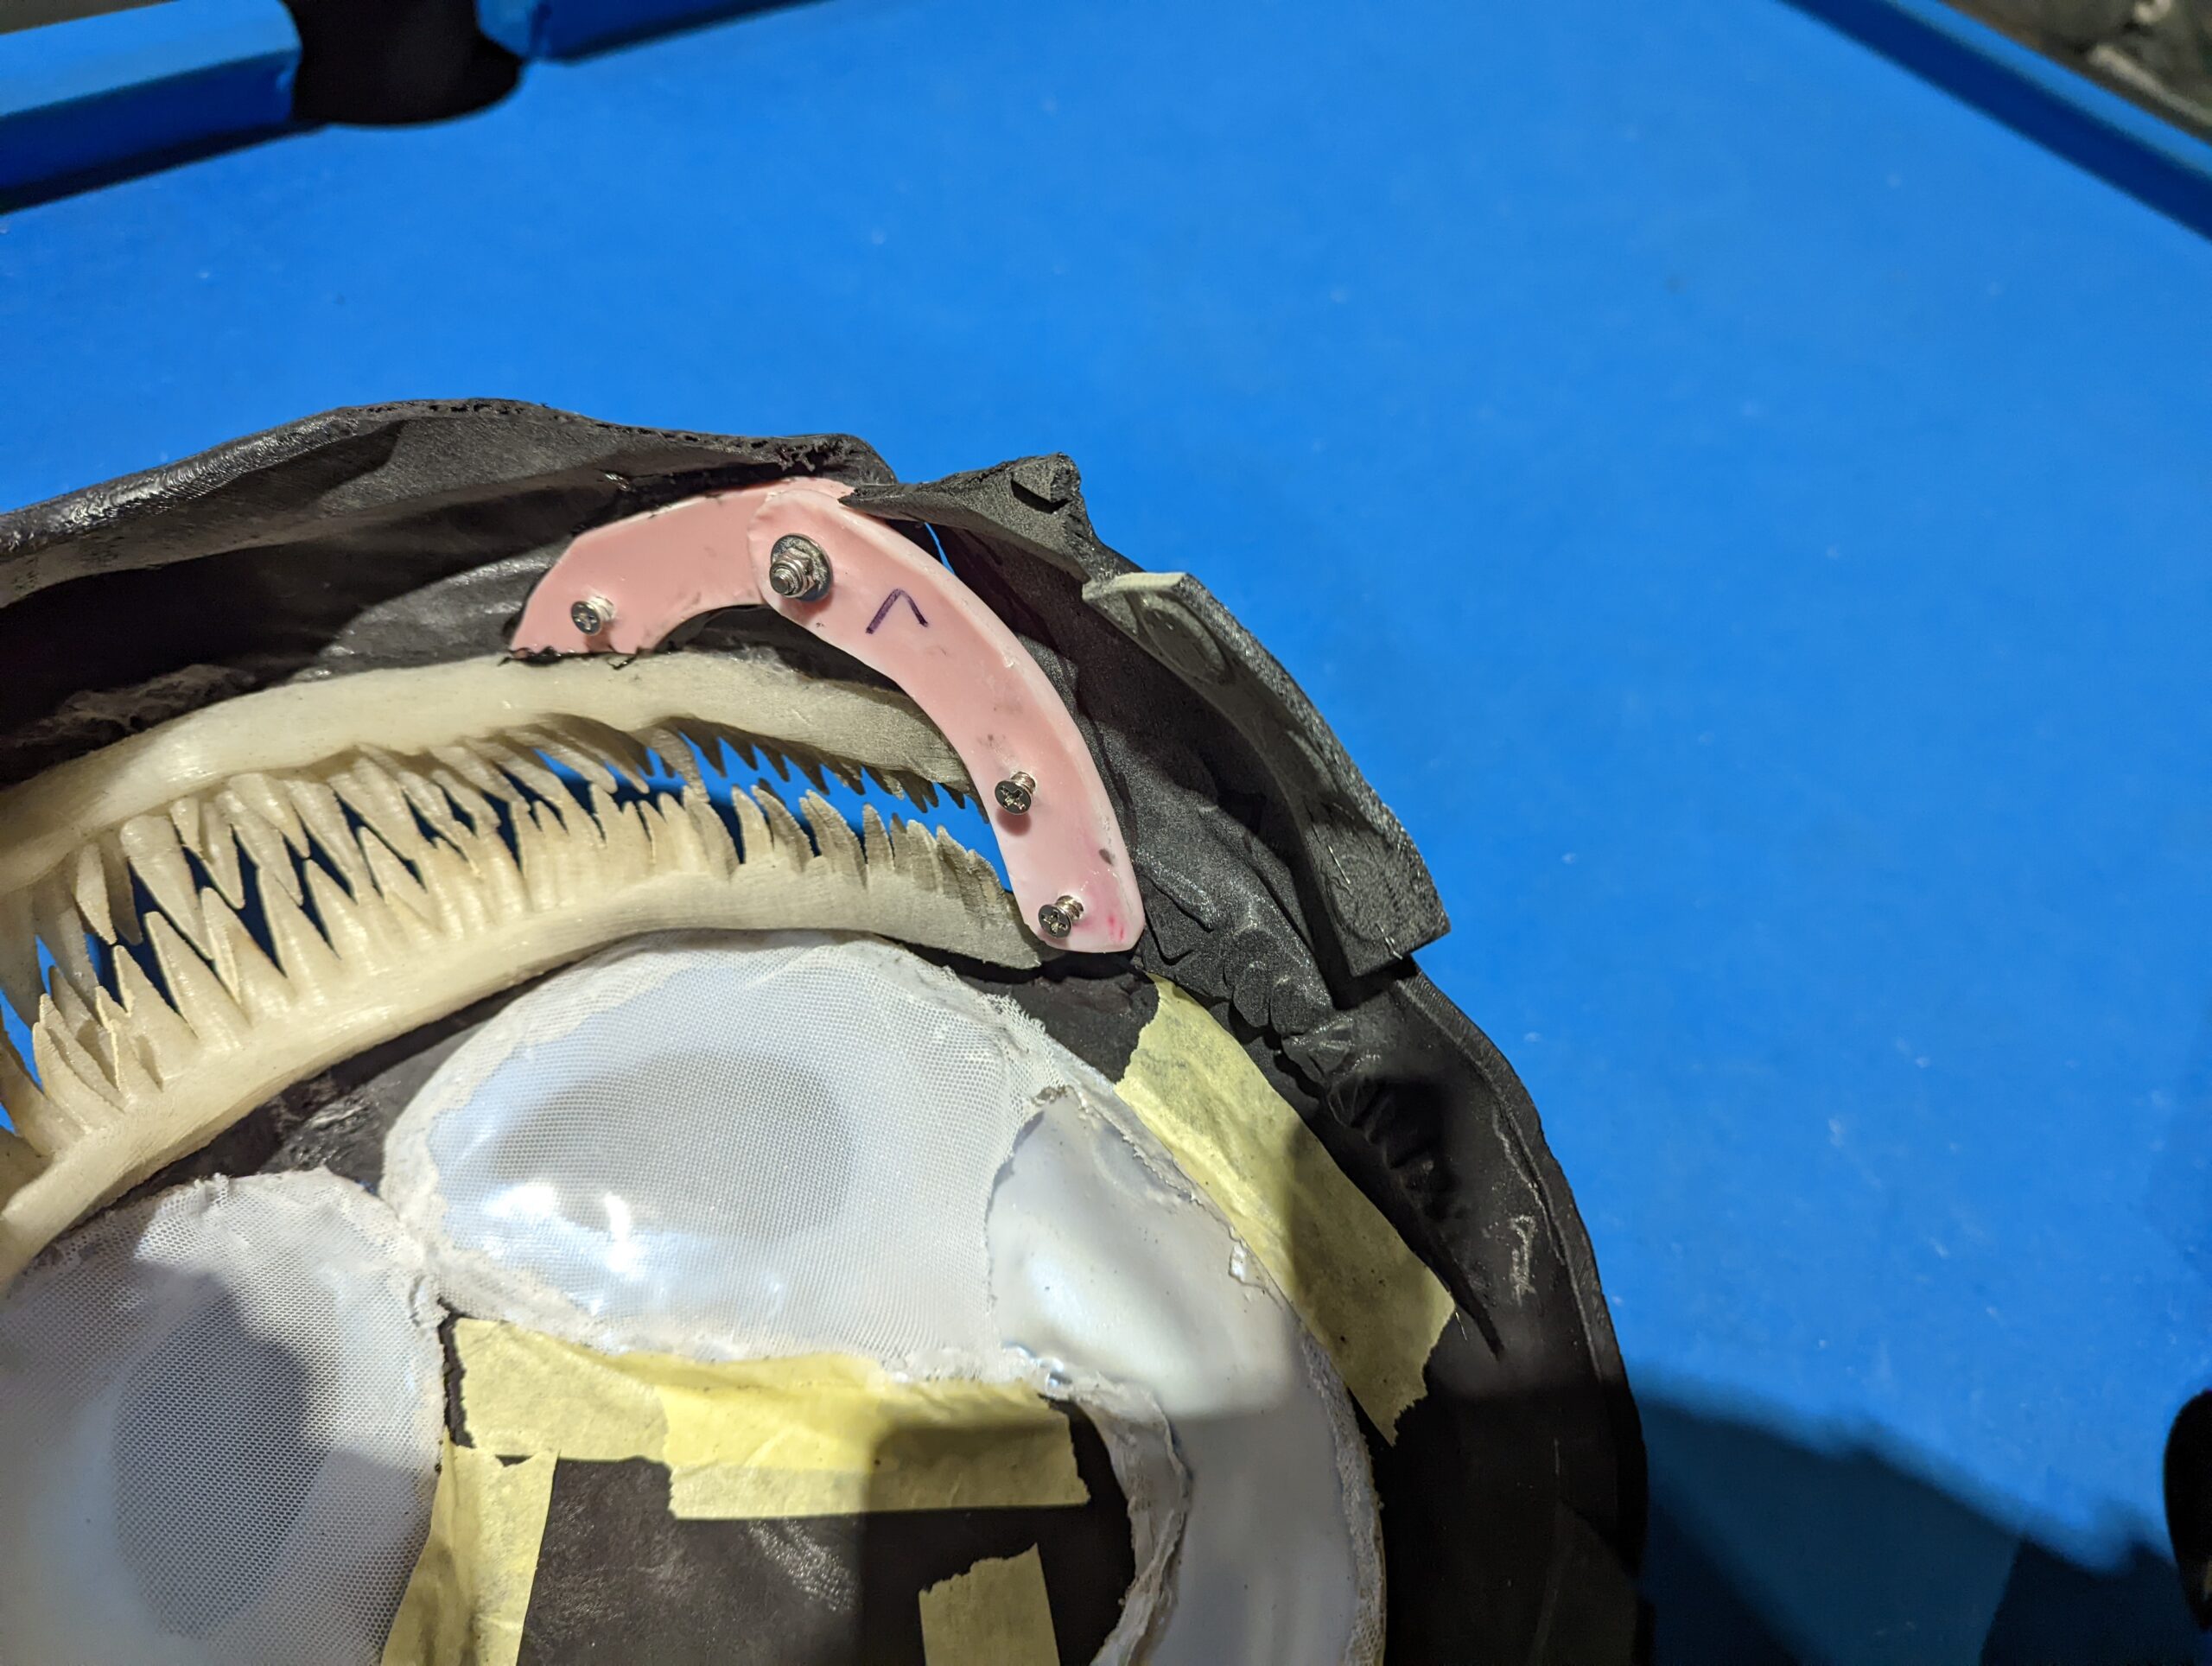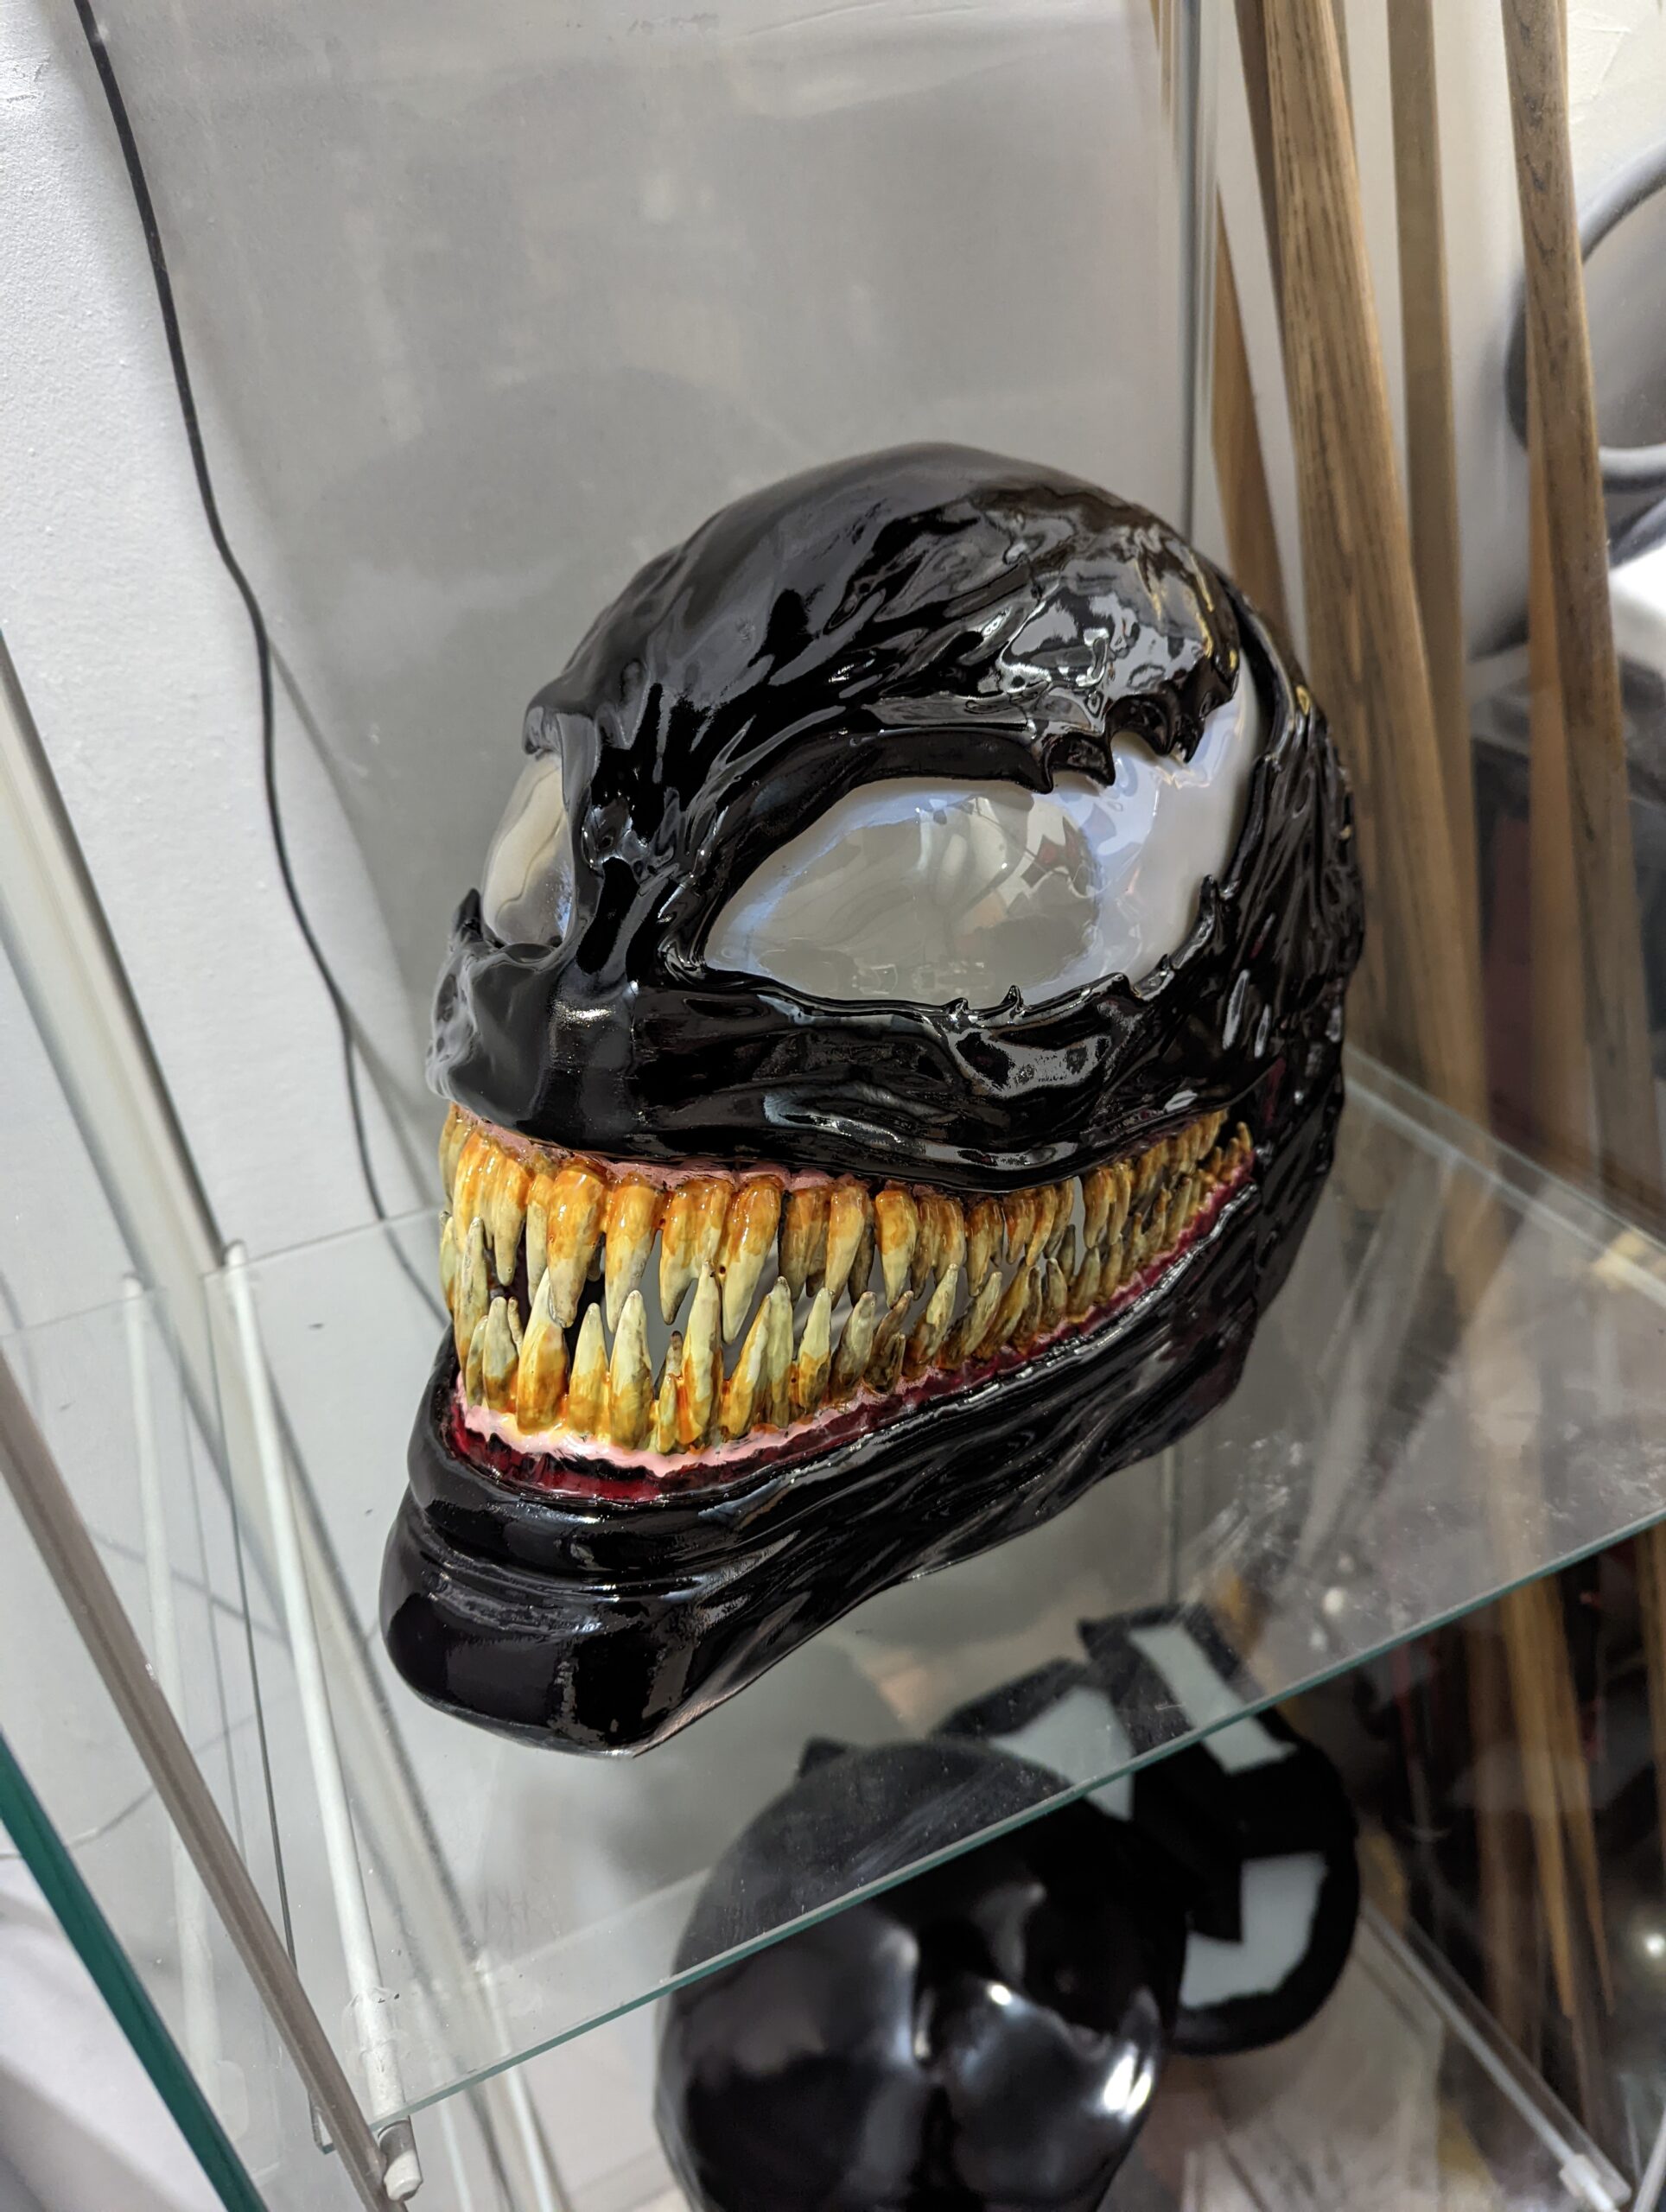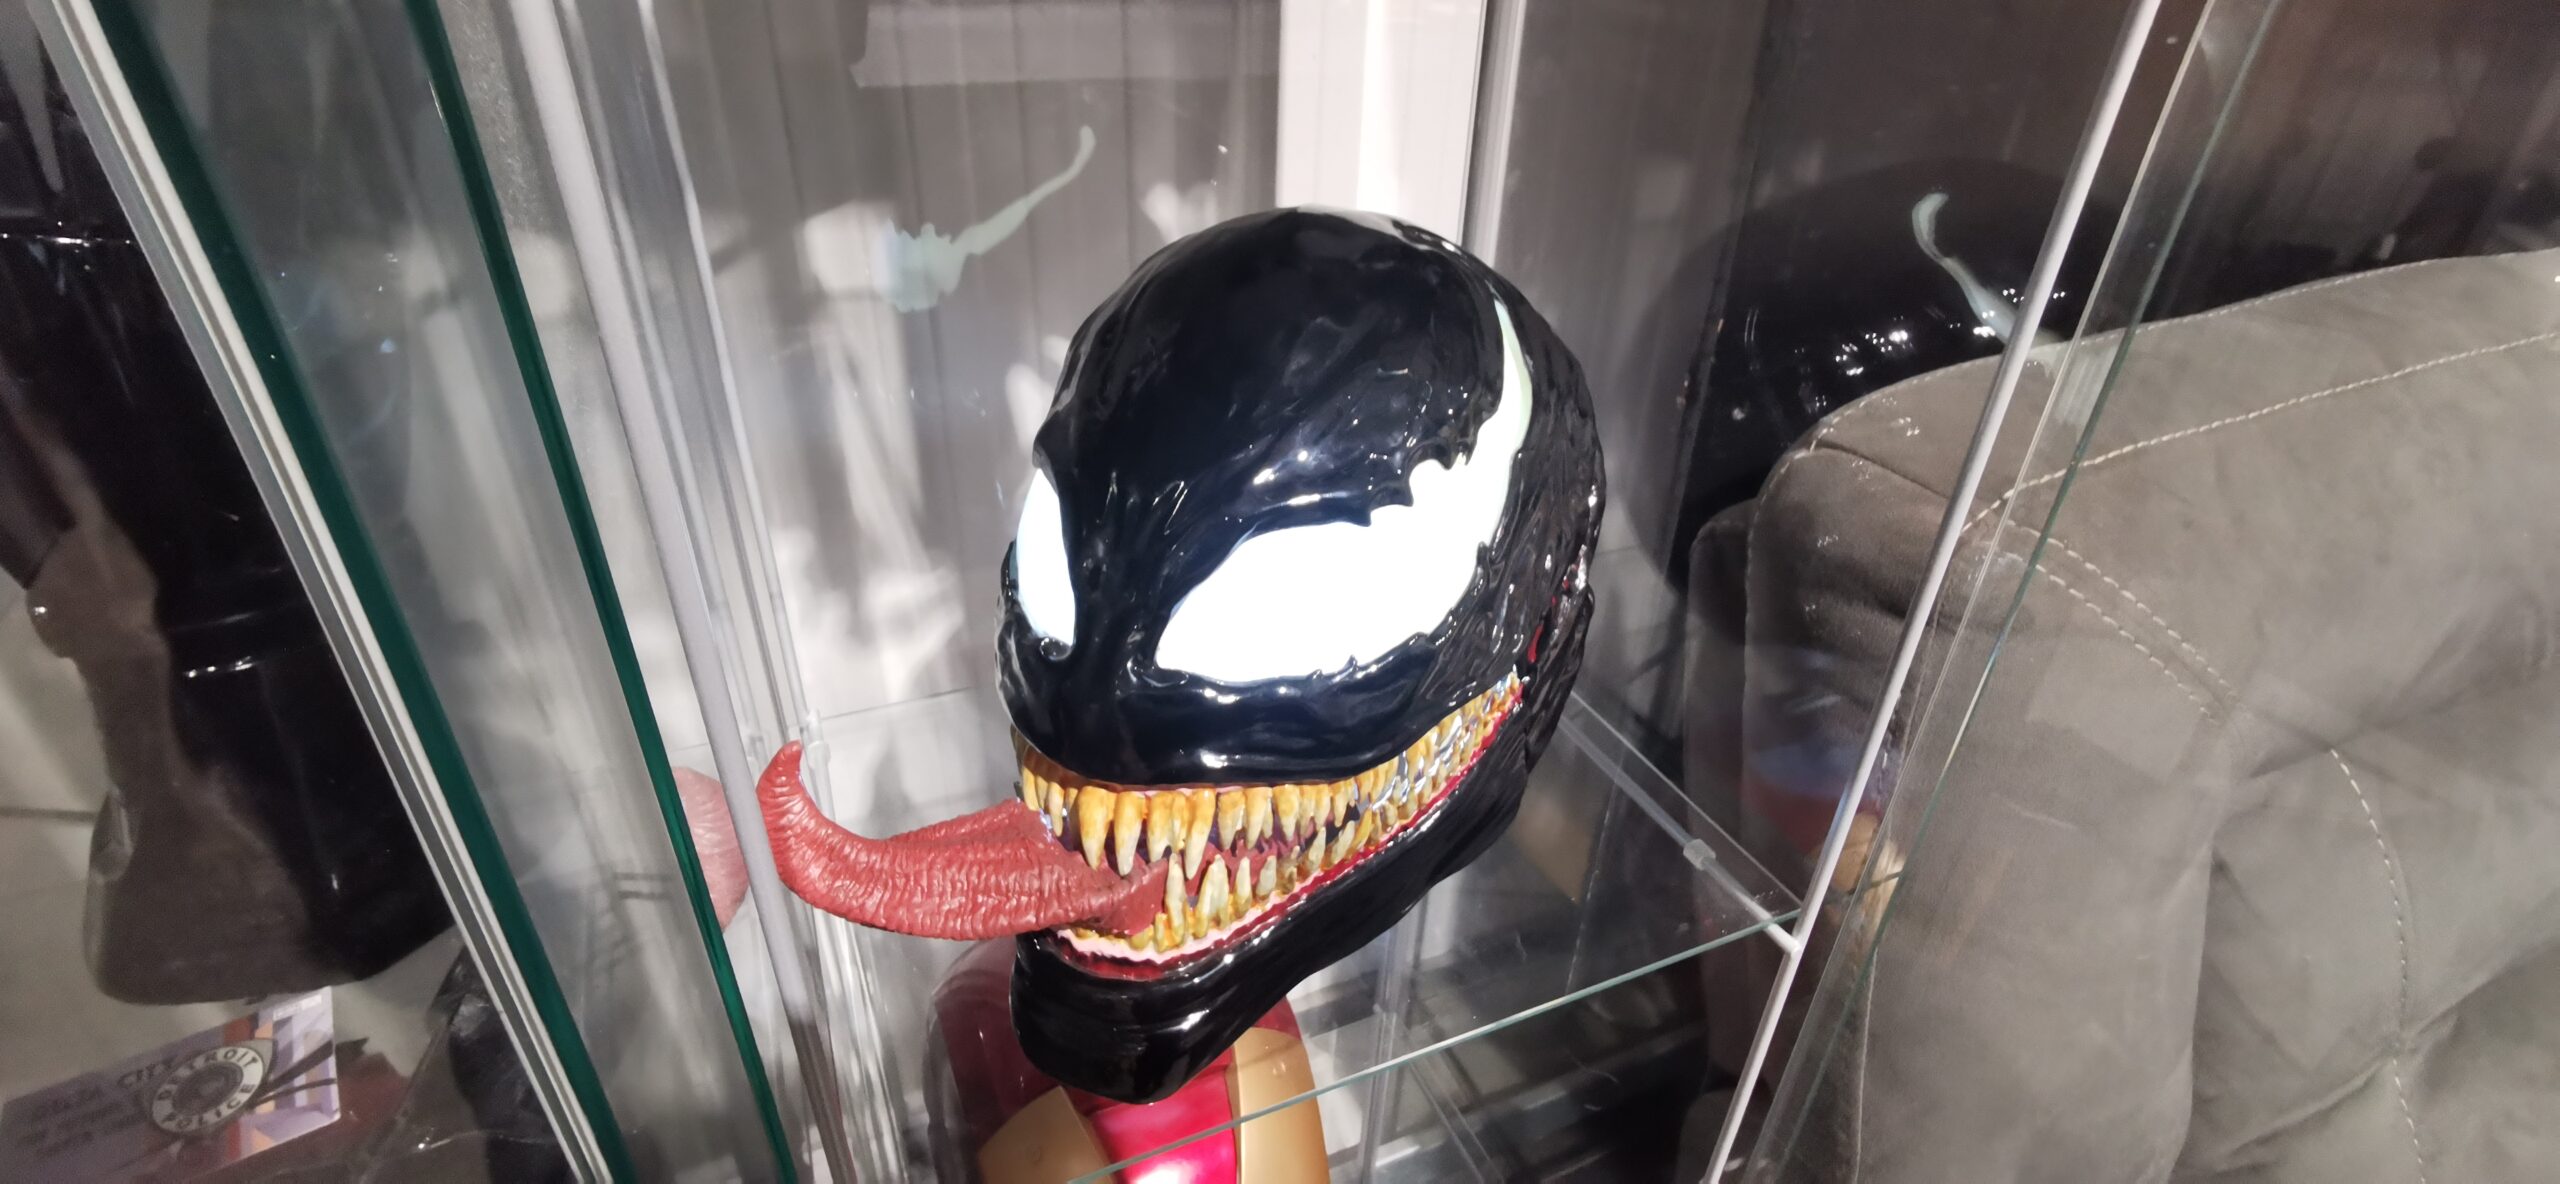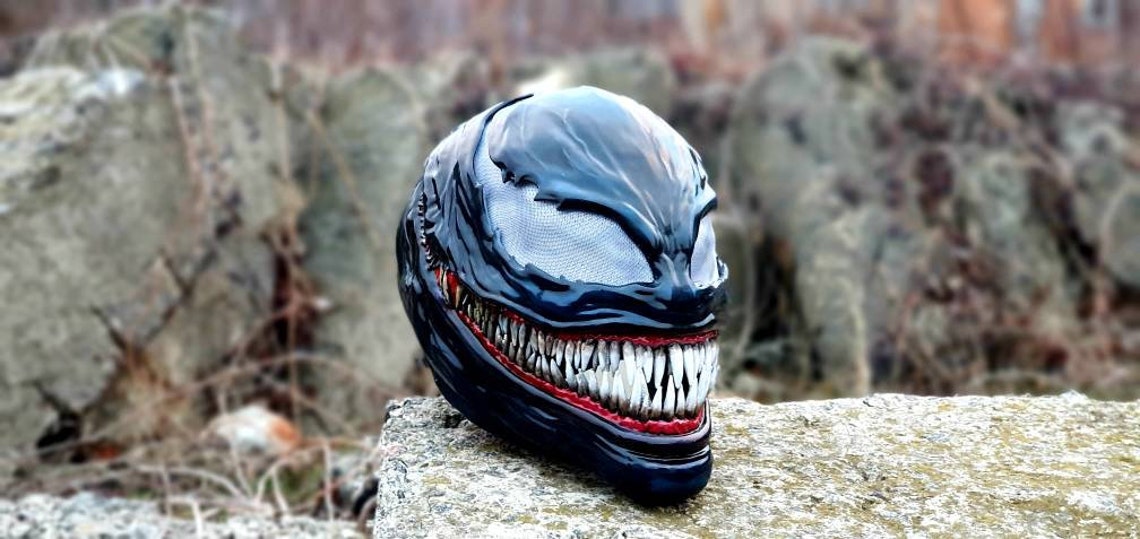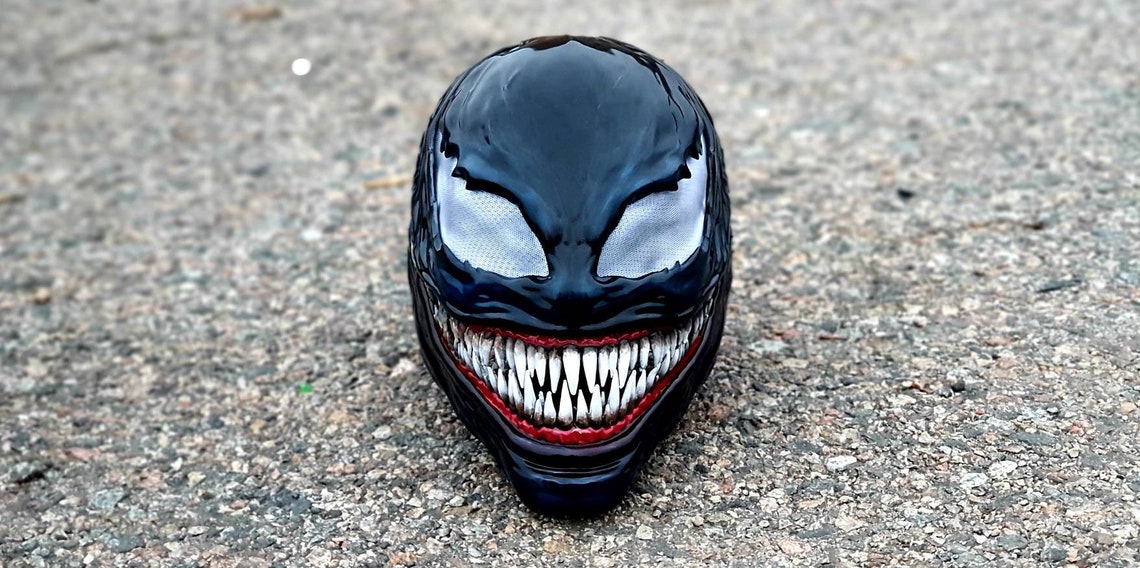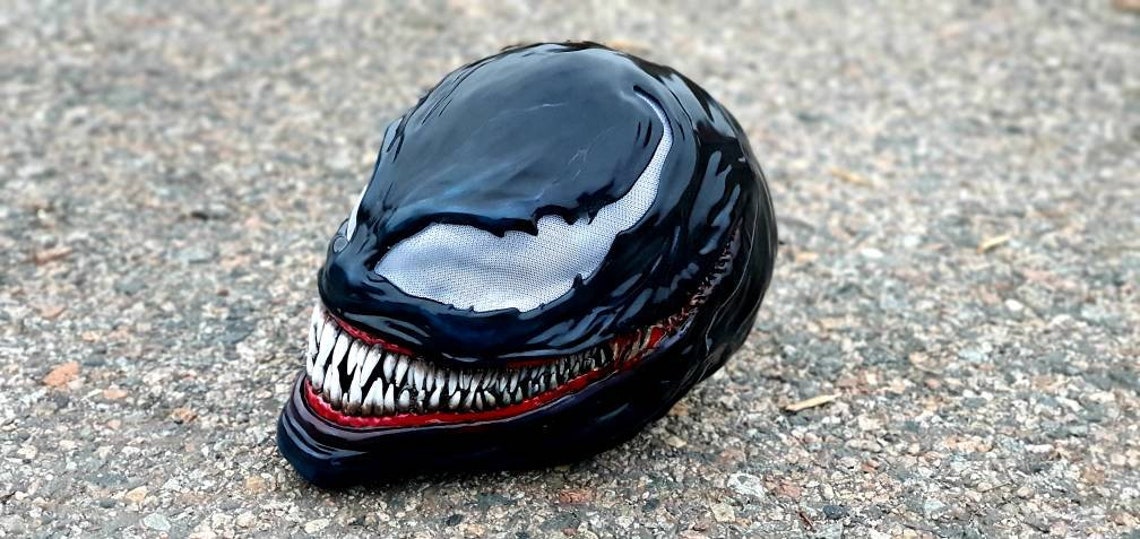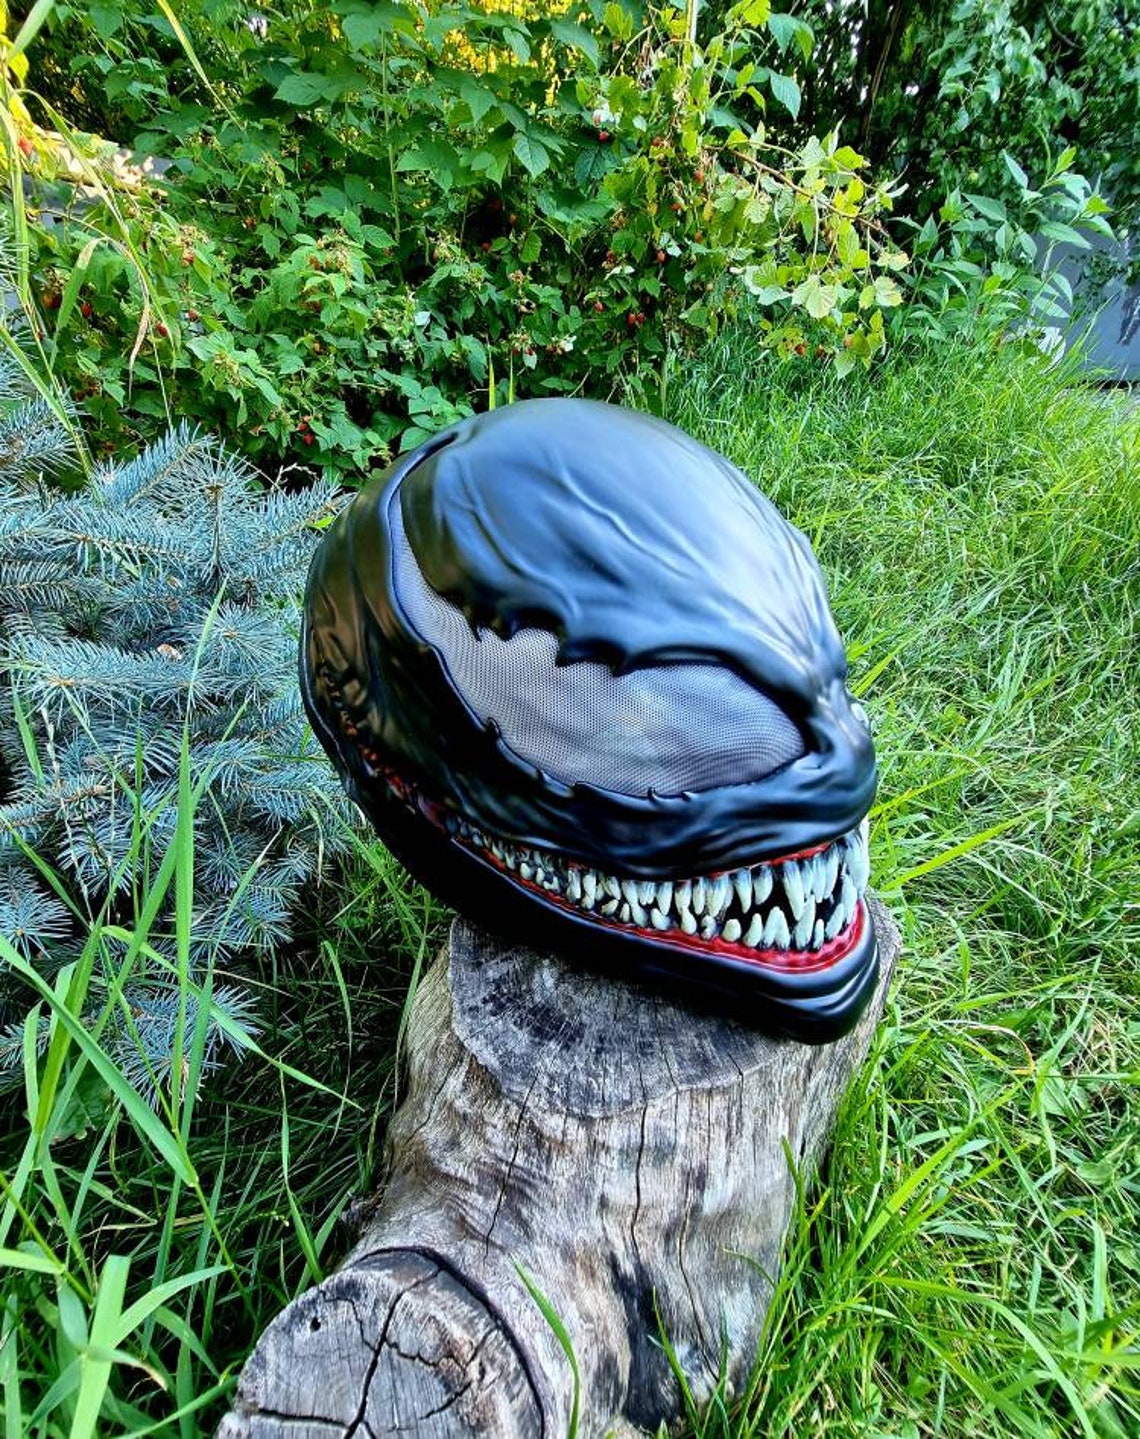
This is our second 3D-printed project, so we had a much better understanding of what was required. We did, however, want to make this one different and add our own touch to it, so we cut the jaw of the mask off and made it manipulable so that whenever the wearer moves his mouth, the mask moves in the same way.
The change in design posed issues during the paint and preparation stages, which we had to learn on the fly, but it was a lot of fun working through the available options. We then decided to add a voice augmenter, amp and 40-watt speakers; this way when the person wearing the mask talks, not only will the mouth simulate the same movement but you should also sound like the character.
We really enjoyed this project and are thrilled with the outcome. Here is how we did it:
Tool & Material List
- 80 grit sandpaper
- 320 grit sandpaper
- Stanley knife blades
- Plastic filler (where necessary)
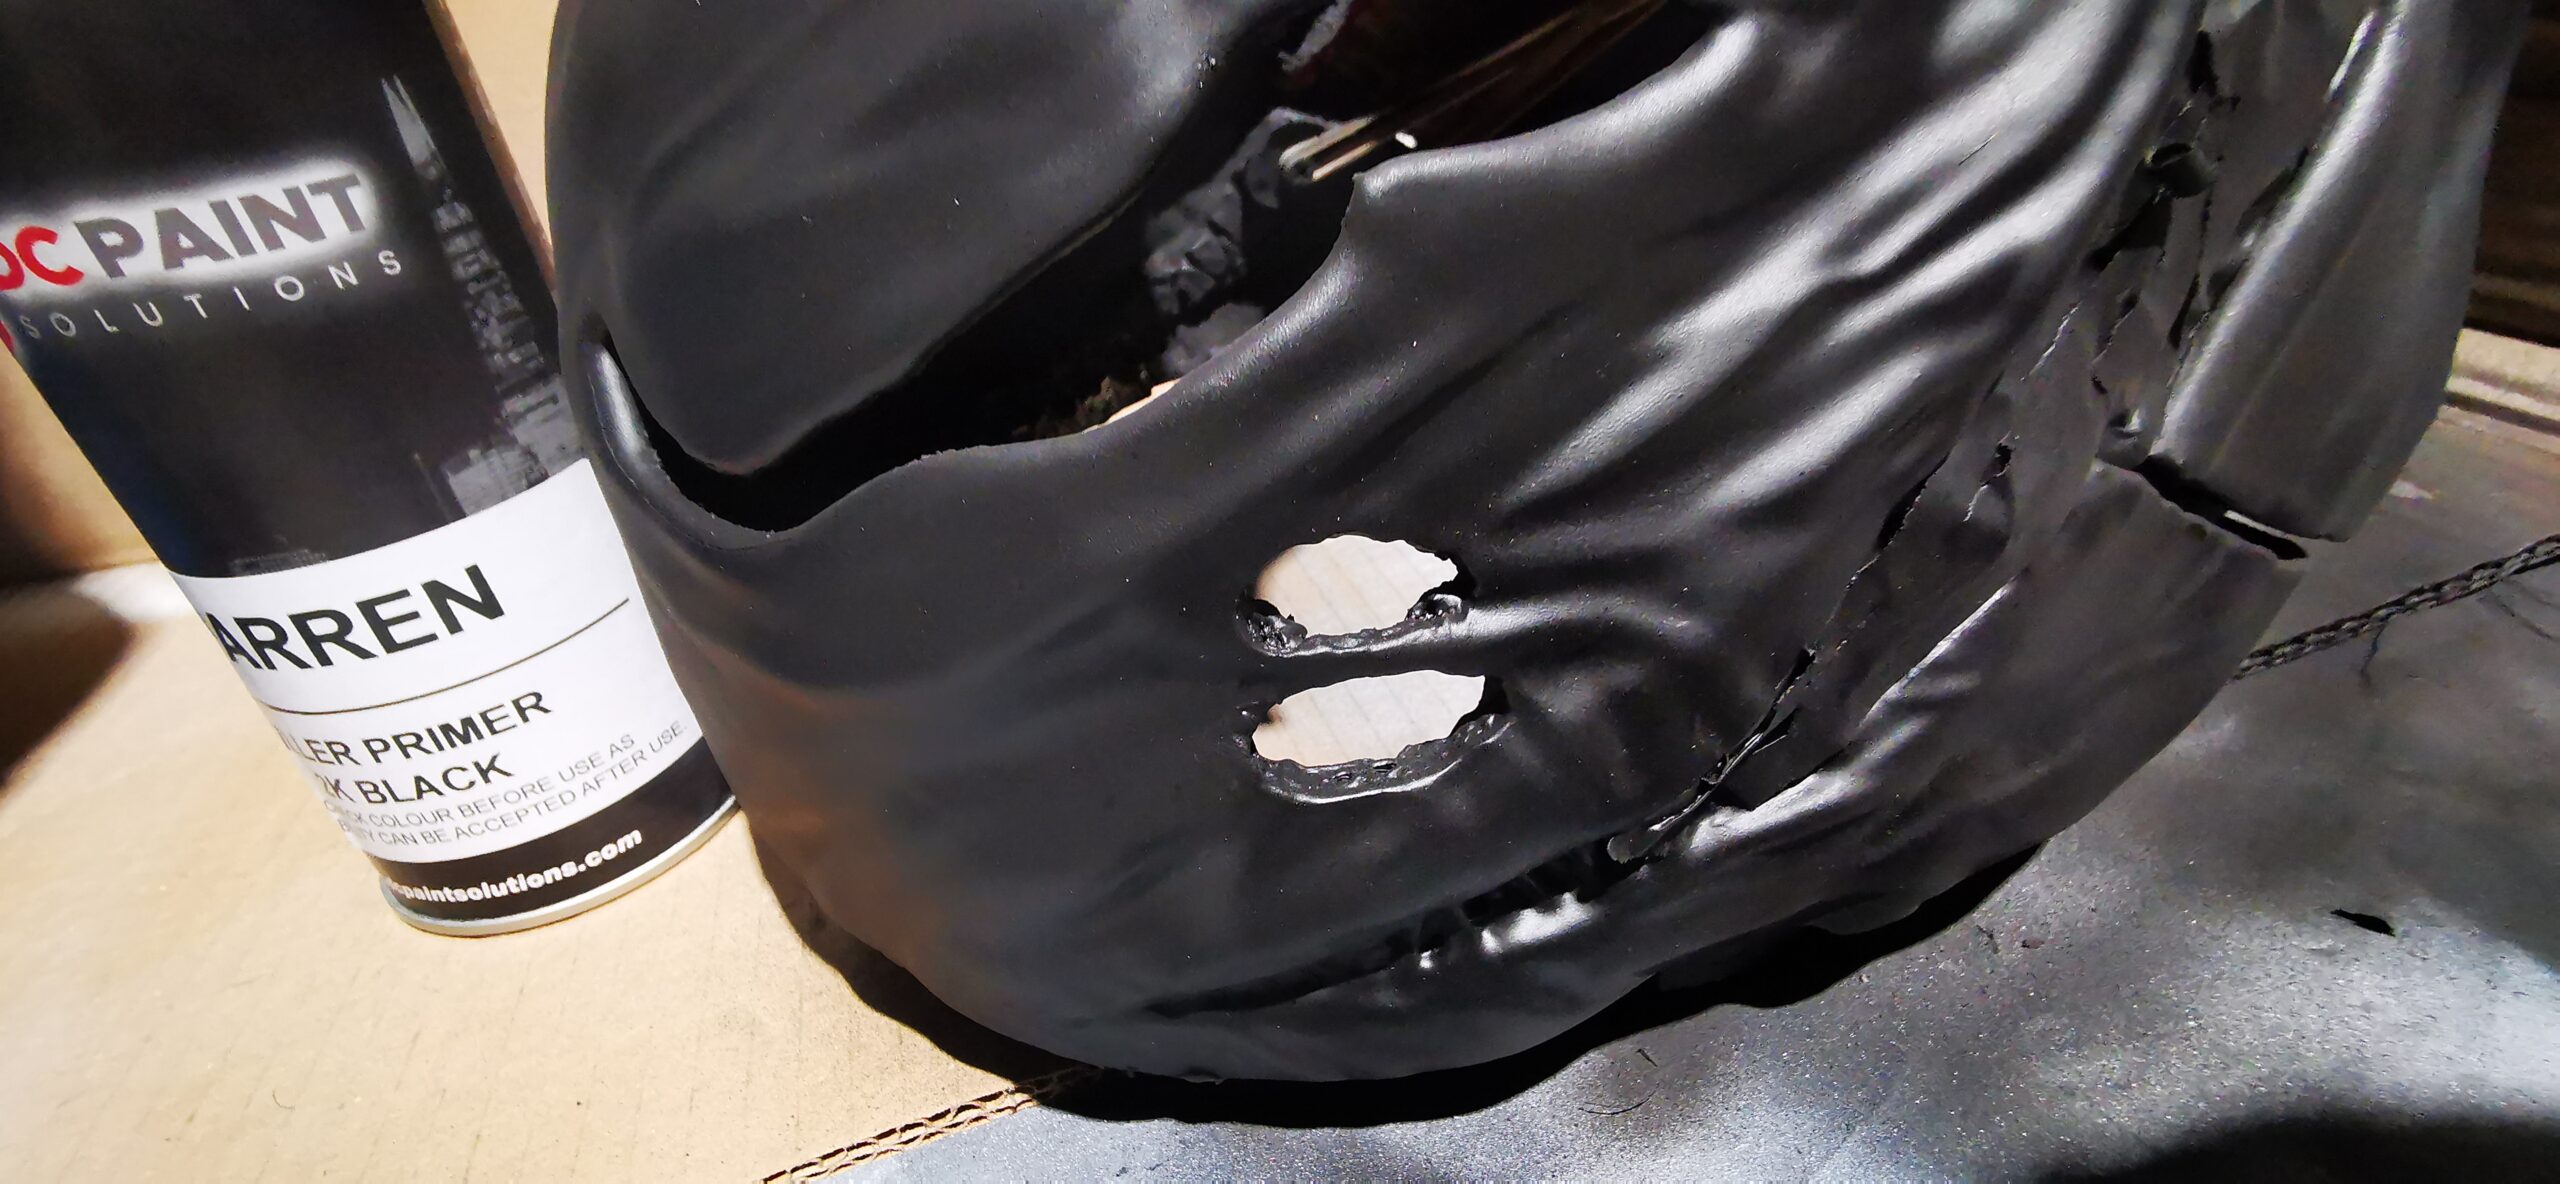
- 2K black filler primer
- RAL 9005 acrylic gloss paint
- 2K gloss lacquer
- 50ml touch-up pots
Preparation
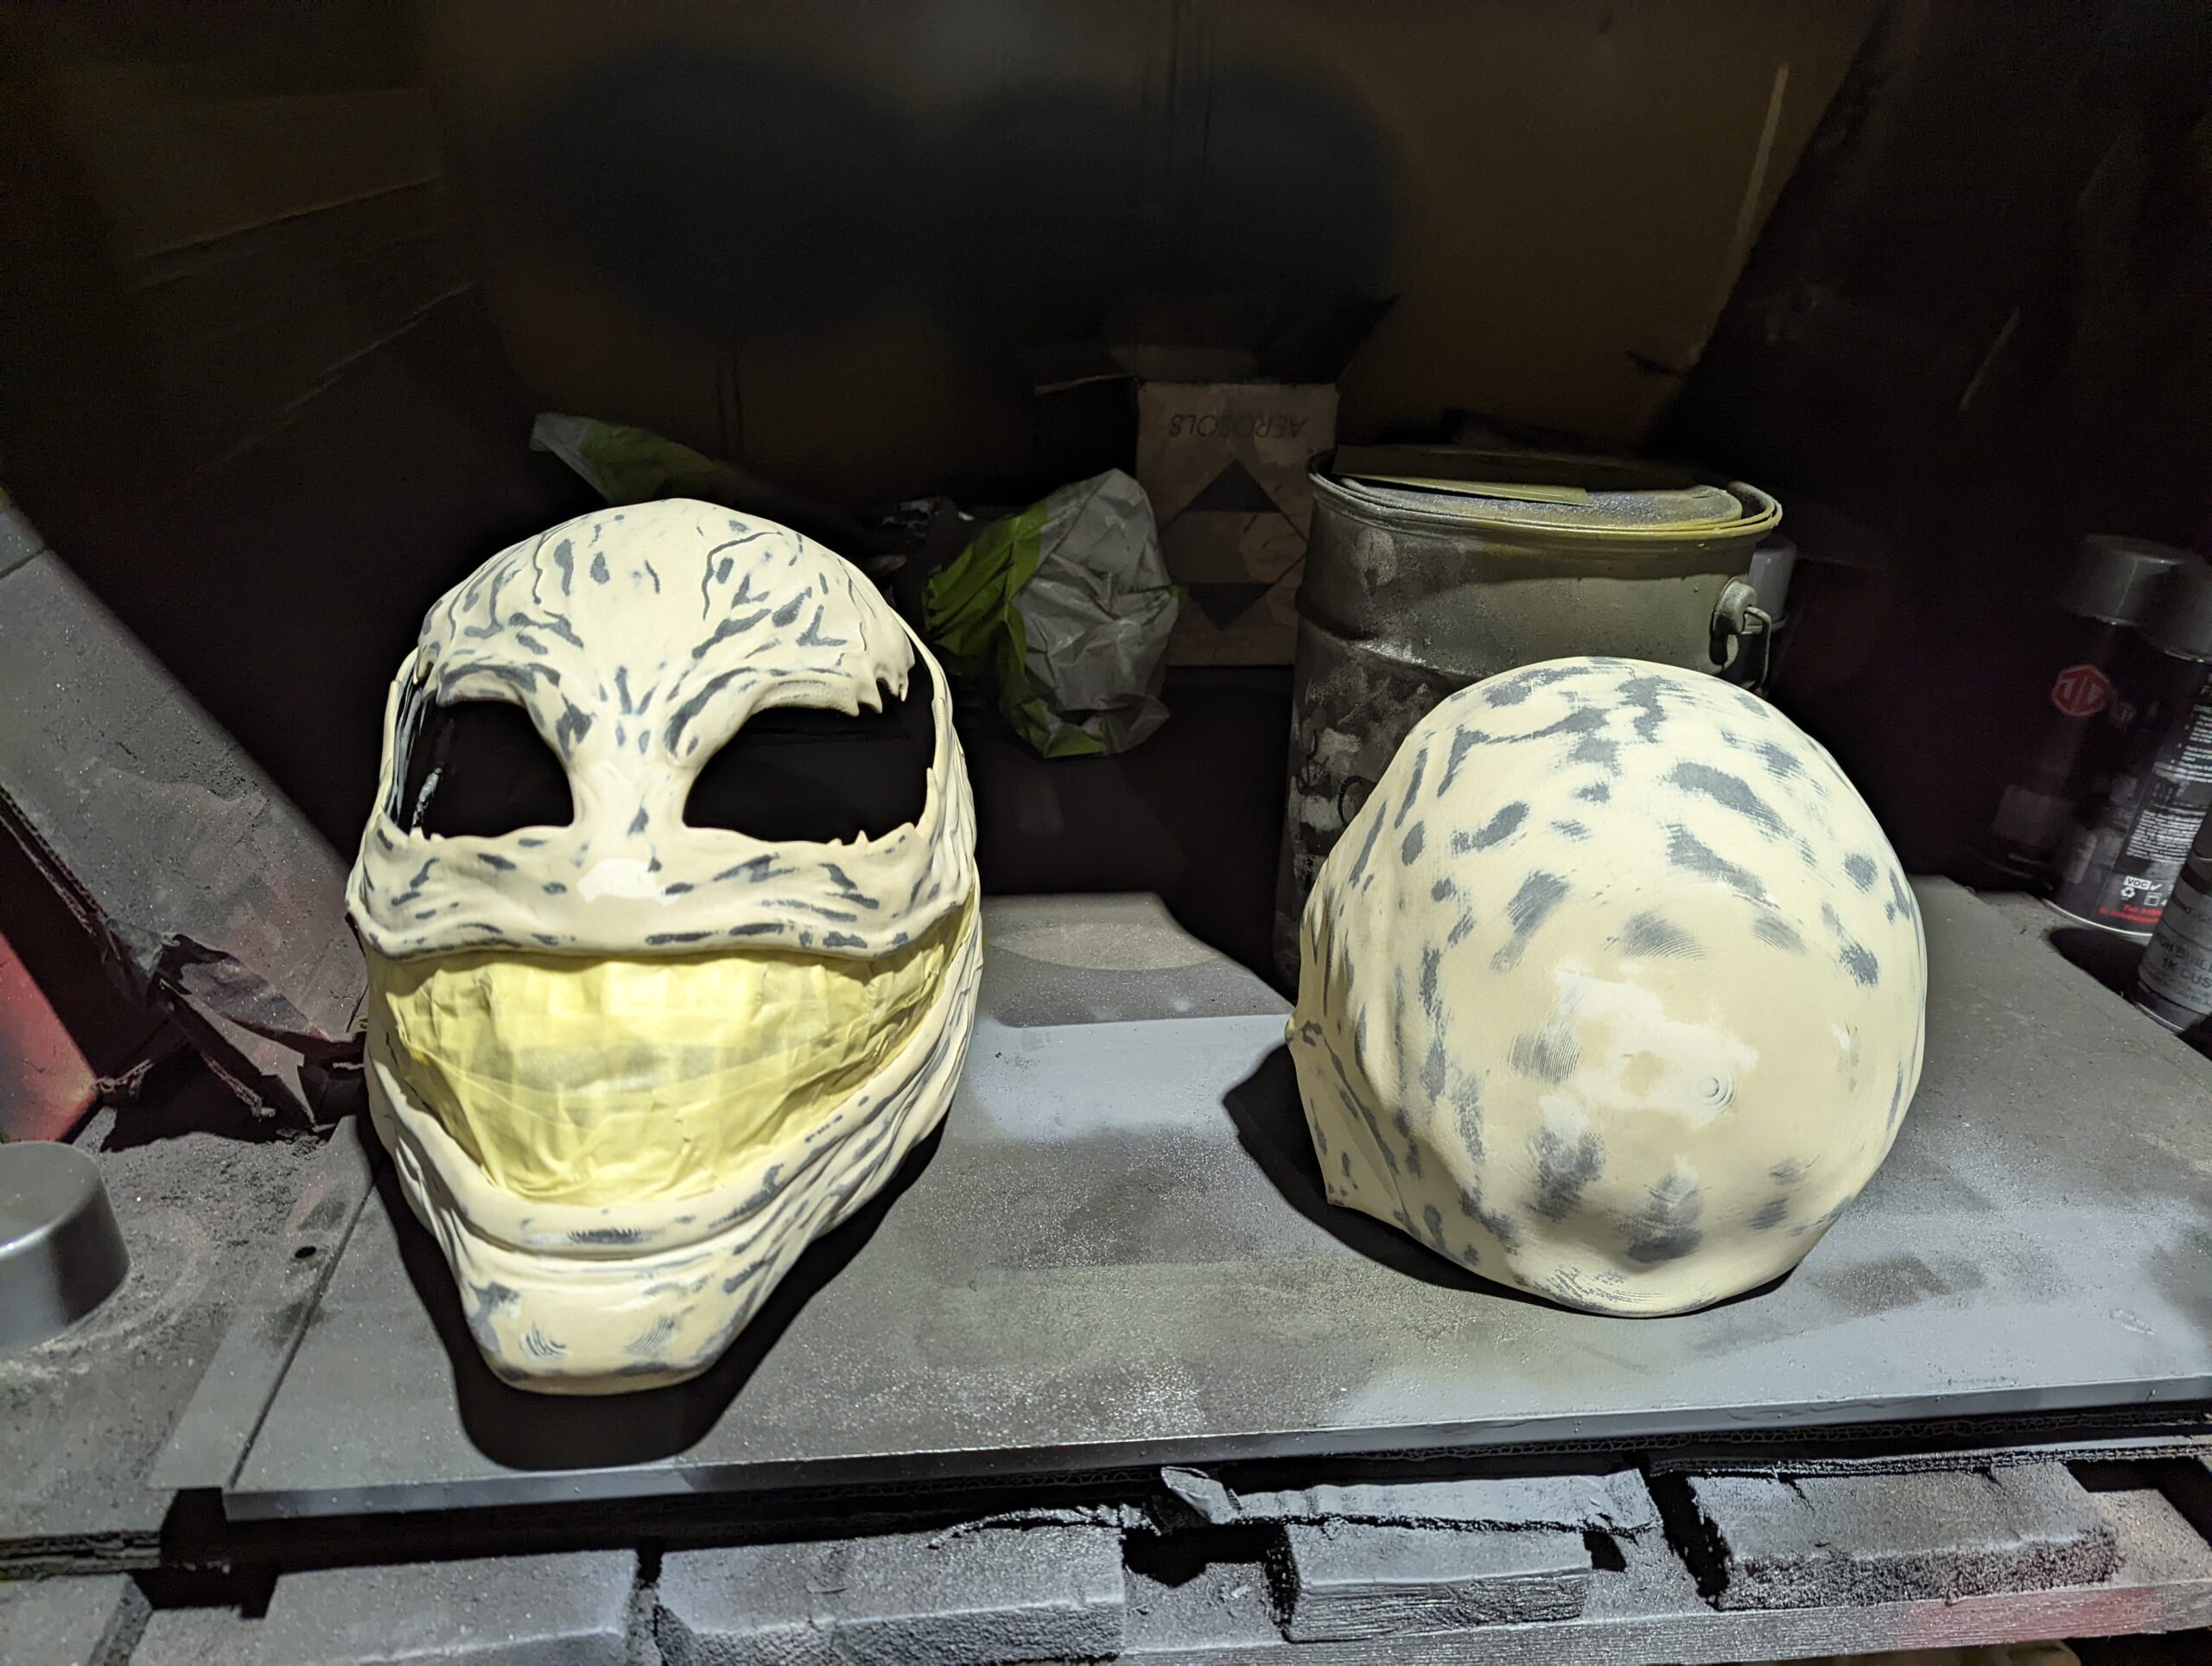
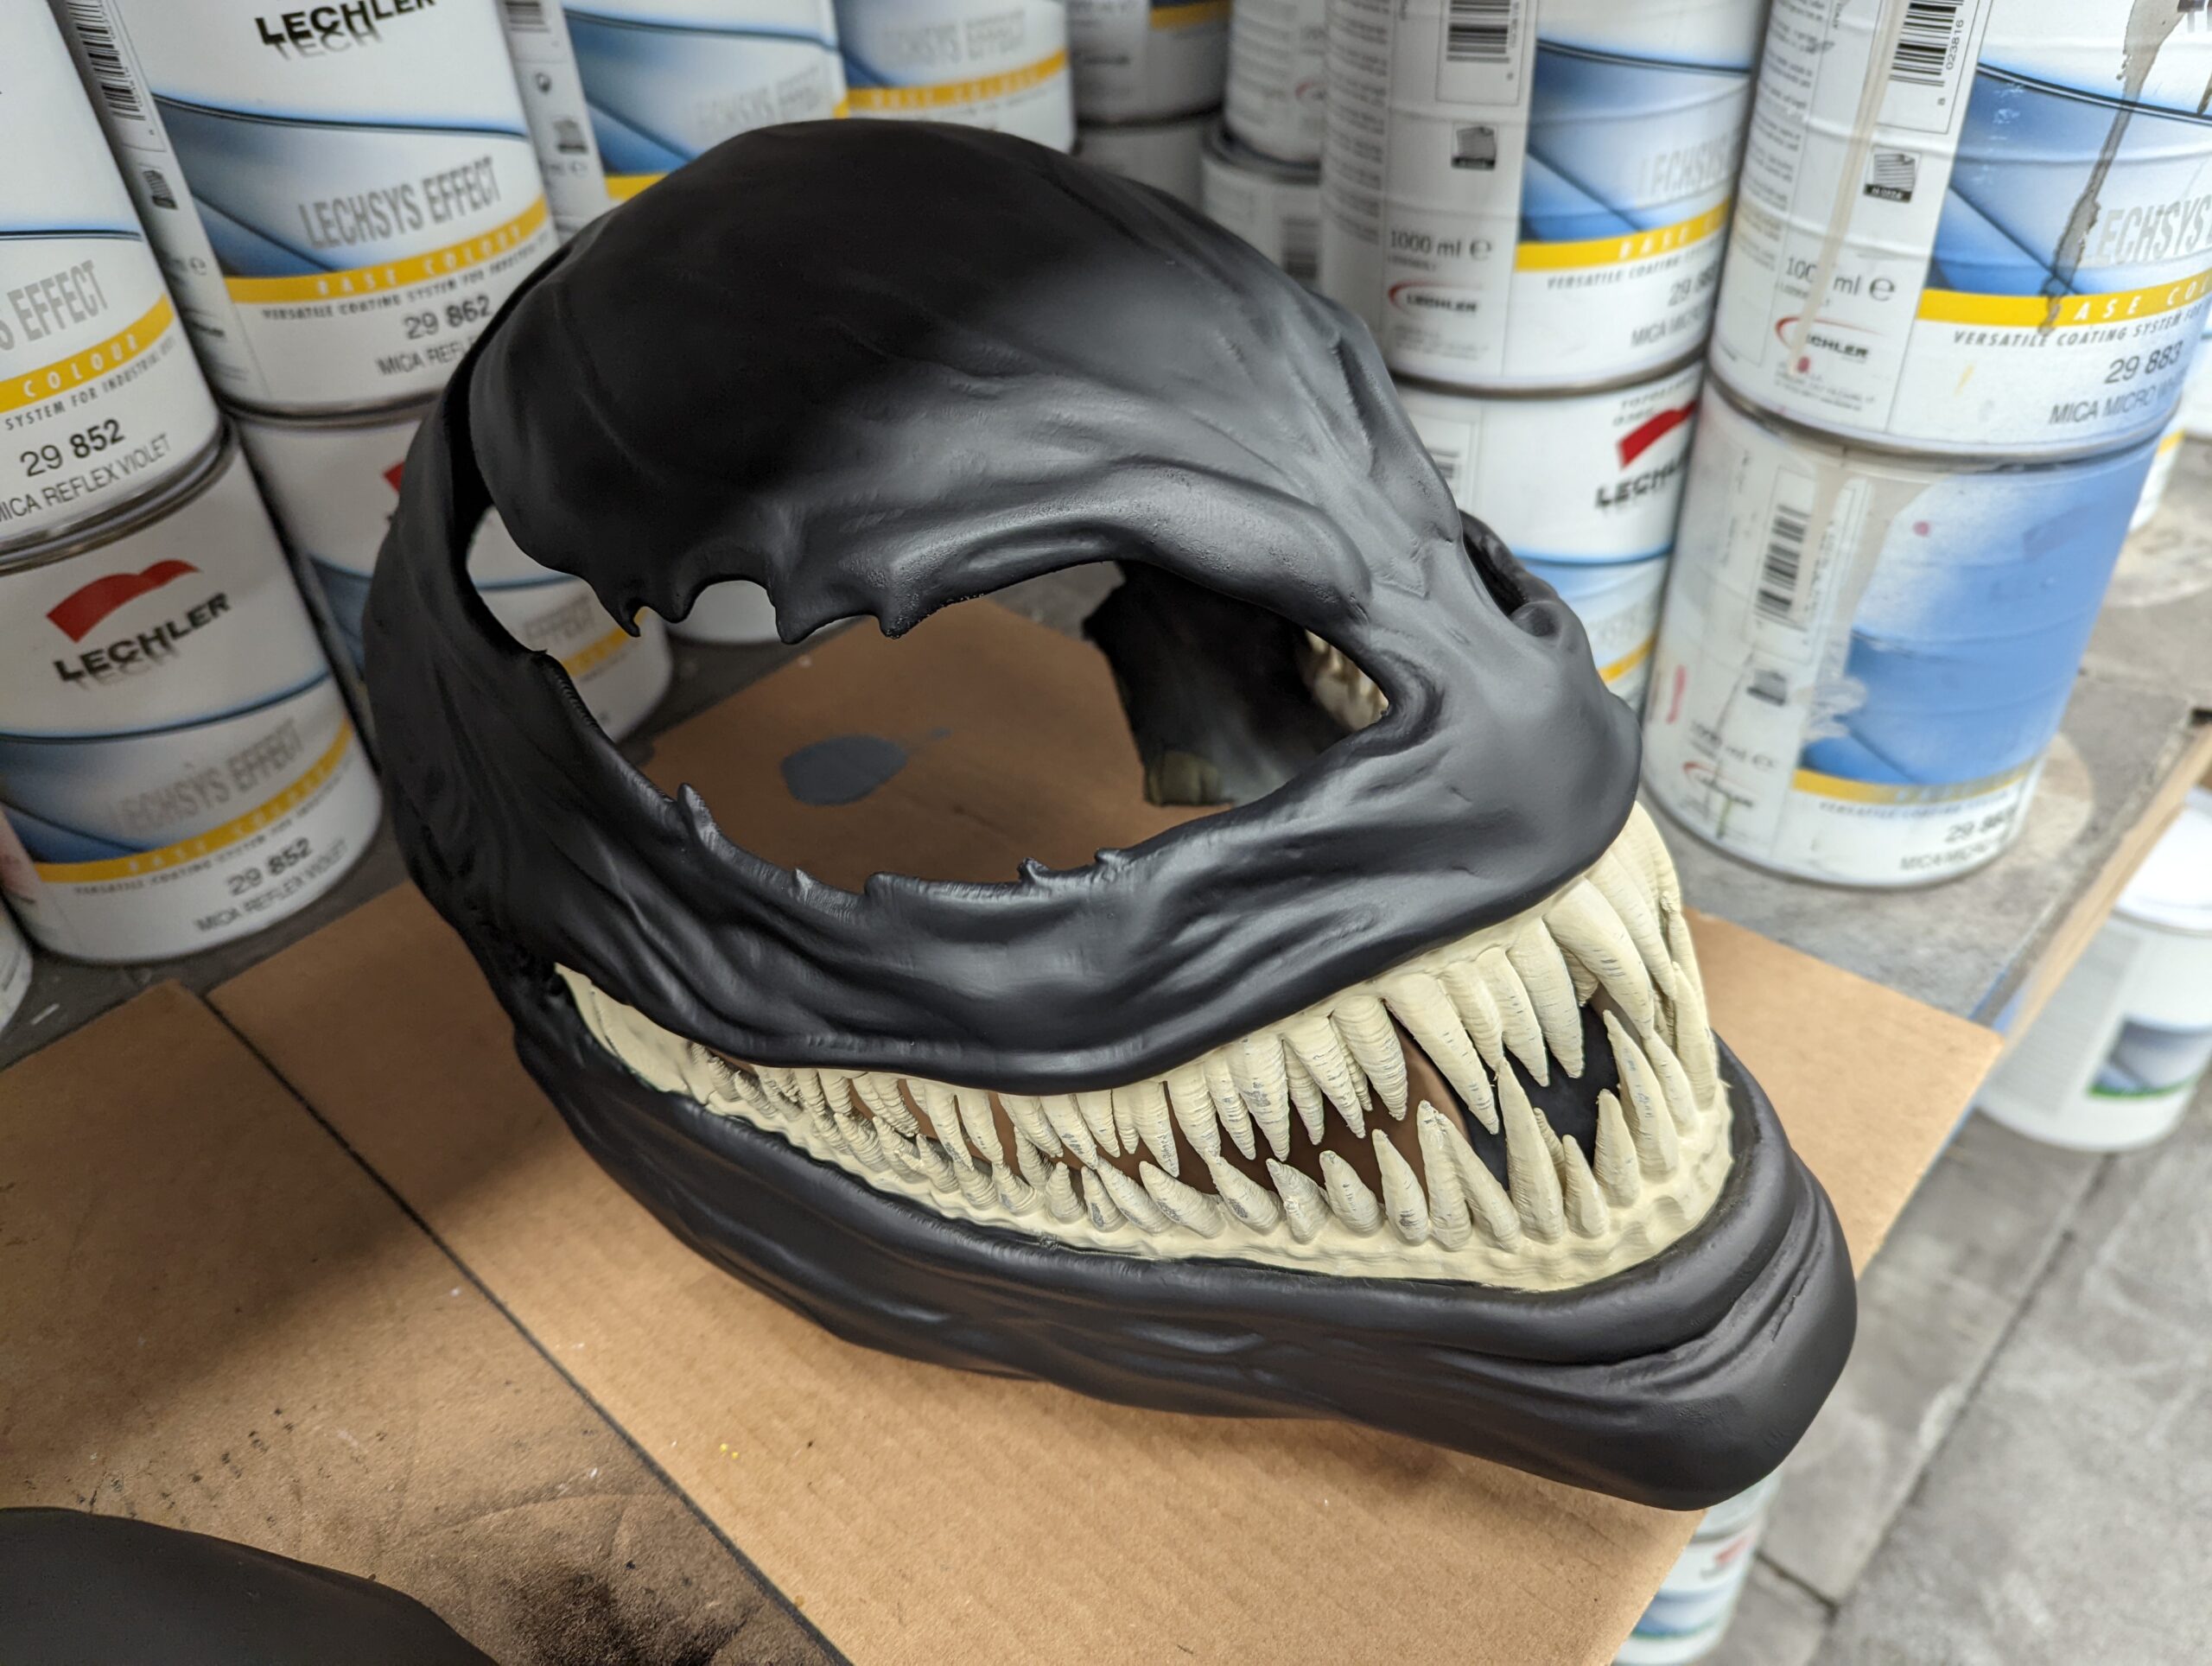
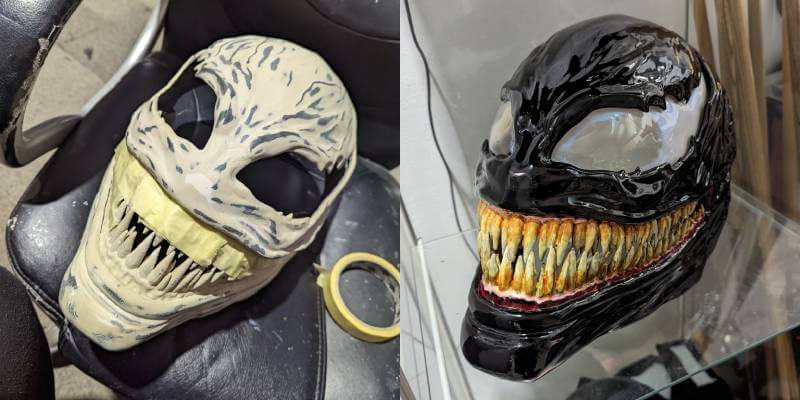
We started by rough sanding the mask with 80 grit sandpaper, which didn’t remove all the lines but made it much easier to make it flush. Then, we reduced the lines further by getting a Stanley blade and shaving the plastic off, one layer at a time. Although massively time-consuming, these stages were important to give us the most flush substrate for the best finish.
If you would like to do the same for your project, begin by sanding the rough printed lines with some 80 grit sandpaper. The super abrasive sandpaper will bring a lot of the heavier lines down.
Top Tip: Be very careful not to sand in the same spot for too long, or the friction will melt the plastic.
Then, using a Stanley blade, start to shave the surface, stripping off as much as you can.
Top Tip: Run the blade along the length of the lines rather than up and down over them, as this will peel the lines and make it harder to make the surface flush.
The plastic is soft enough to scrape layers off at a time, so don’t apply too much pressure when making your passes, or you can melt the plastic. We used a higher 320 grit sandpaper to get a smoother finish, which would be easier to paint. If your prep is good enough, you should not need any filler, but the filler is really handy for fixing any minor mistakes.
Once complete, it’s time to move on to painting.
Paint
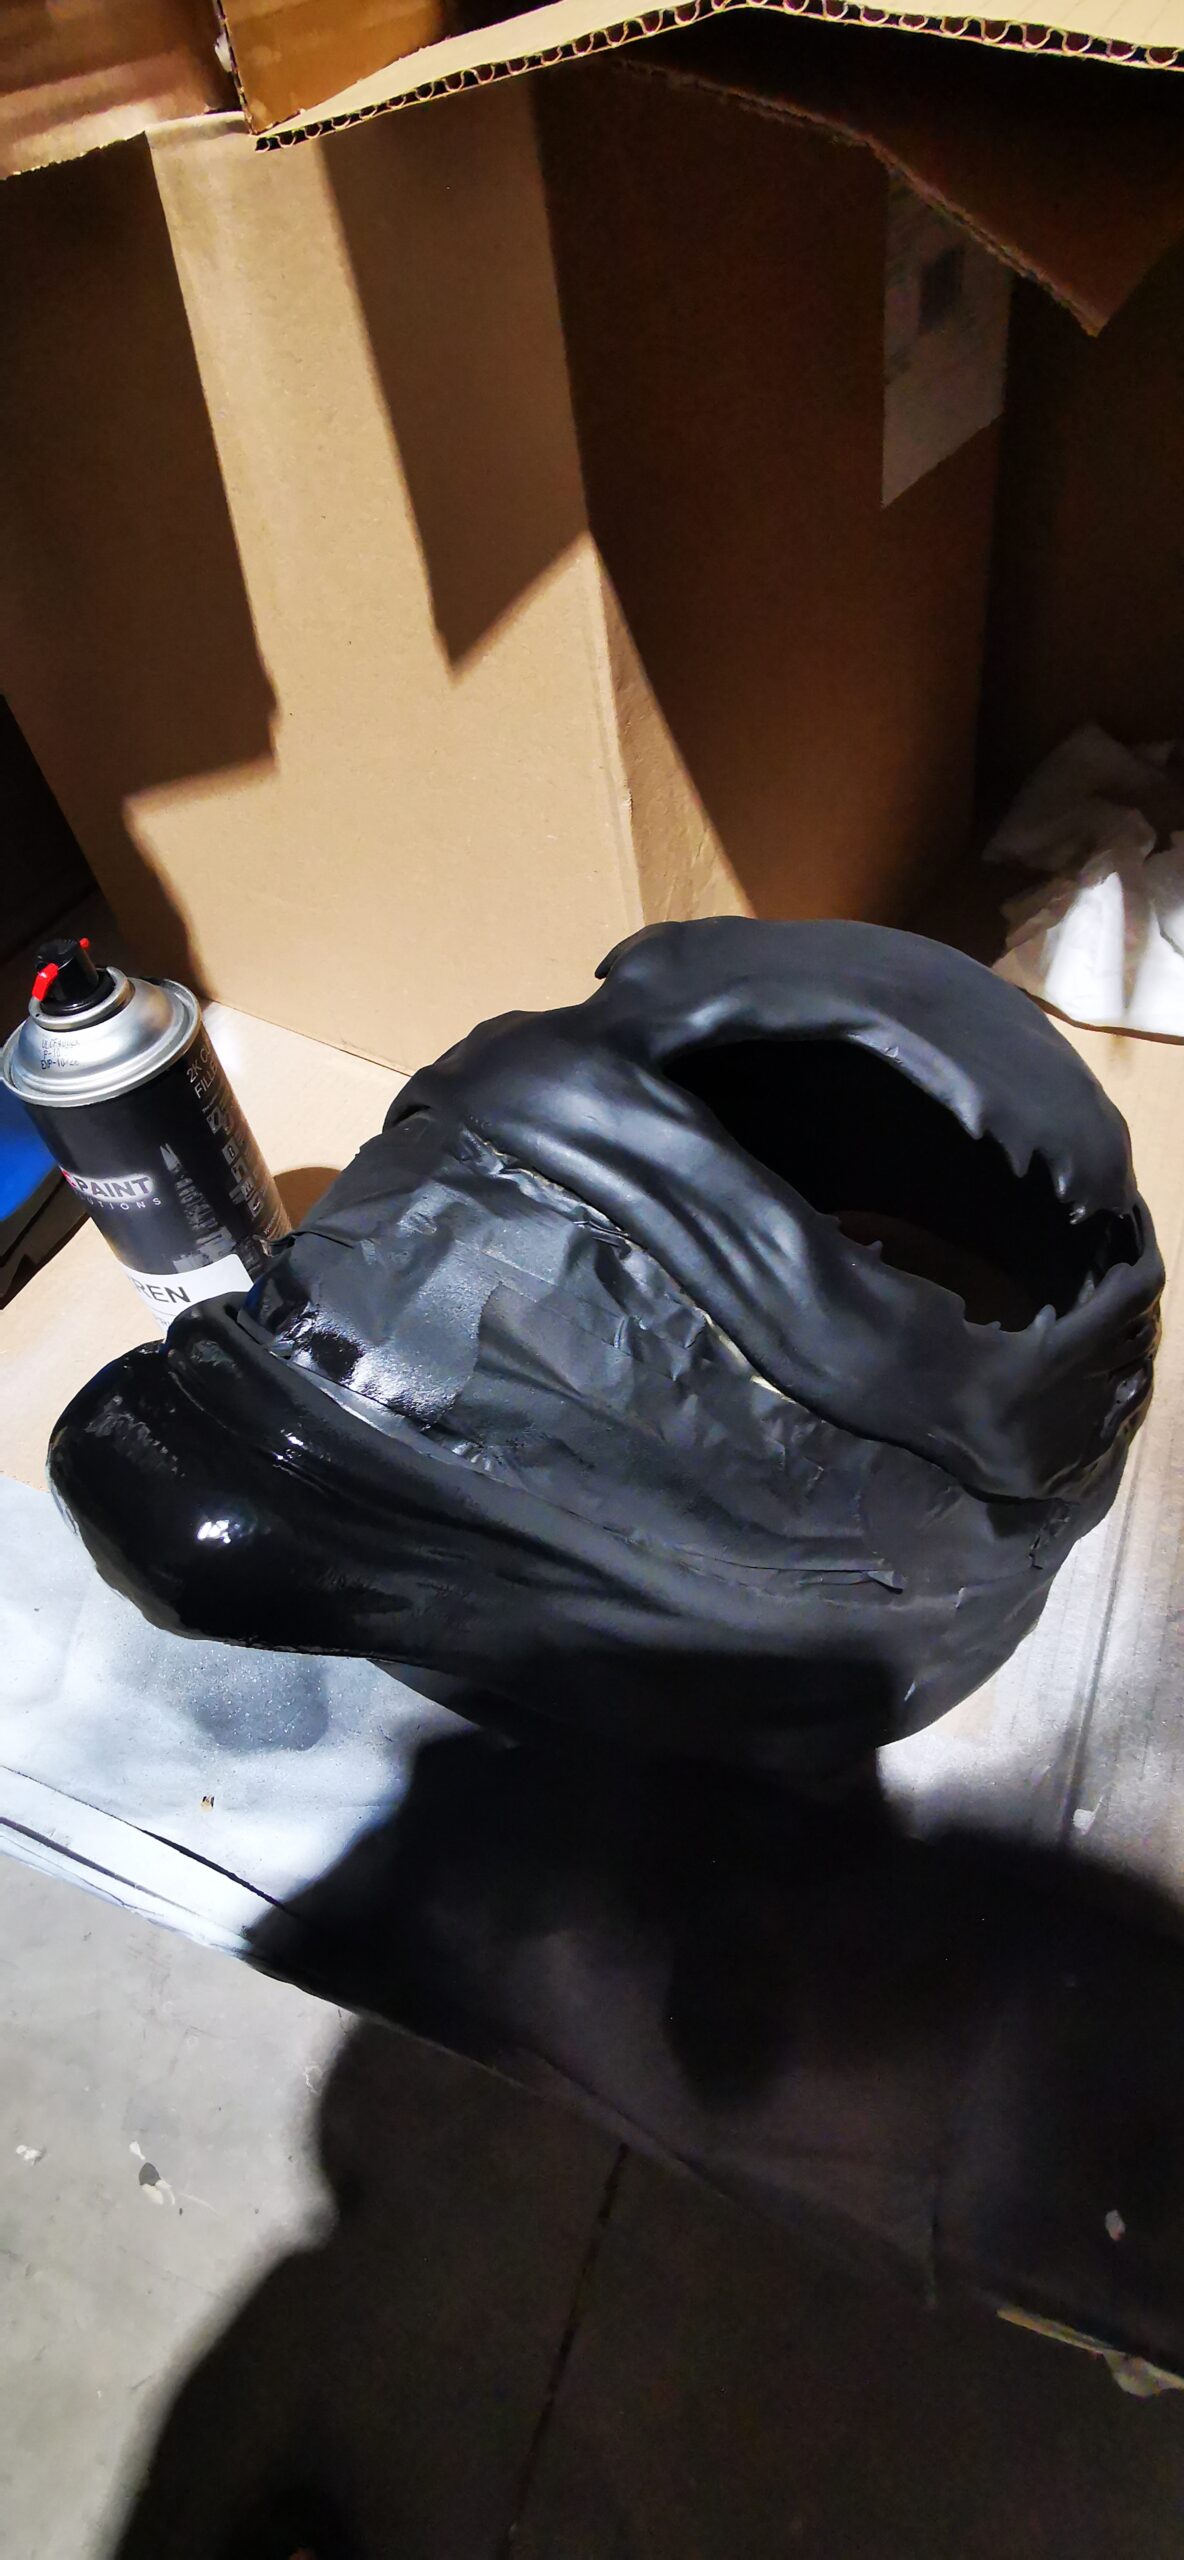
With this project, we decided to use the new DC Paint Solutions 2K filler primer as it acts as a very effective filler and primer all in one.
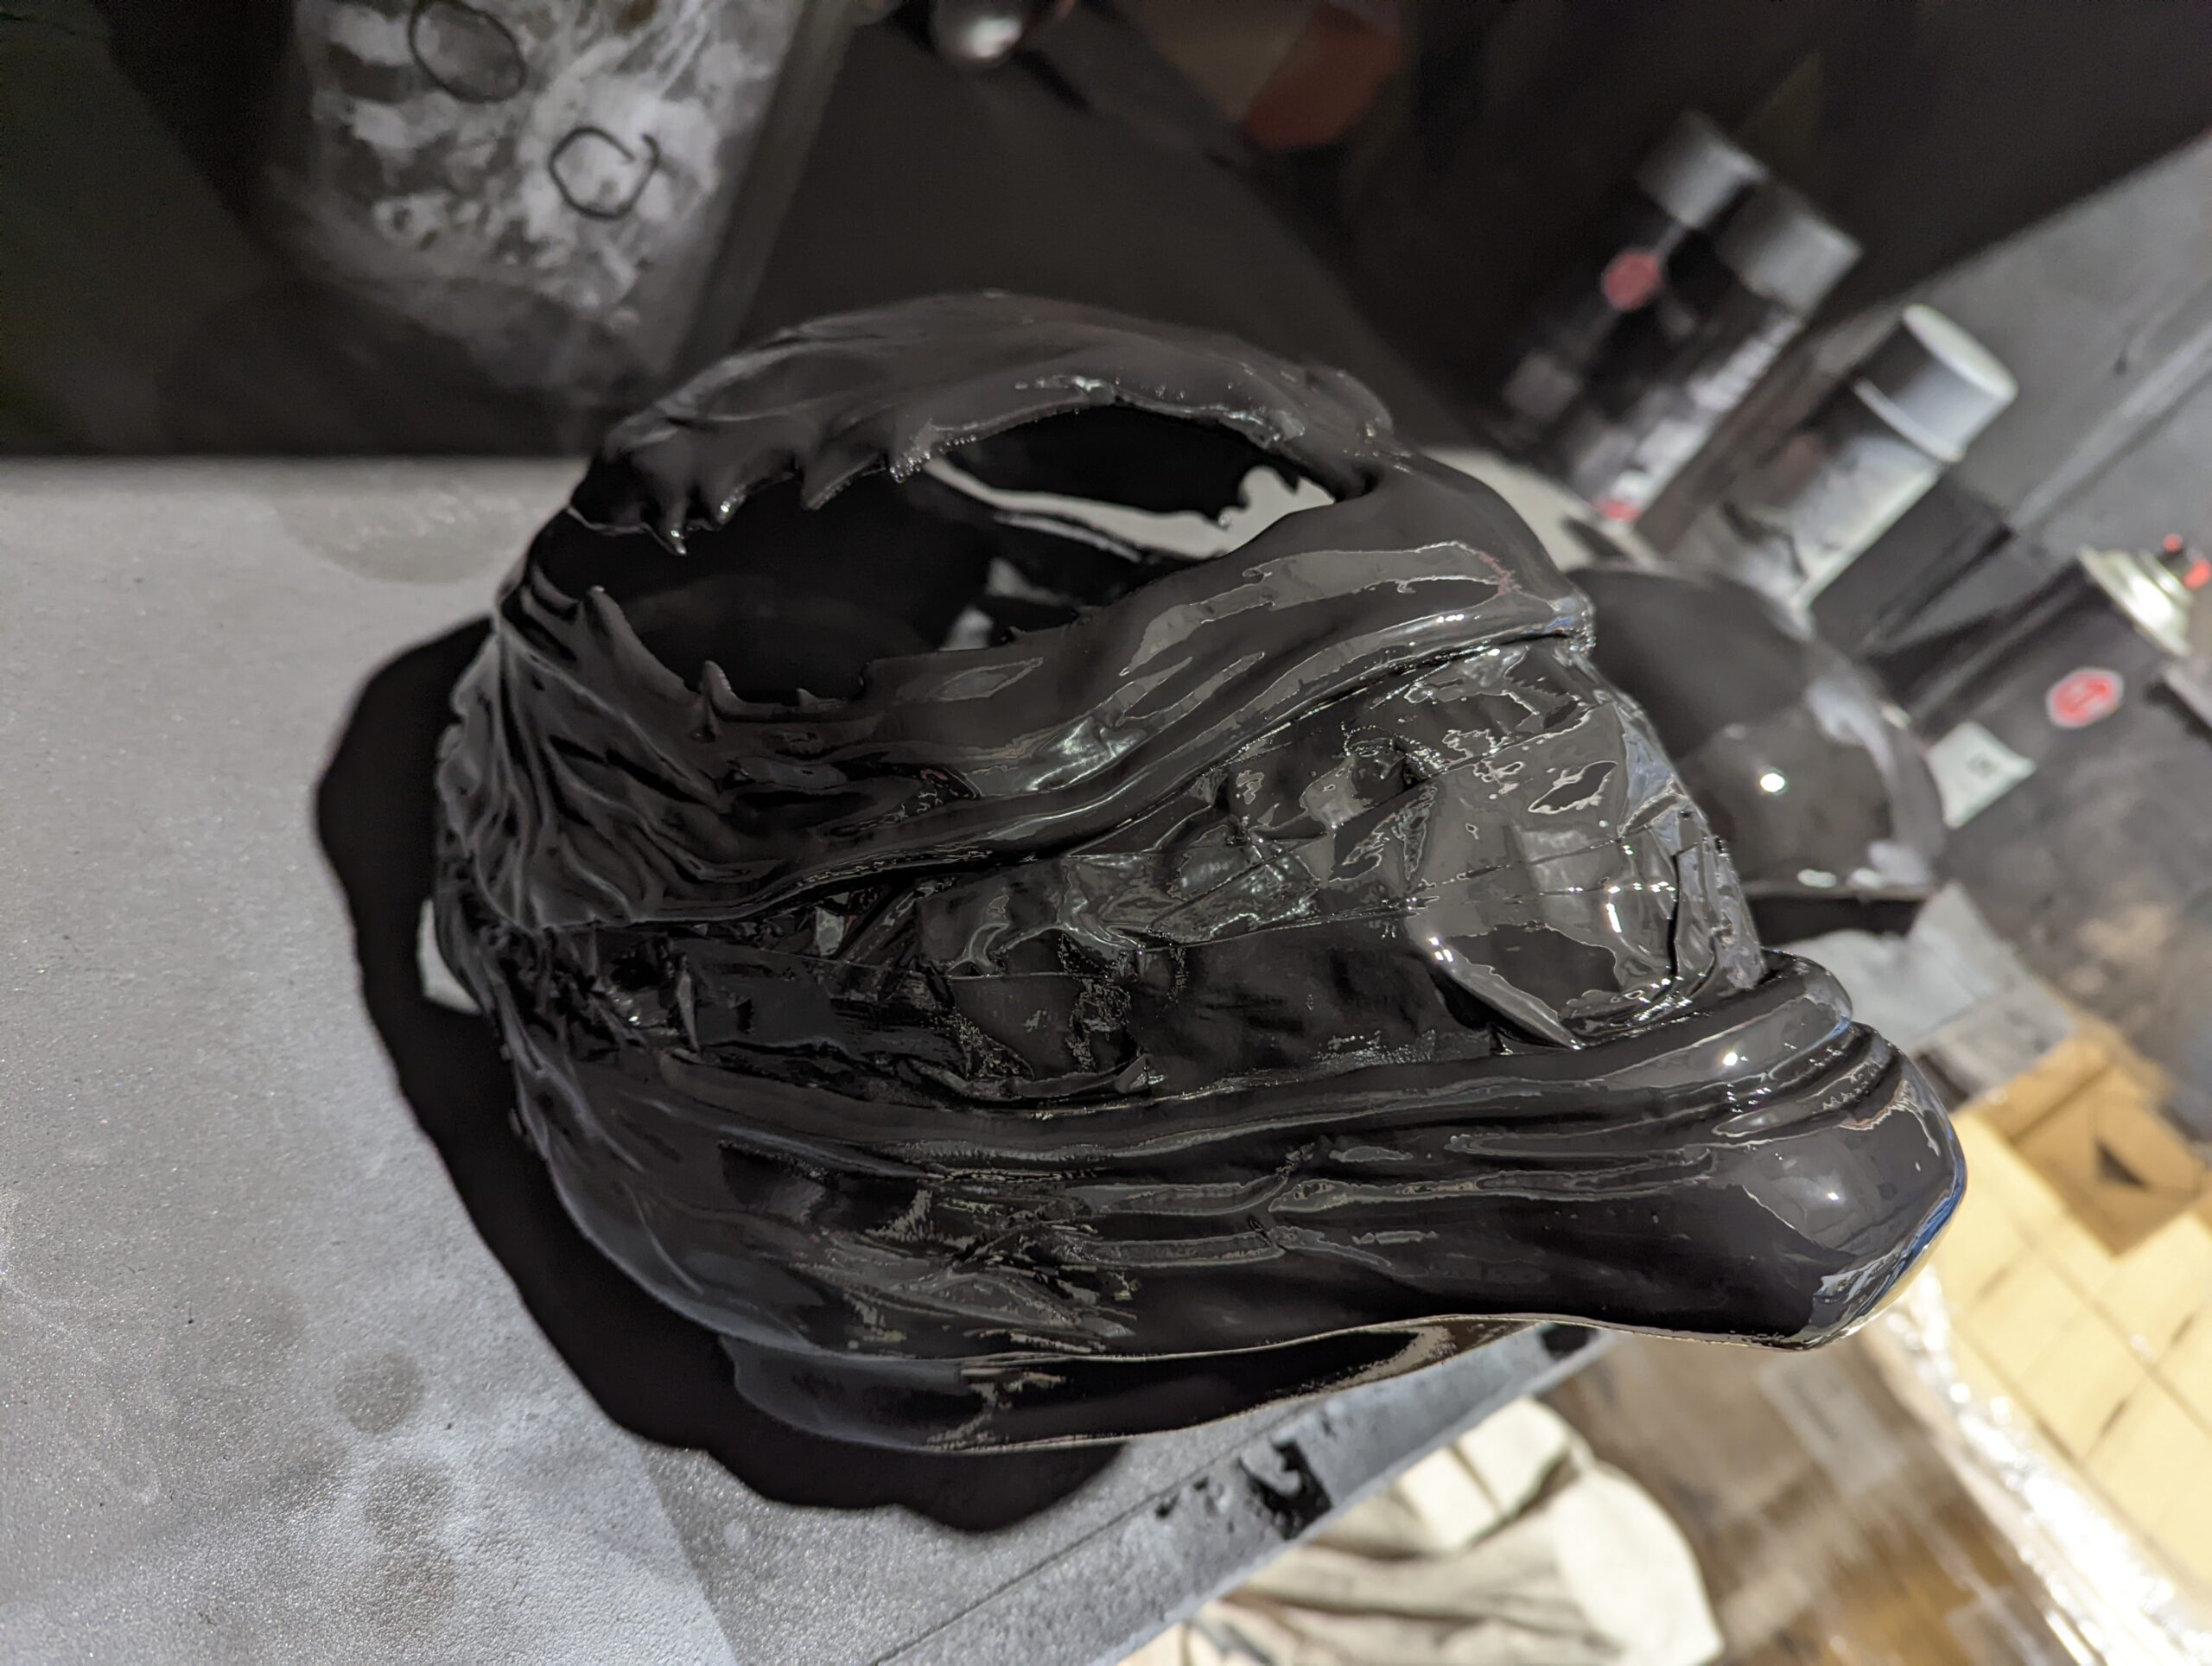
The 2K filler primer filled a number of the finer printed lines perfectly. We applied 3 coats and allowed 30/40 minutes for it to cure between each.
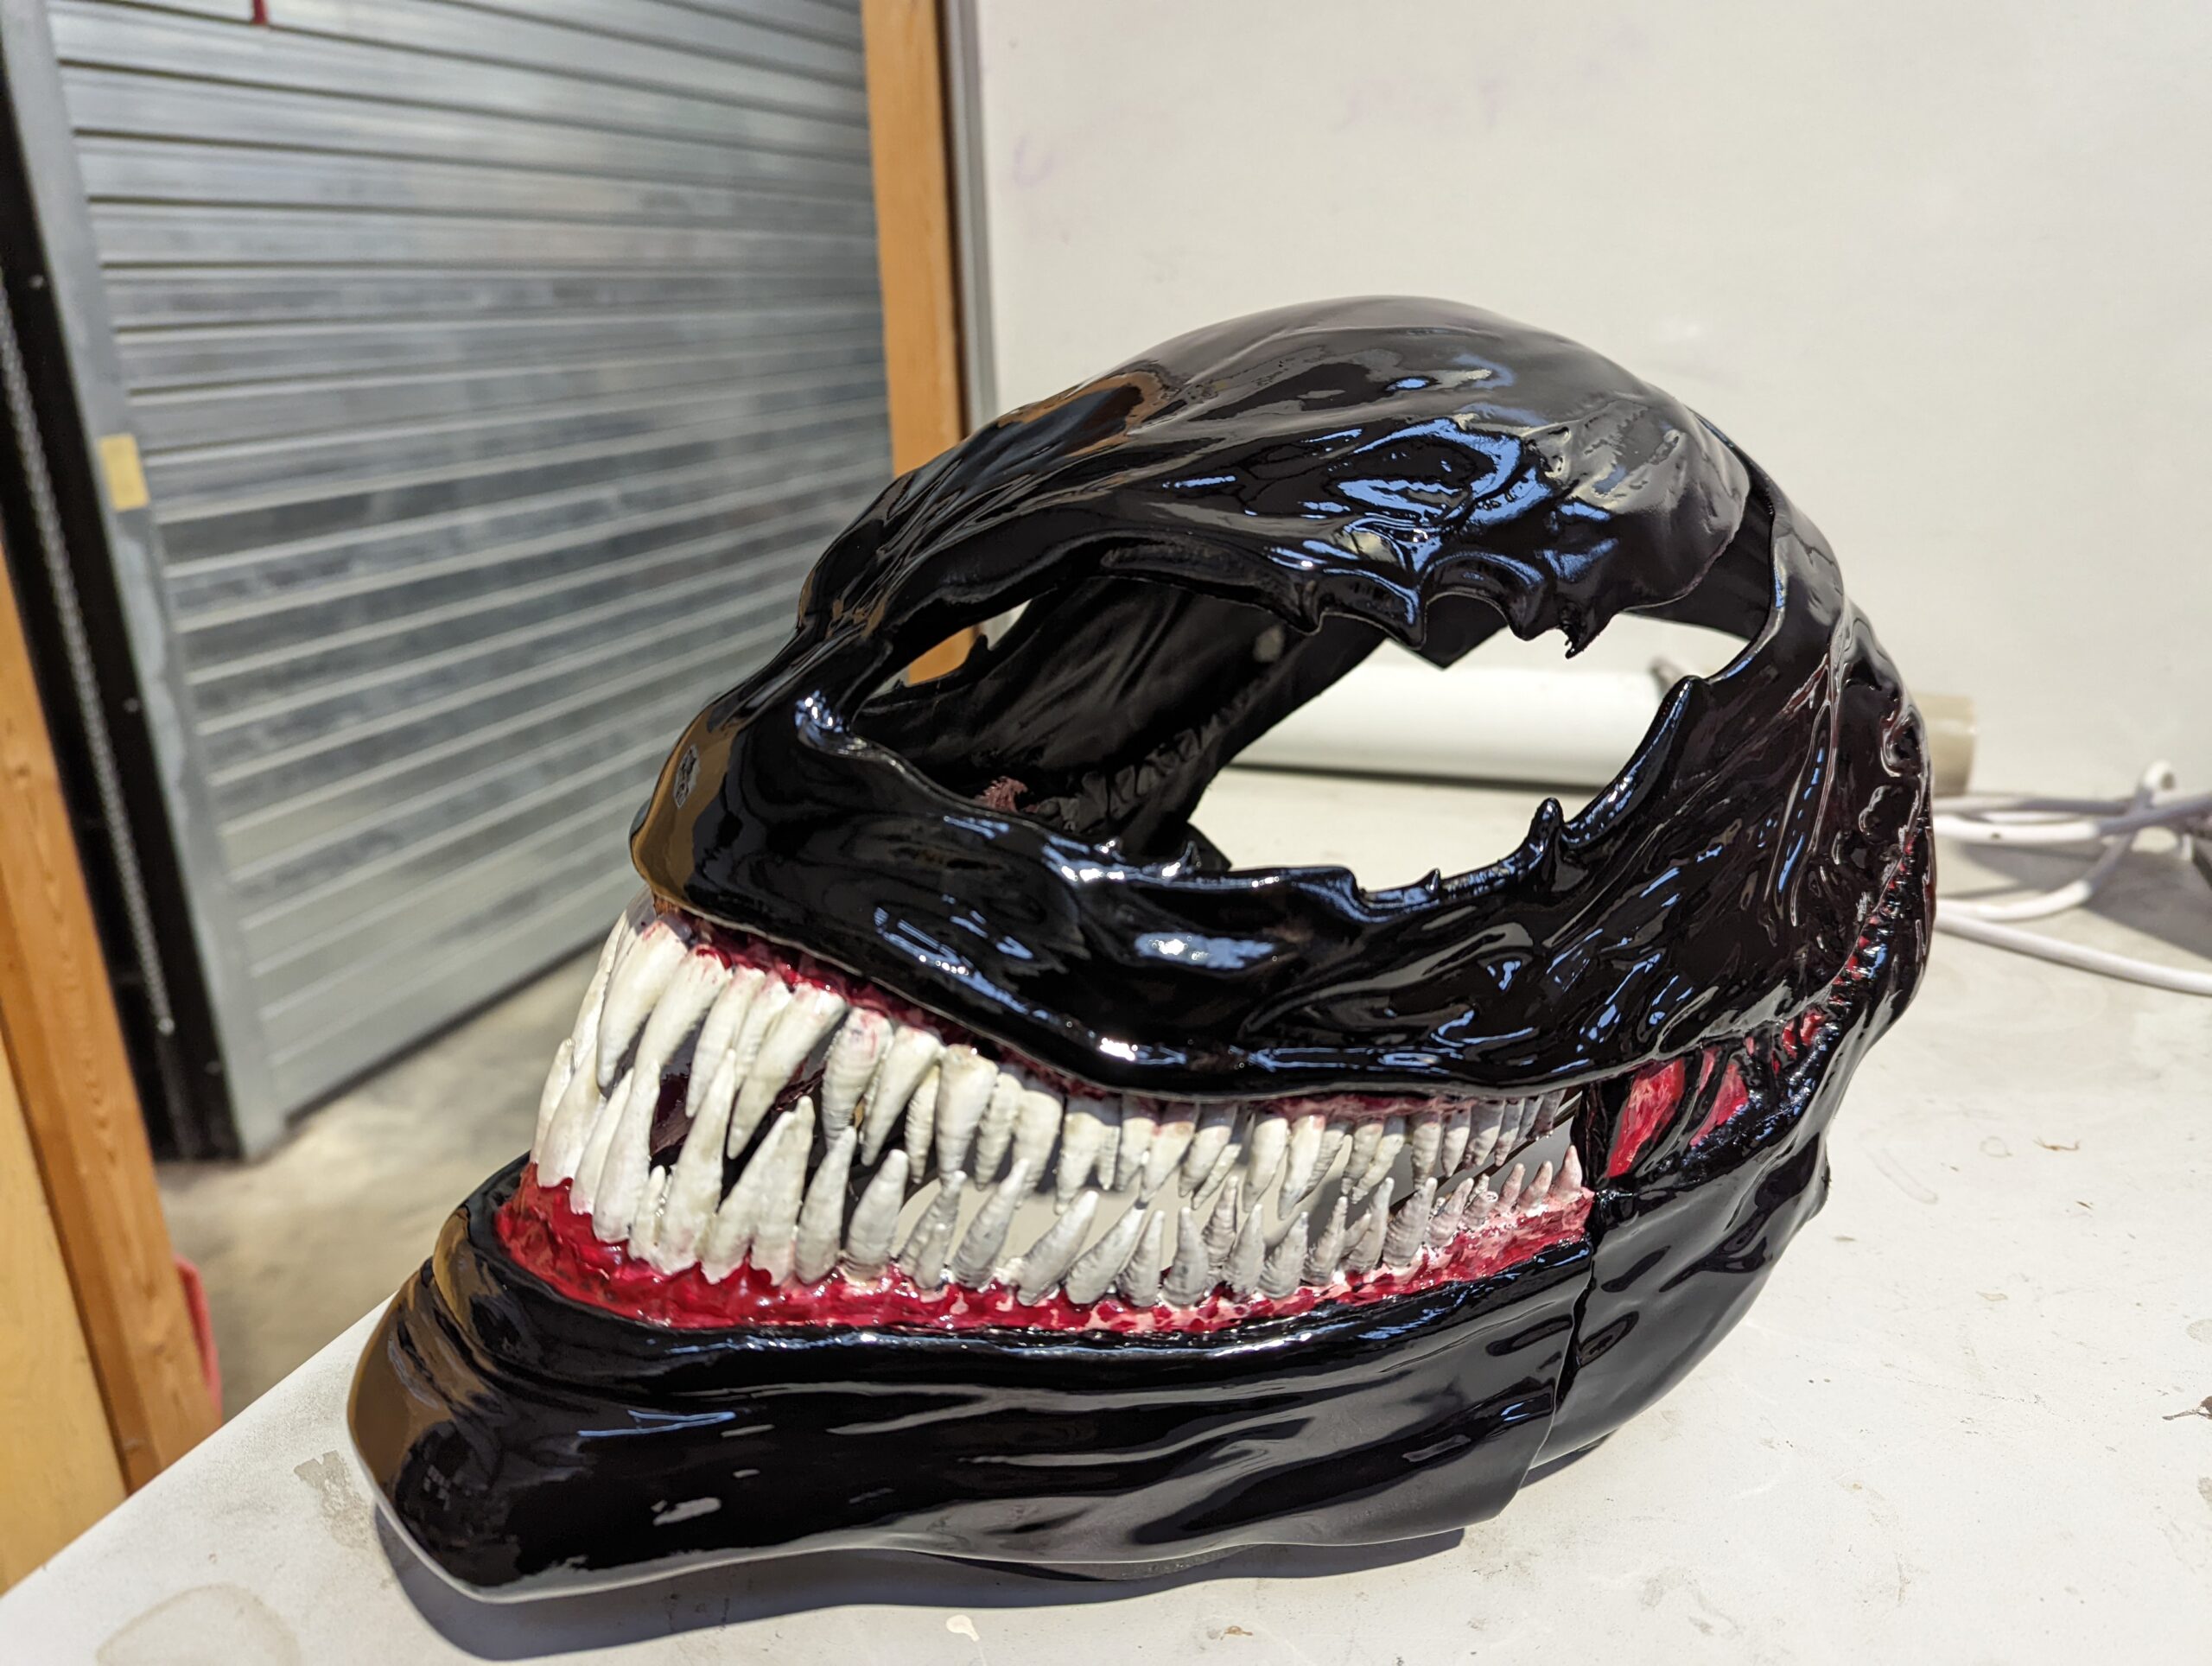
We then applied around 3 coats of the RAL 9005 acrylic paint. We left the project to fully cure overnight.
We went for a hardened finish, so we top-coated the project with a 2K gloss lacquer, around 4 coats. Once this cured (again overnight), we applied one final coat and left it to cure for the day.
Extras
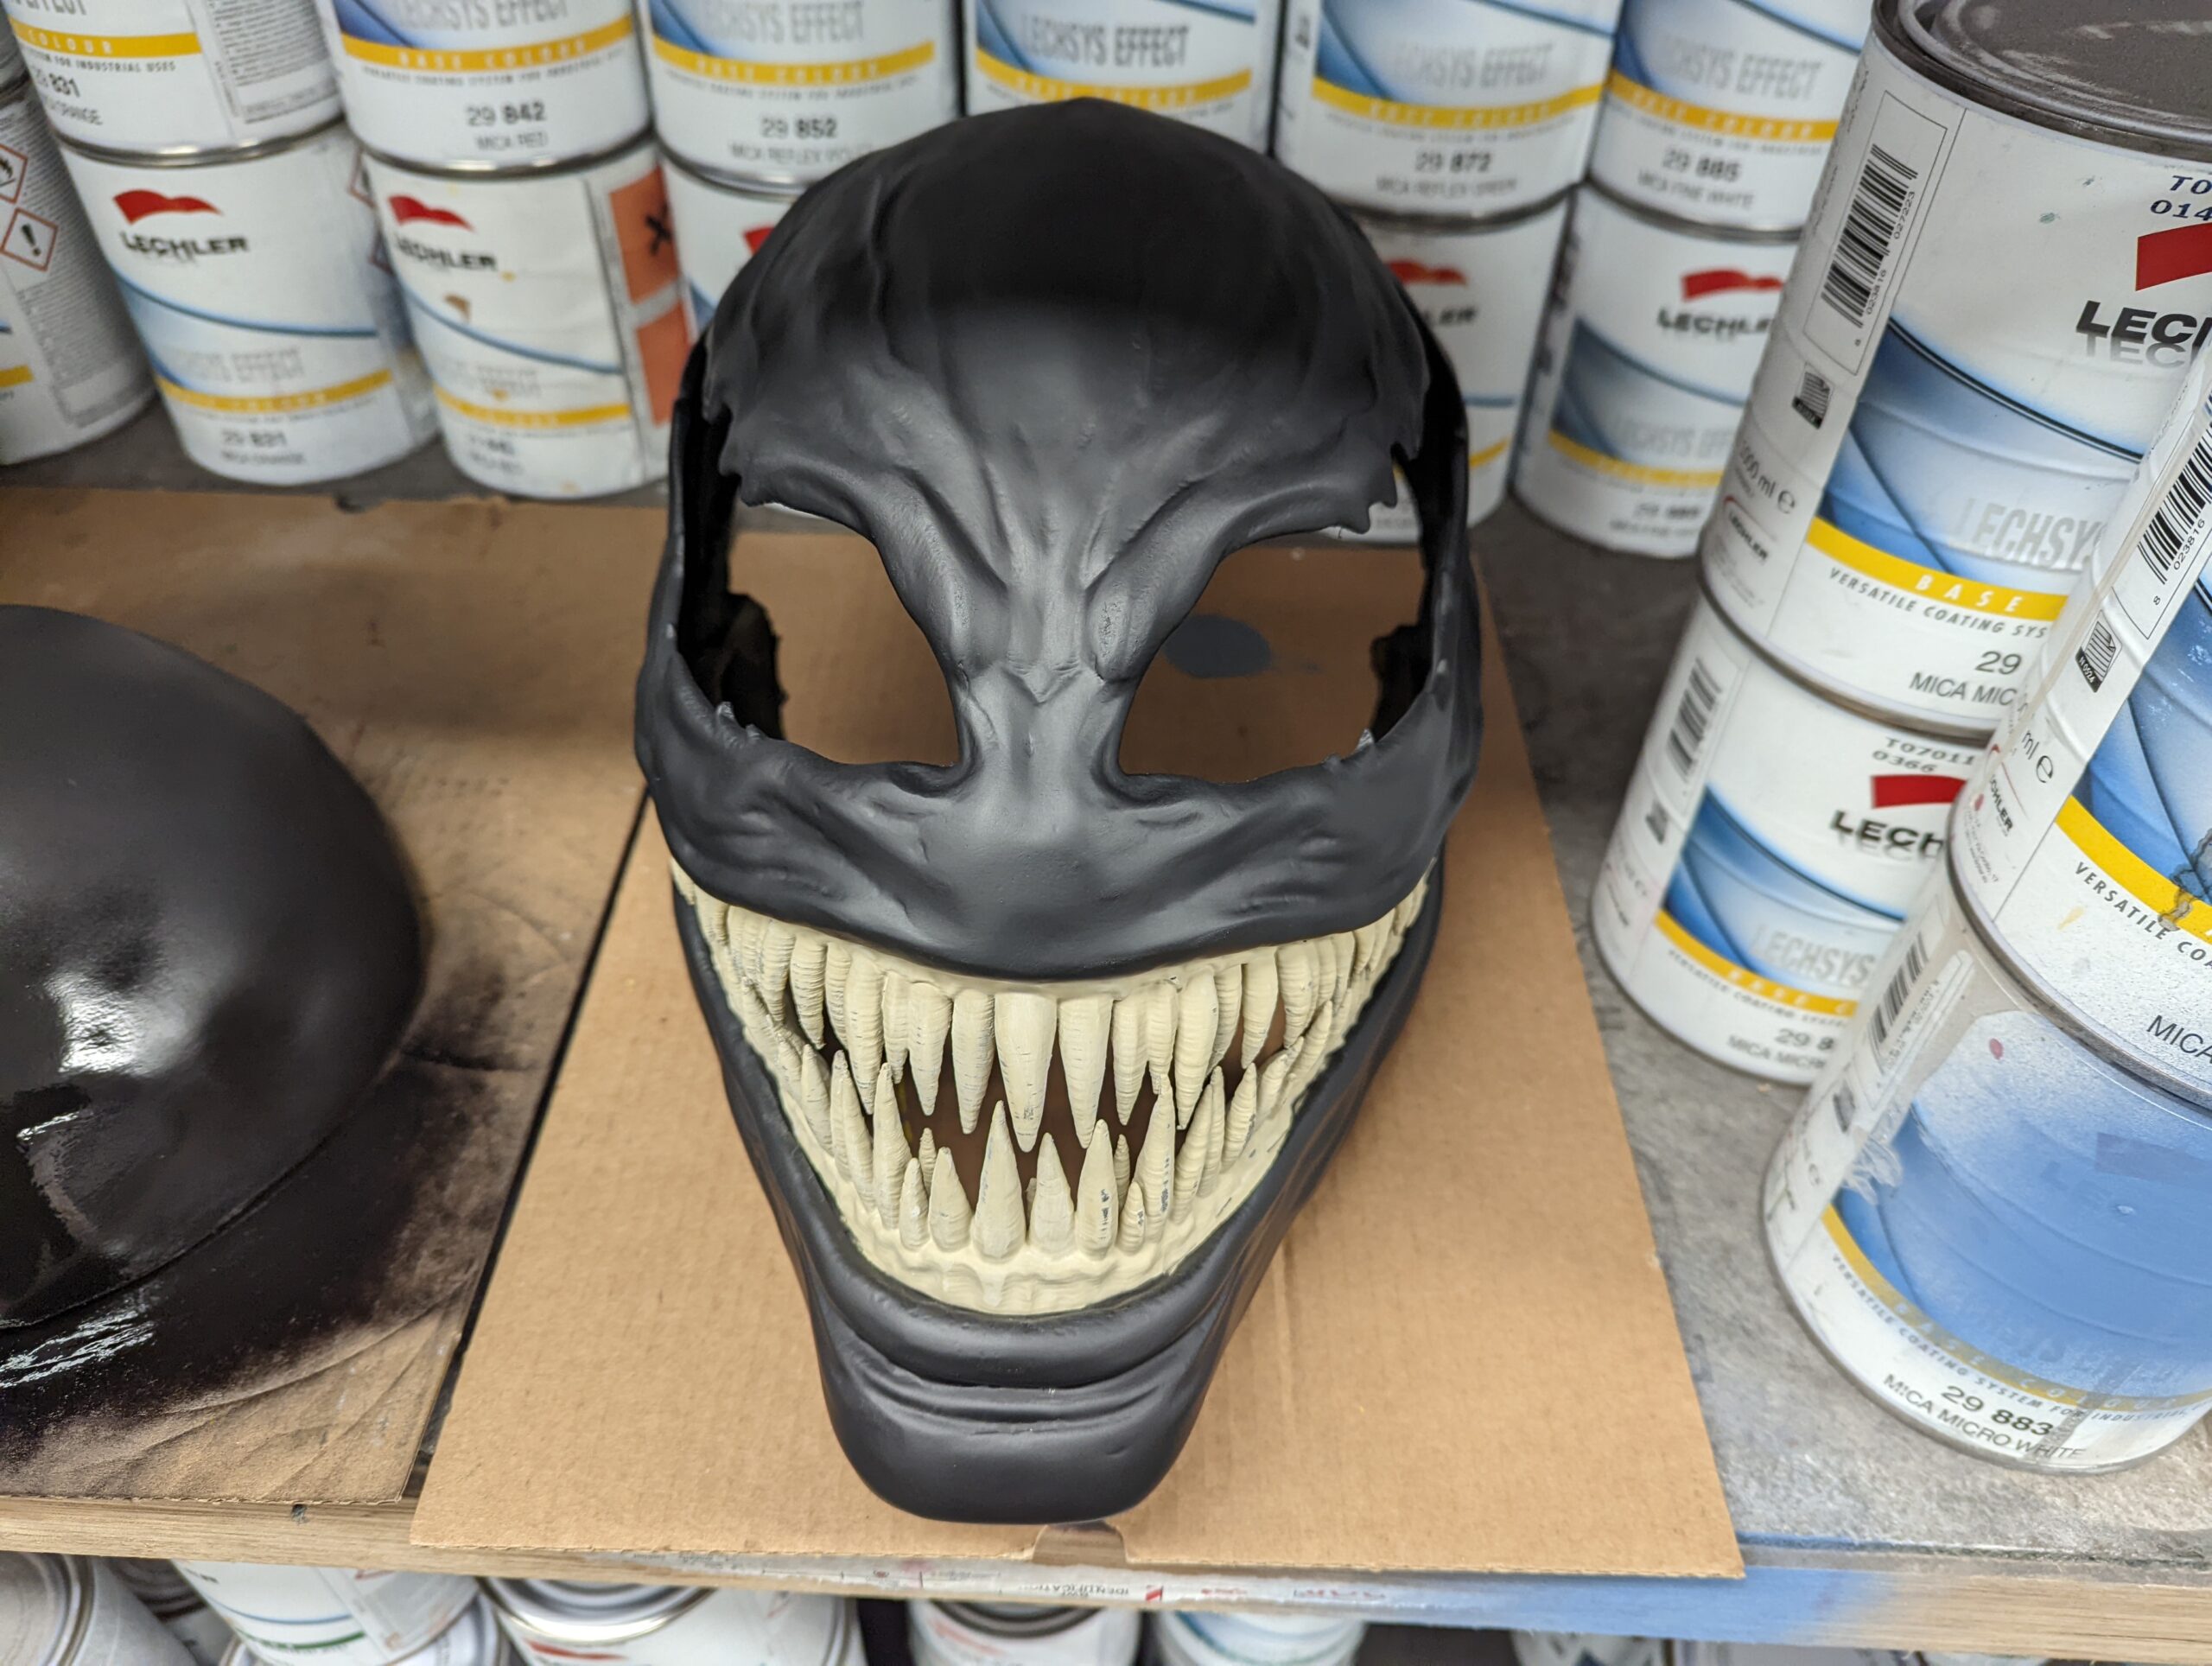
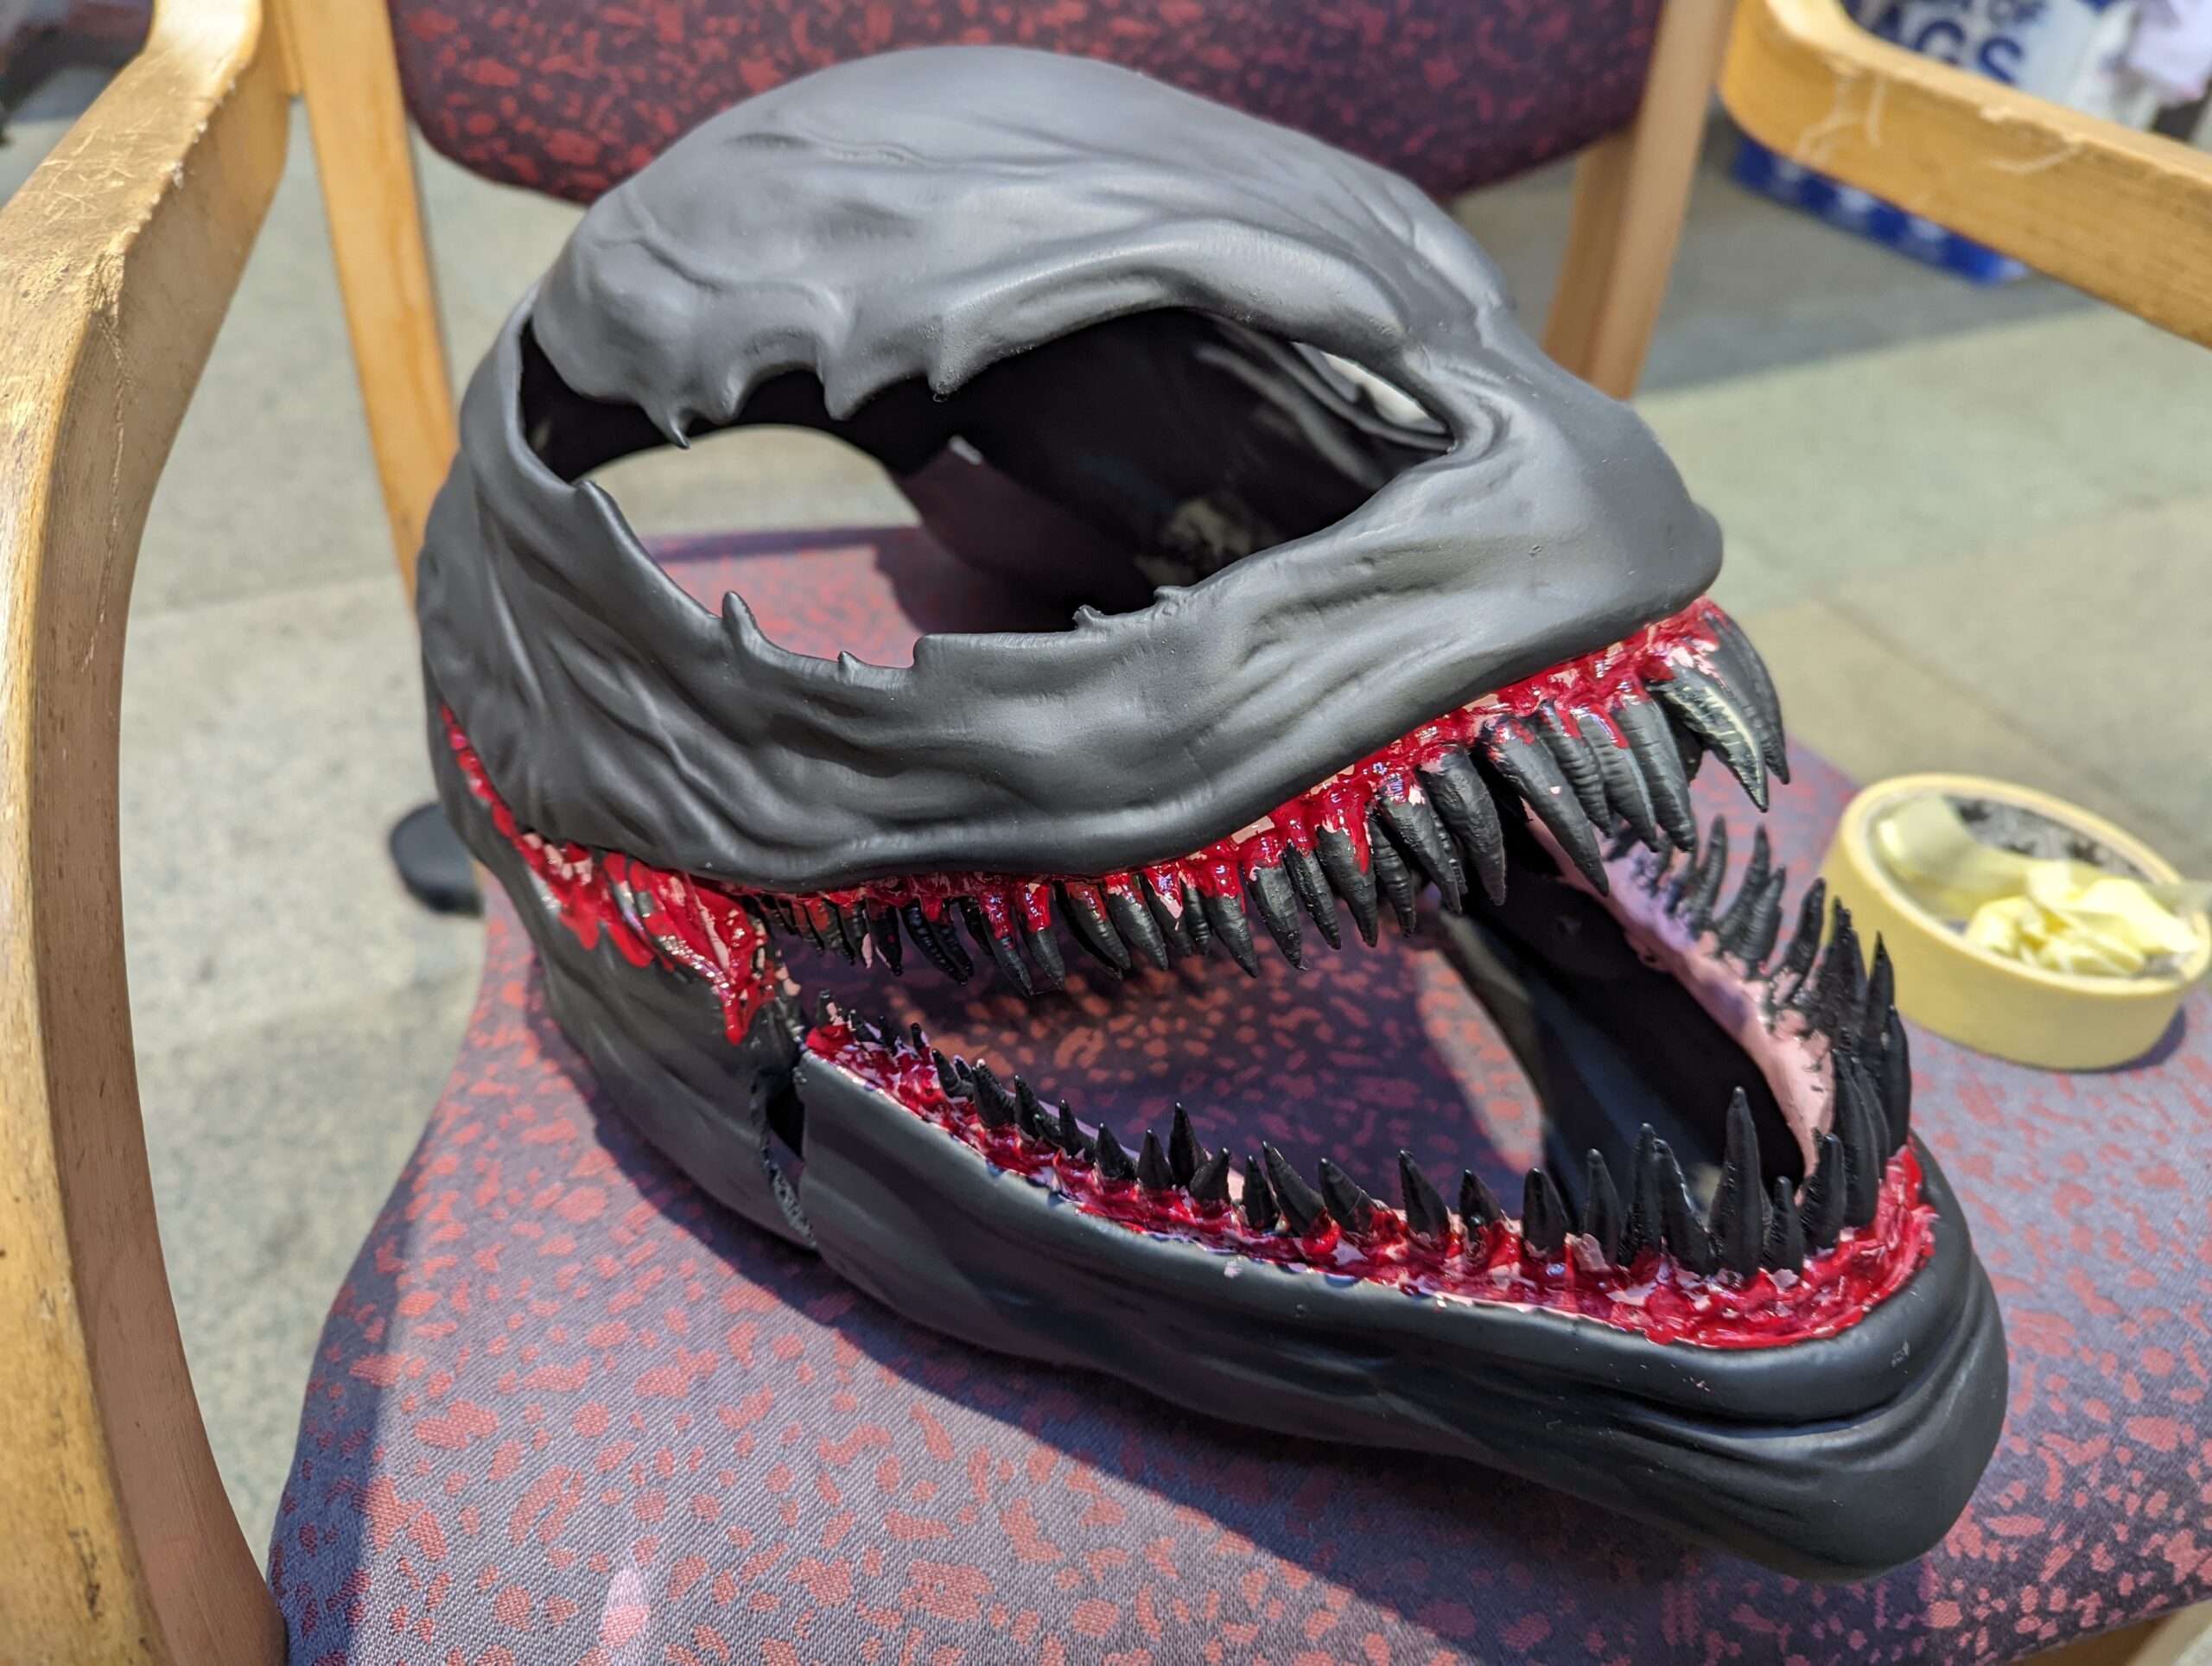
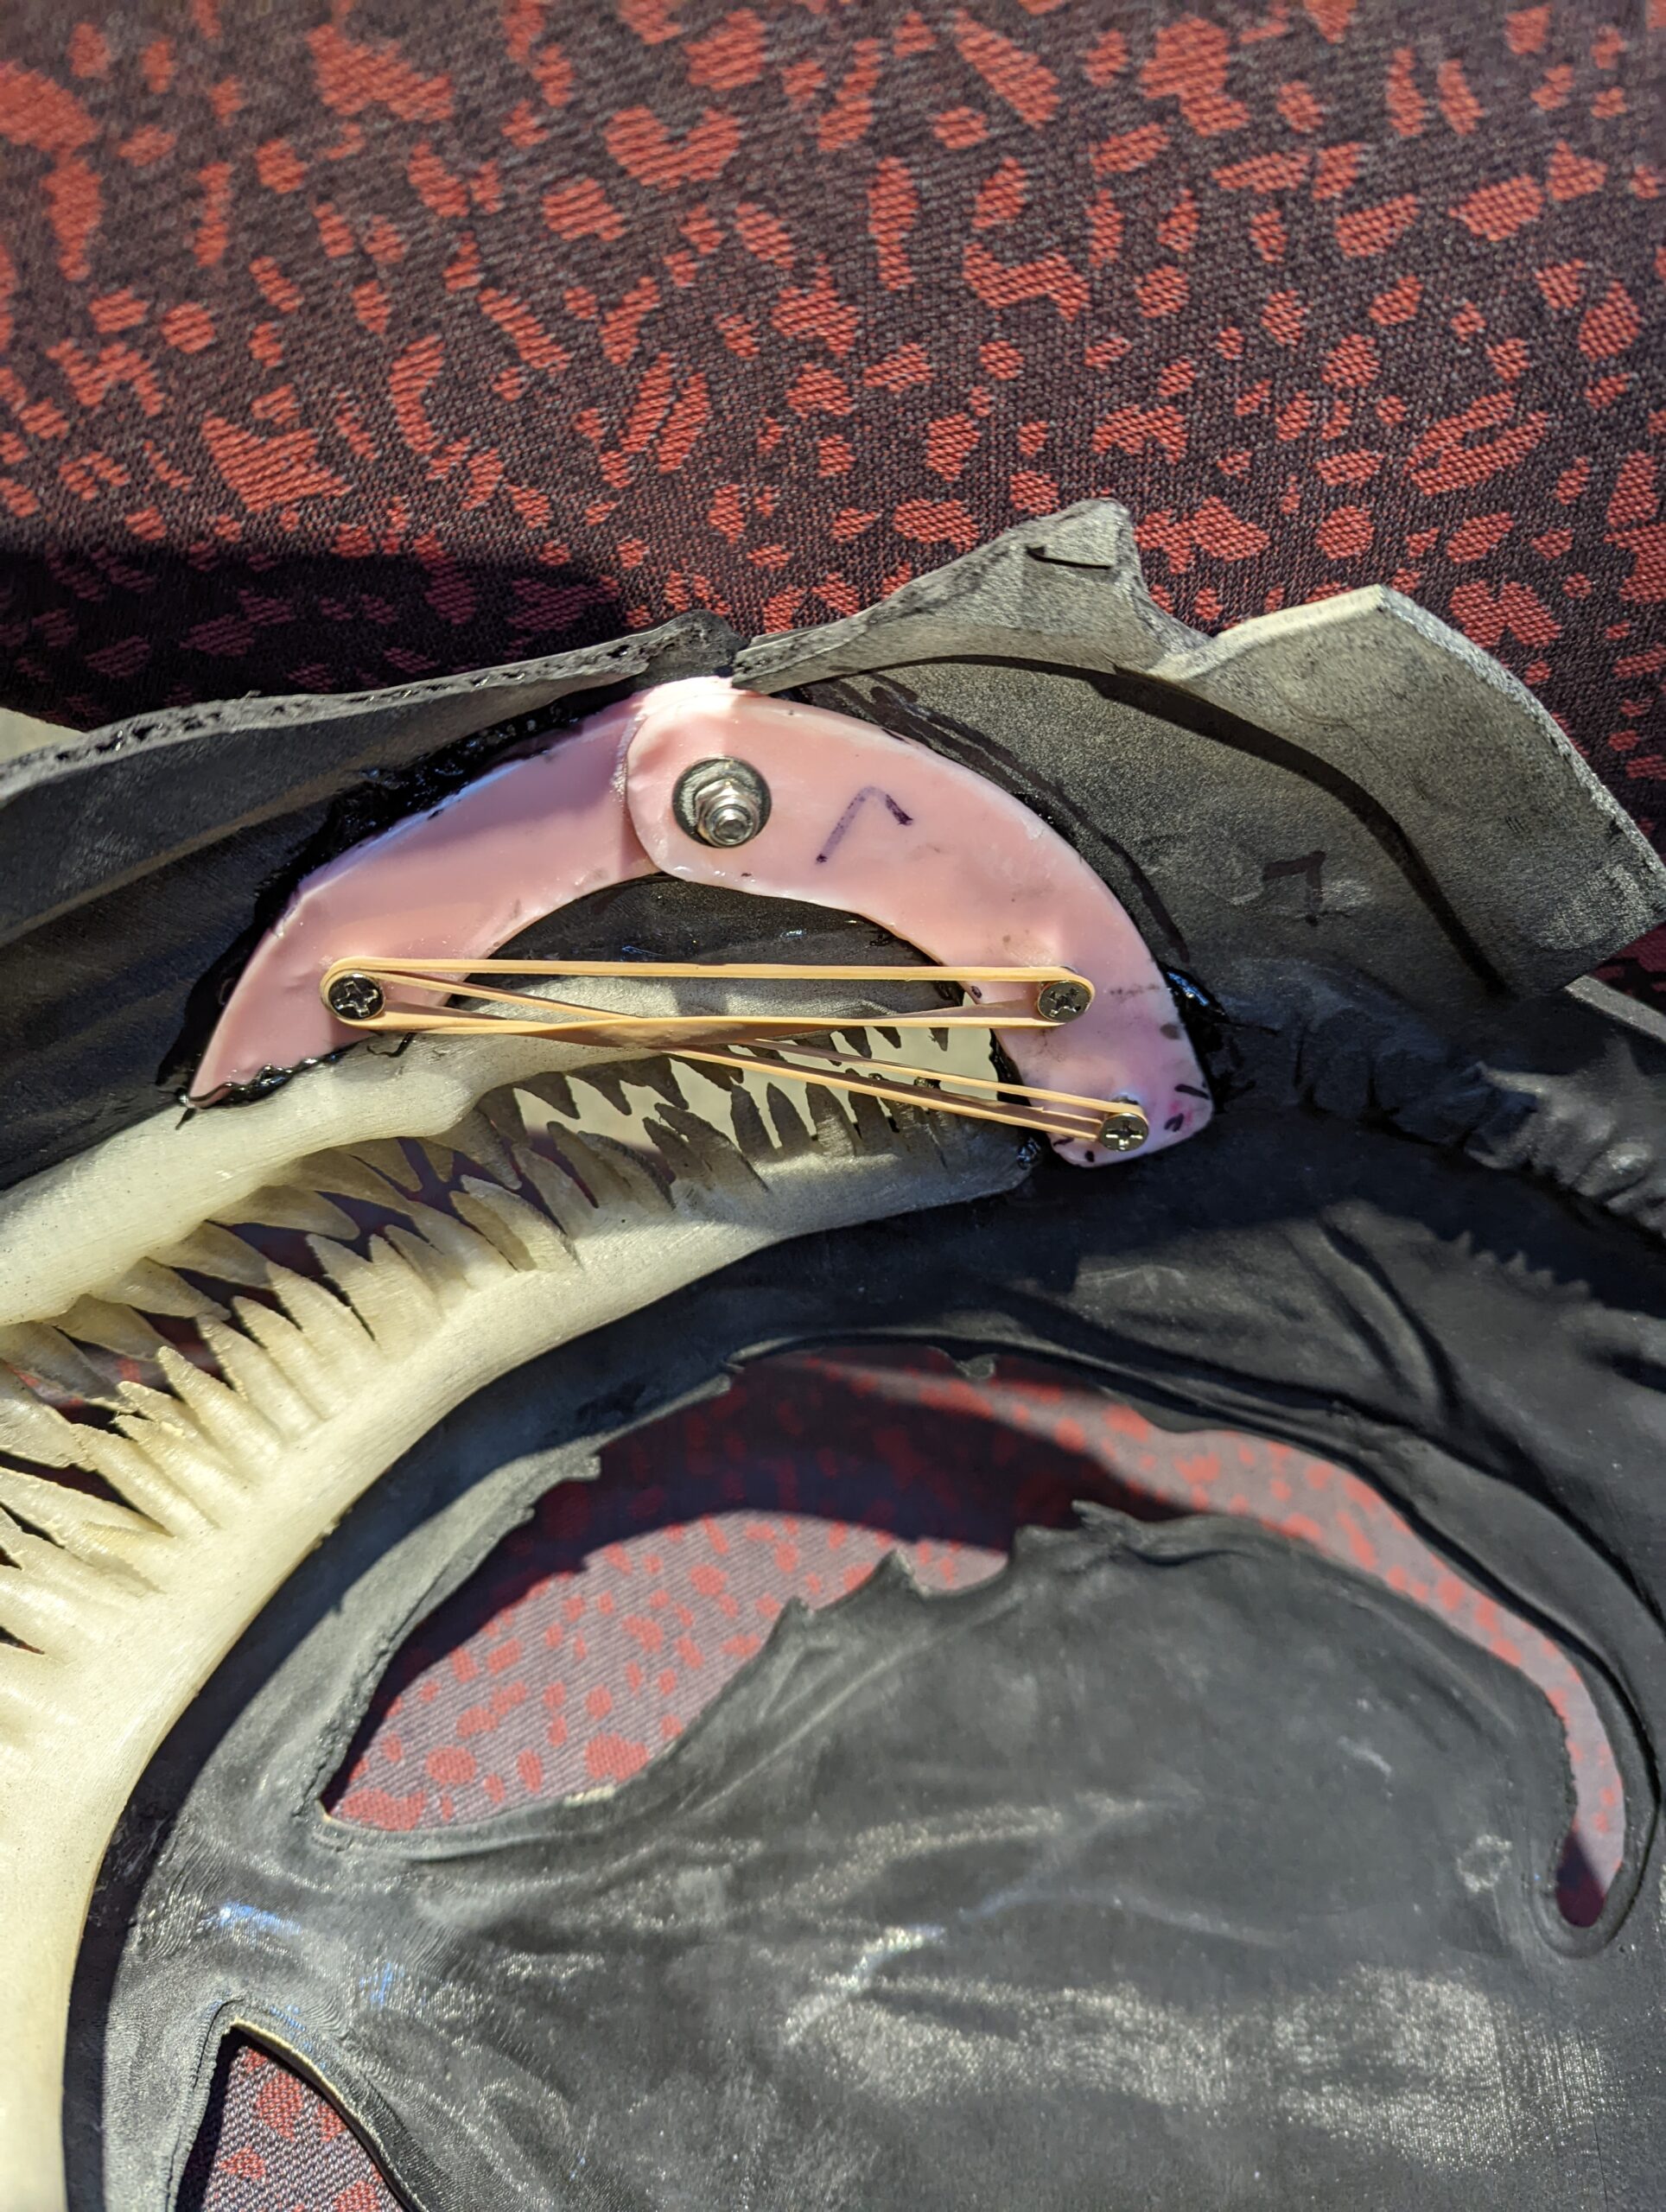
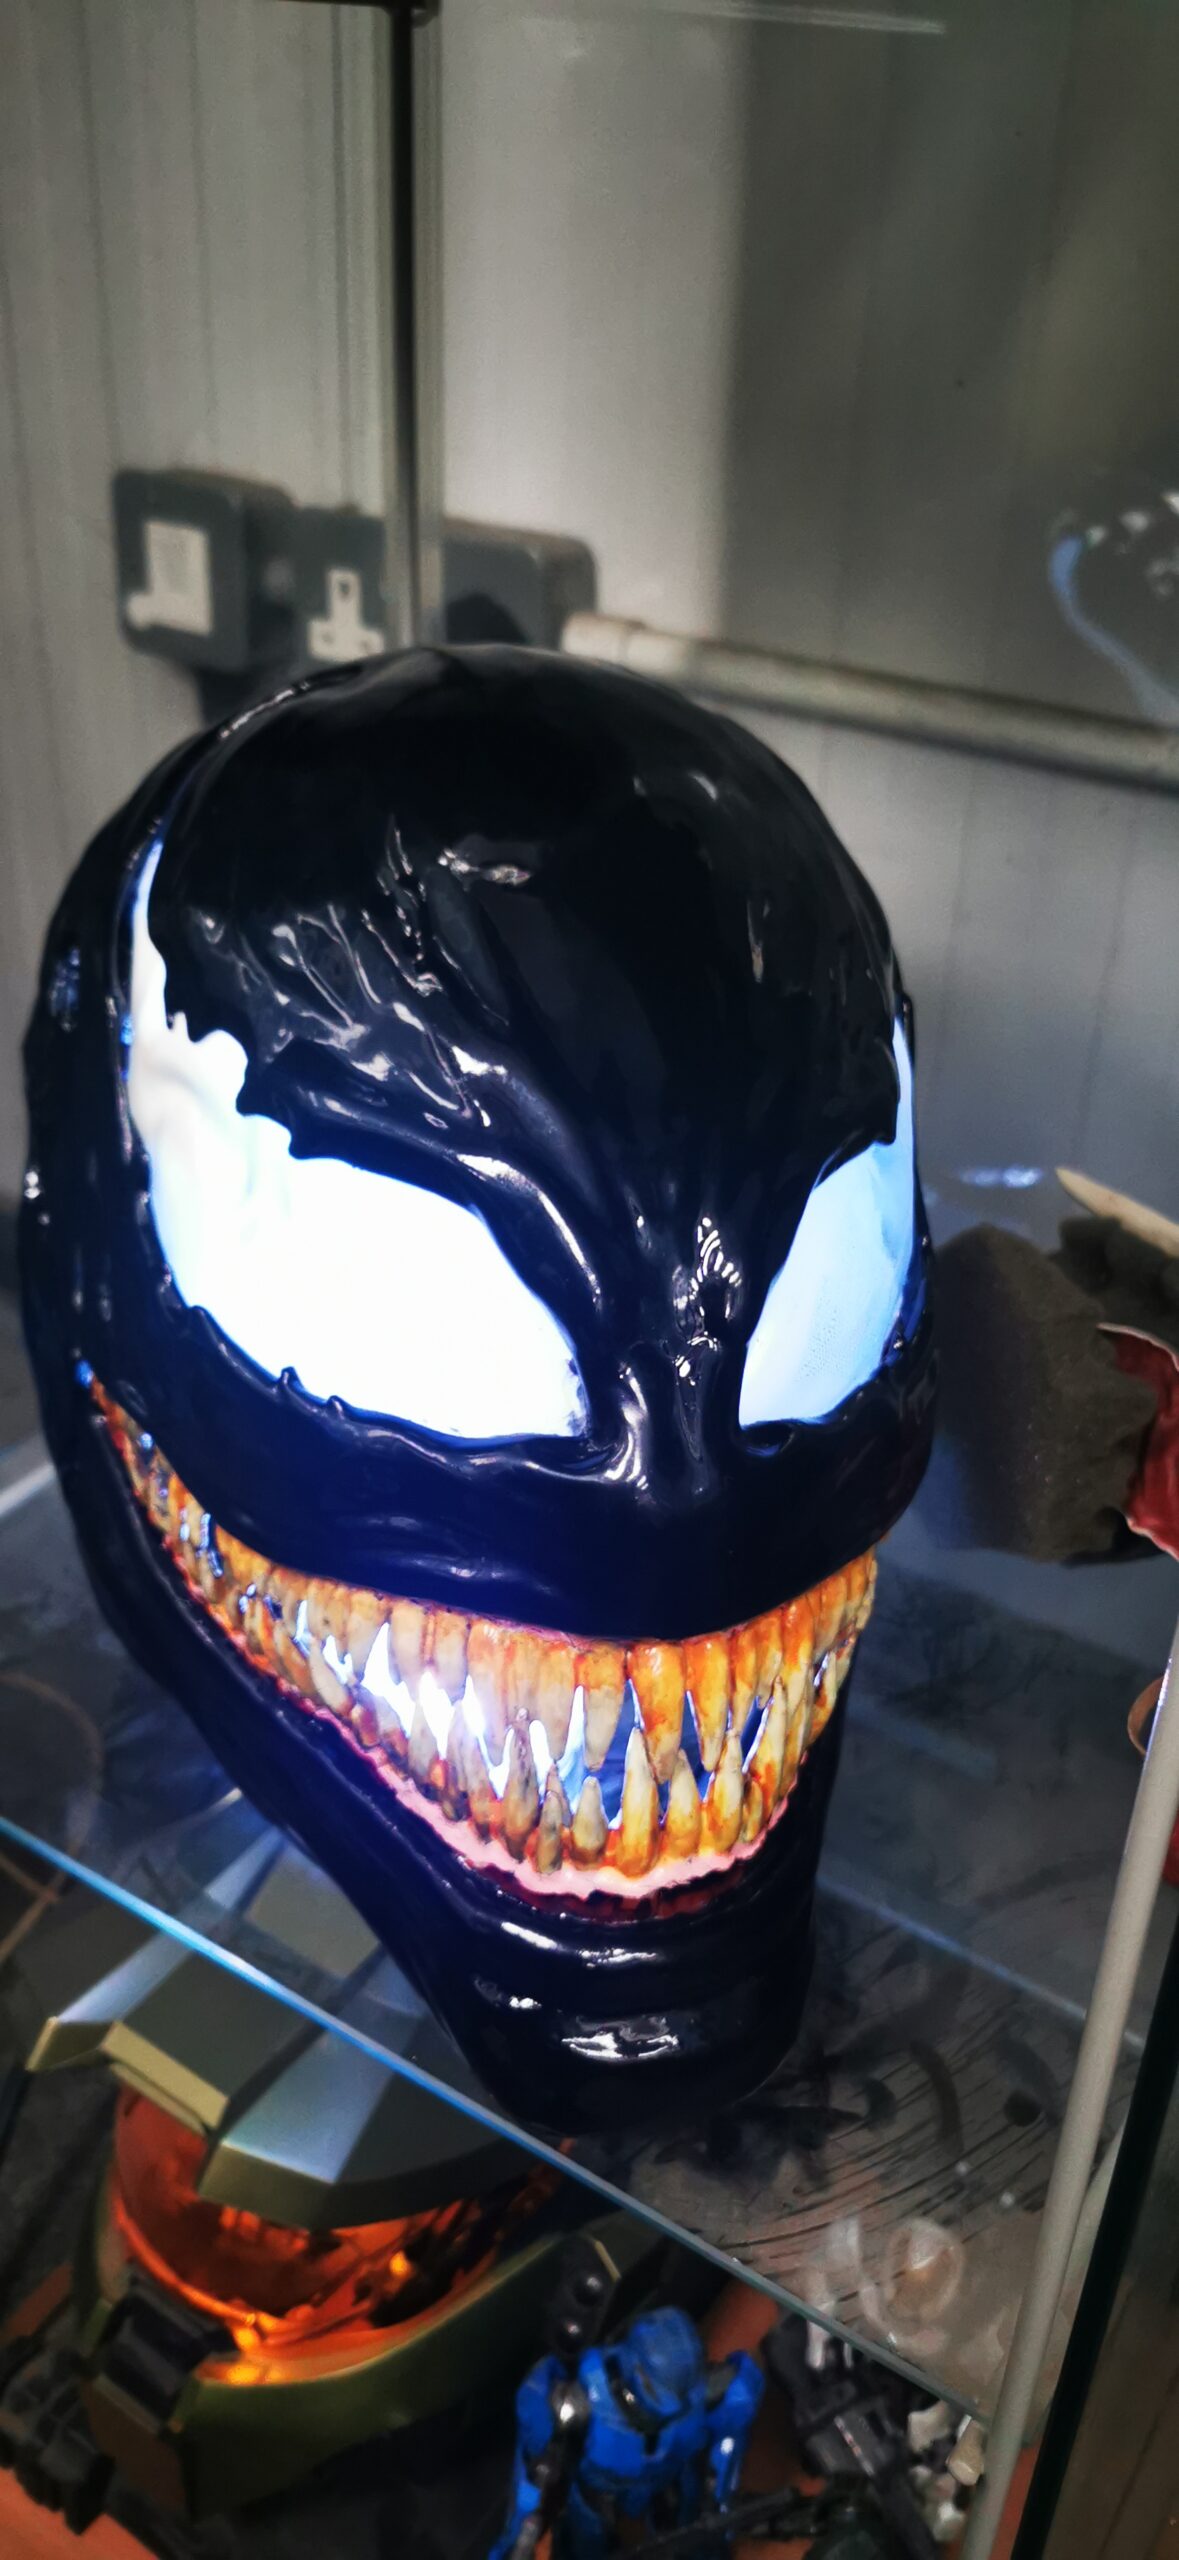
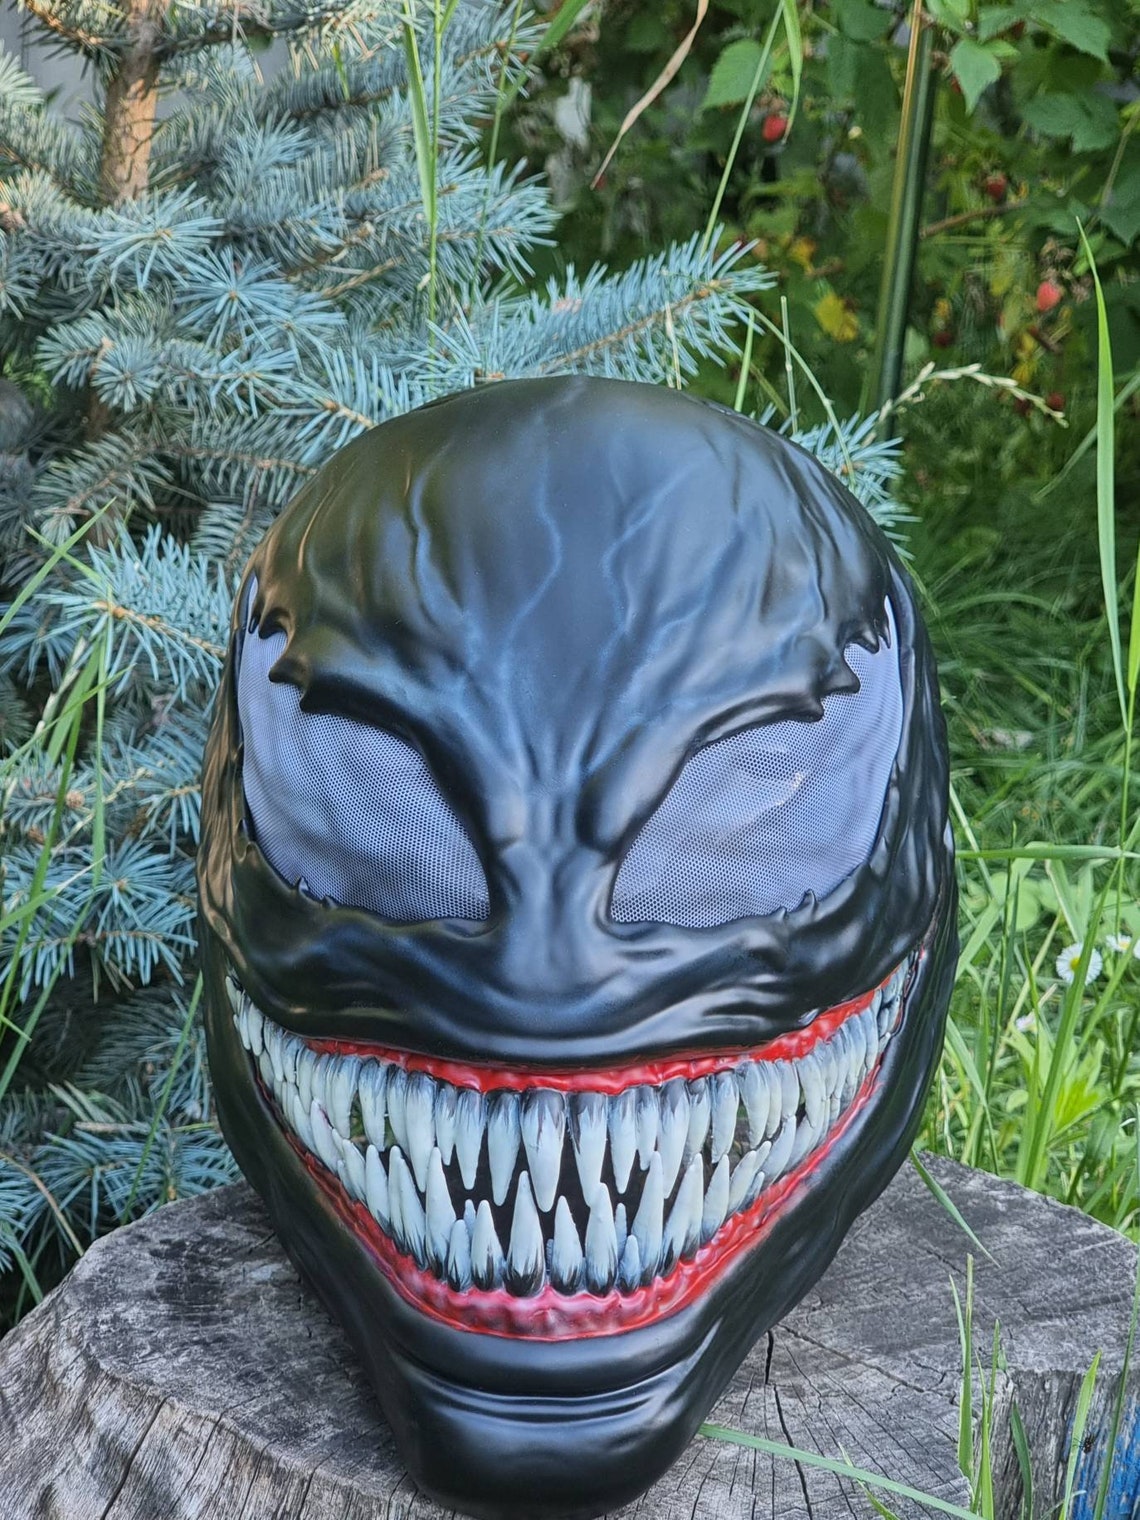
We decided early on to separate the jaw so we can make it moveable and, when it’s worn, actually simulate the same speech as the wearer. So, between the primer paint and the RAL 9005 paint, we created a hinge joint and elasticated it so it sprung back in place when you opened your mouth.
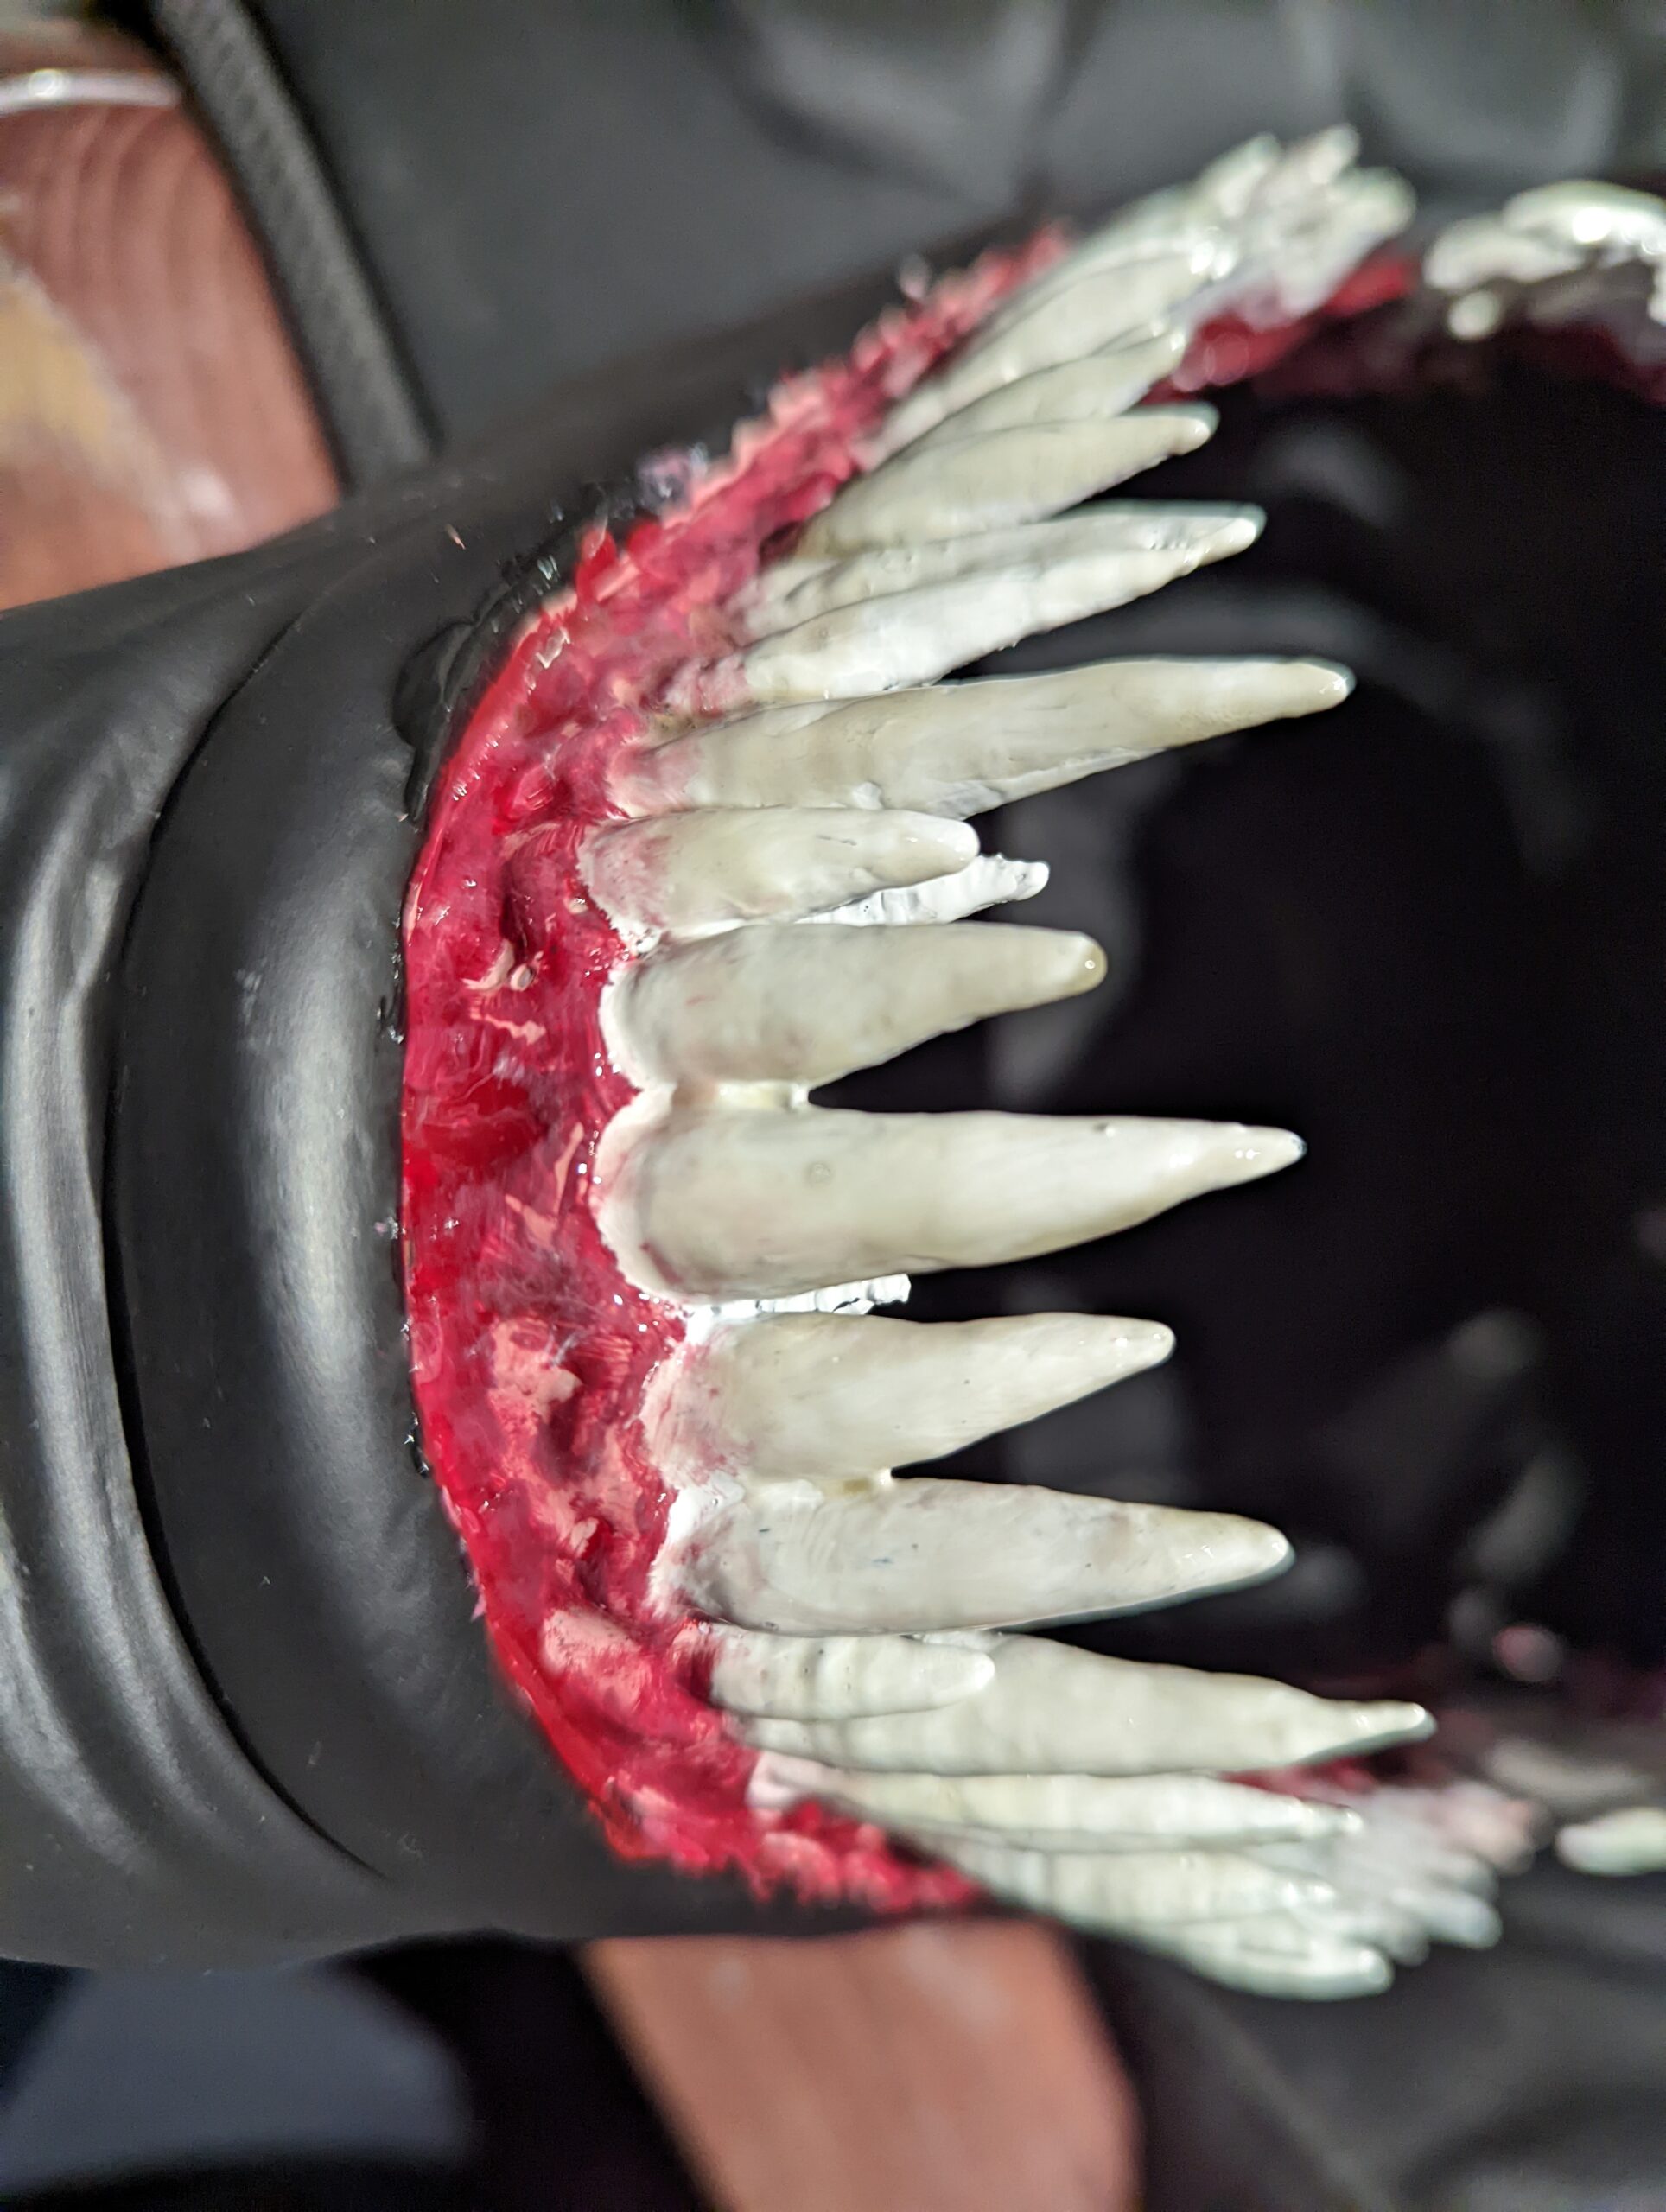
We then had to create the paint for the teeth, which in itself caused problems with the finish. When you think of painting teeth, you think white; however, when we painted them white, the mask looked too much like Mr Clean. To solve this, we added a little oxide yellow, but it then looked like someone had been smoking 50 a day. We needed to find a happy medium.
In the end, we added an off-white but then made a 50 ml pot of lacquer very lightly tinted with oxide yellow. This wash was applied by brush and gave us exactly what we were looking for. We applied the pink and maroon paint to the gums in the same way.
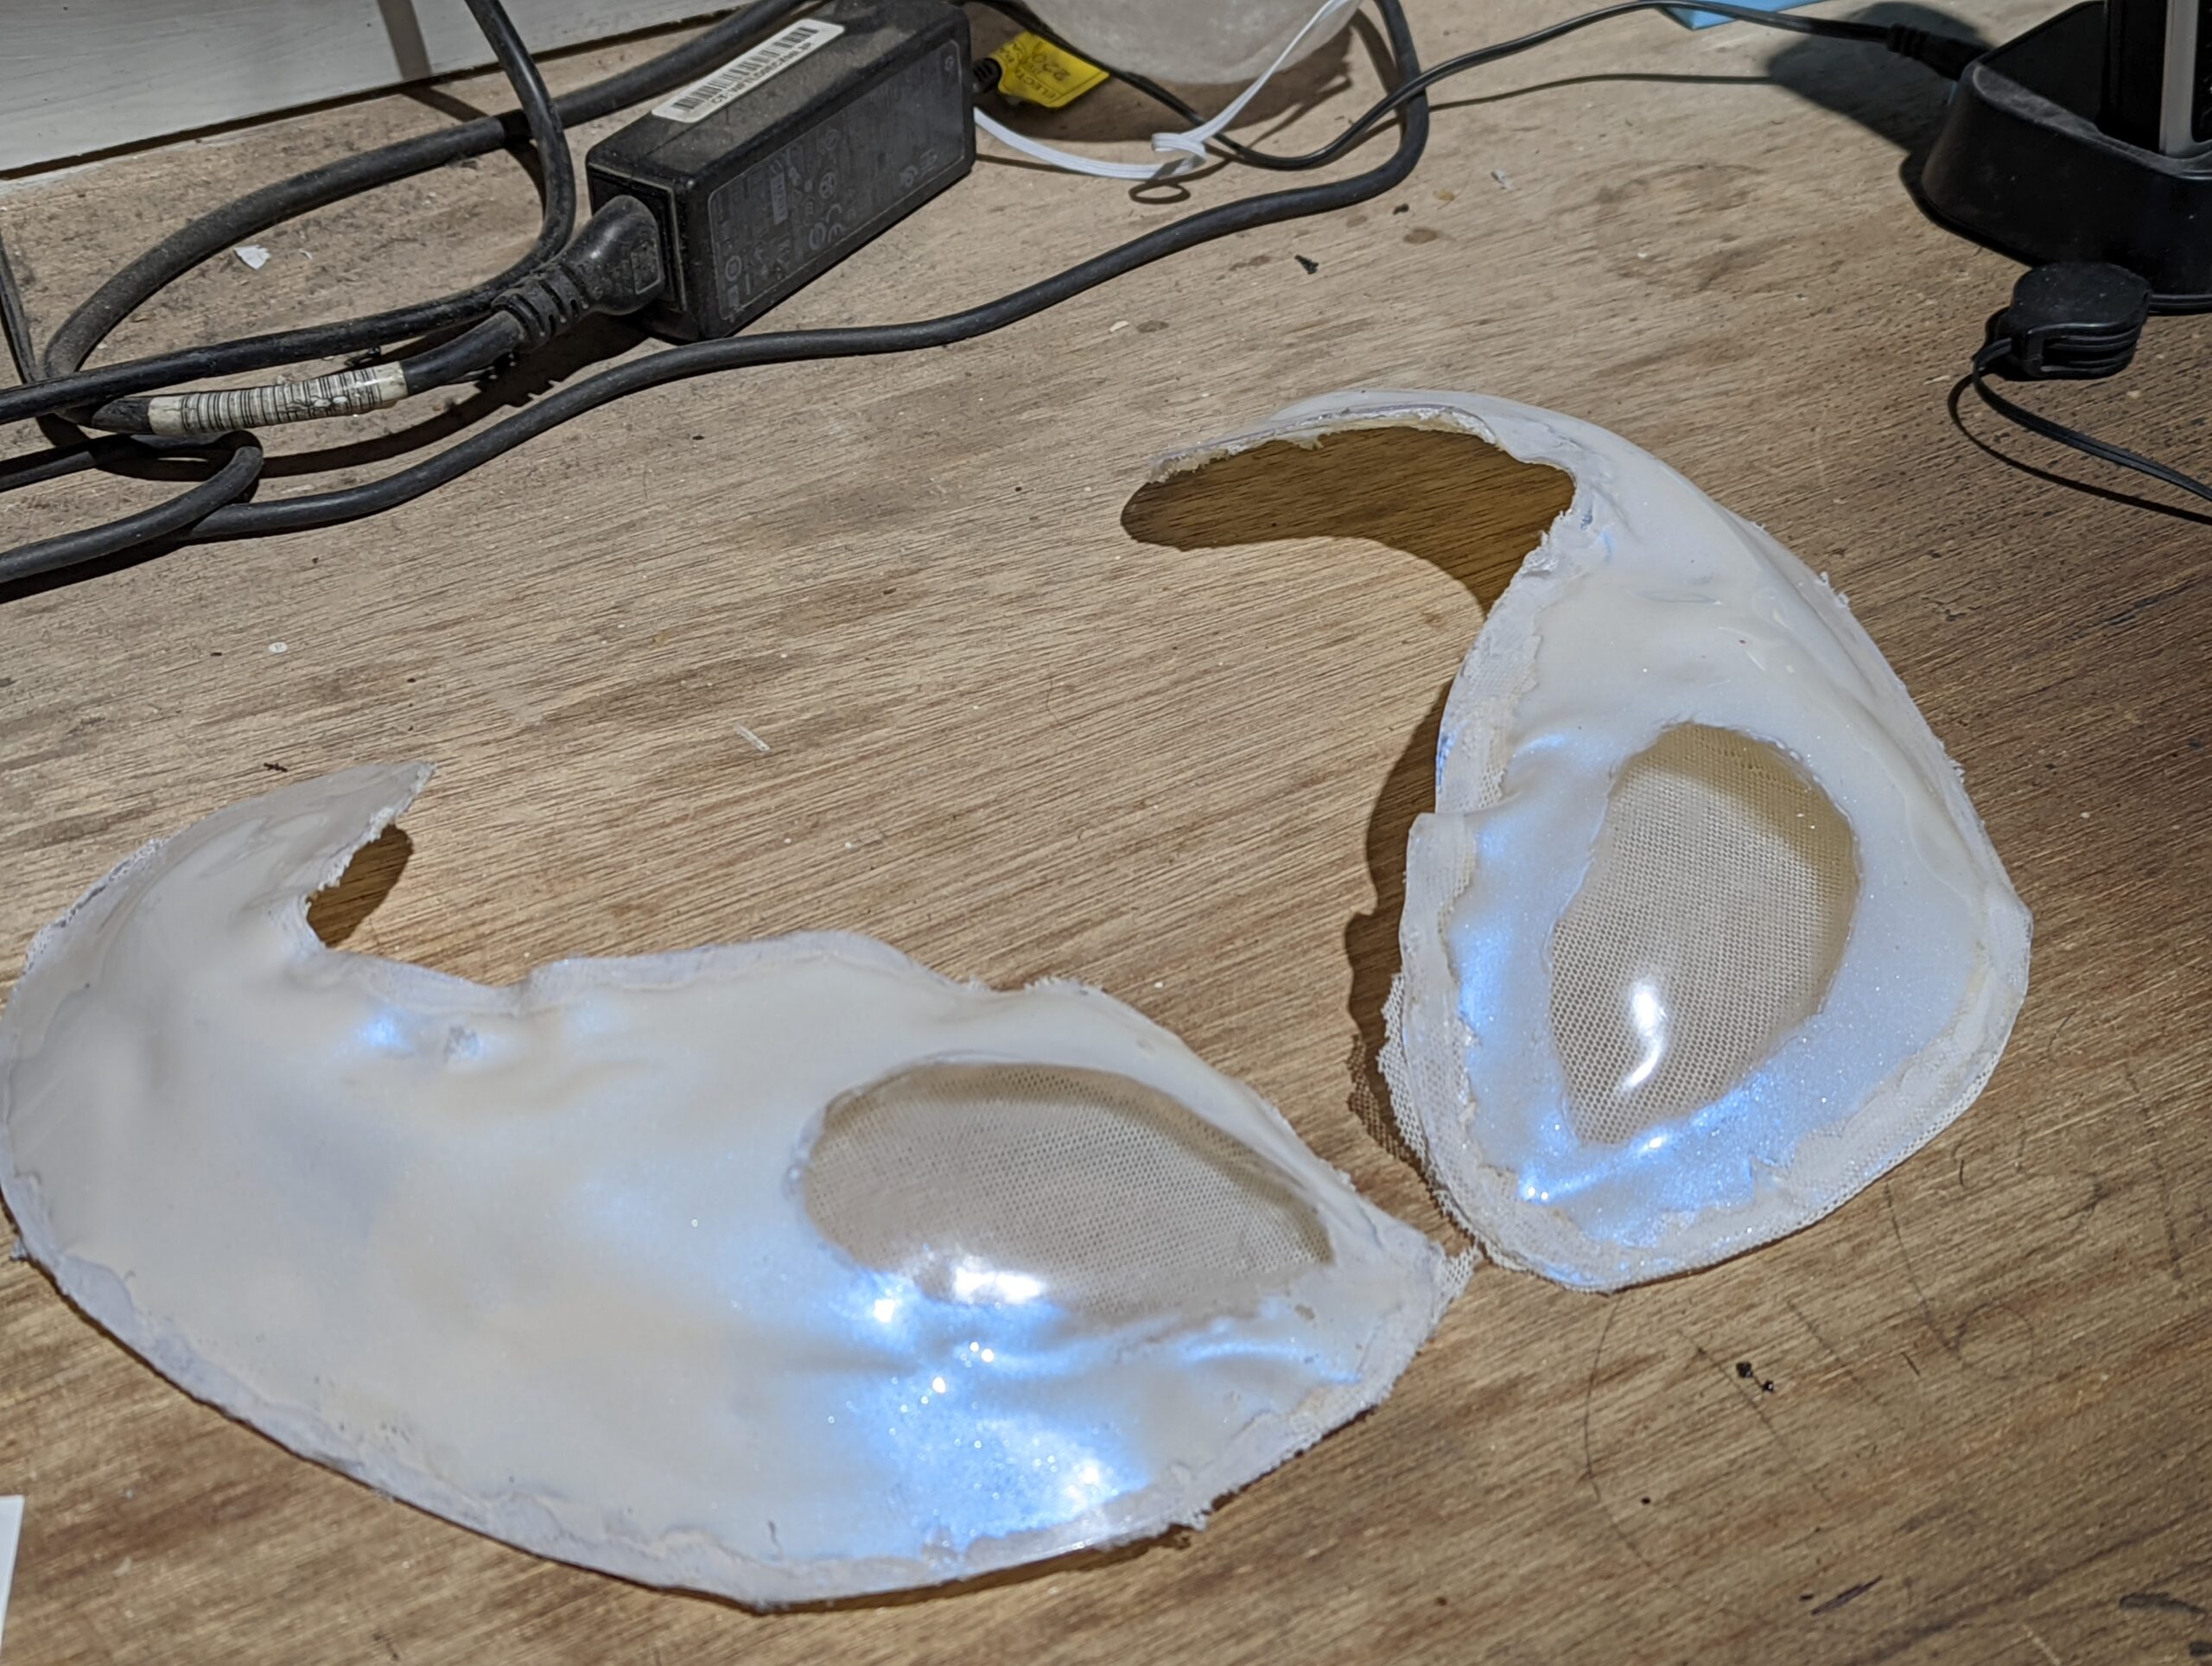
After the manipulable jaw, we decided to add some voice augmentation, so we bought a device that can change your voice accordingly. We then needed to add an amp to increase the volume and speakers capable of projecting a good scary sound. We had to carve holes in the mask around where the ears would normally be and then cover them over with similar sinew-like strands to compliment the mask and hide the speakers. The results were spectacular, and we were really chuffed.
There were a lot of hurdles on this one and new processes to try, but we were really happy with the outcome. We ended up with something unique, effective and pretty scary, but ultimately very cool!