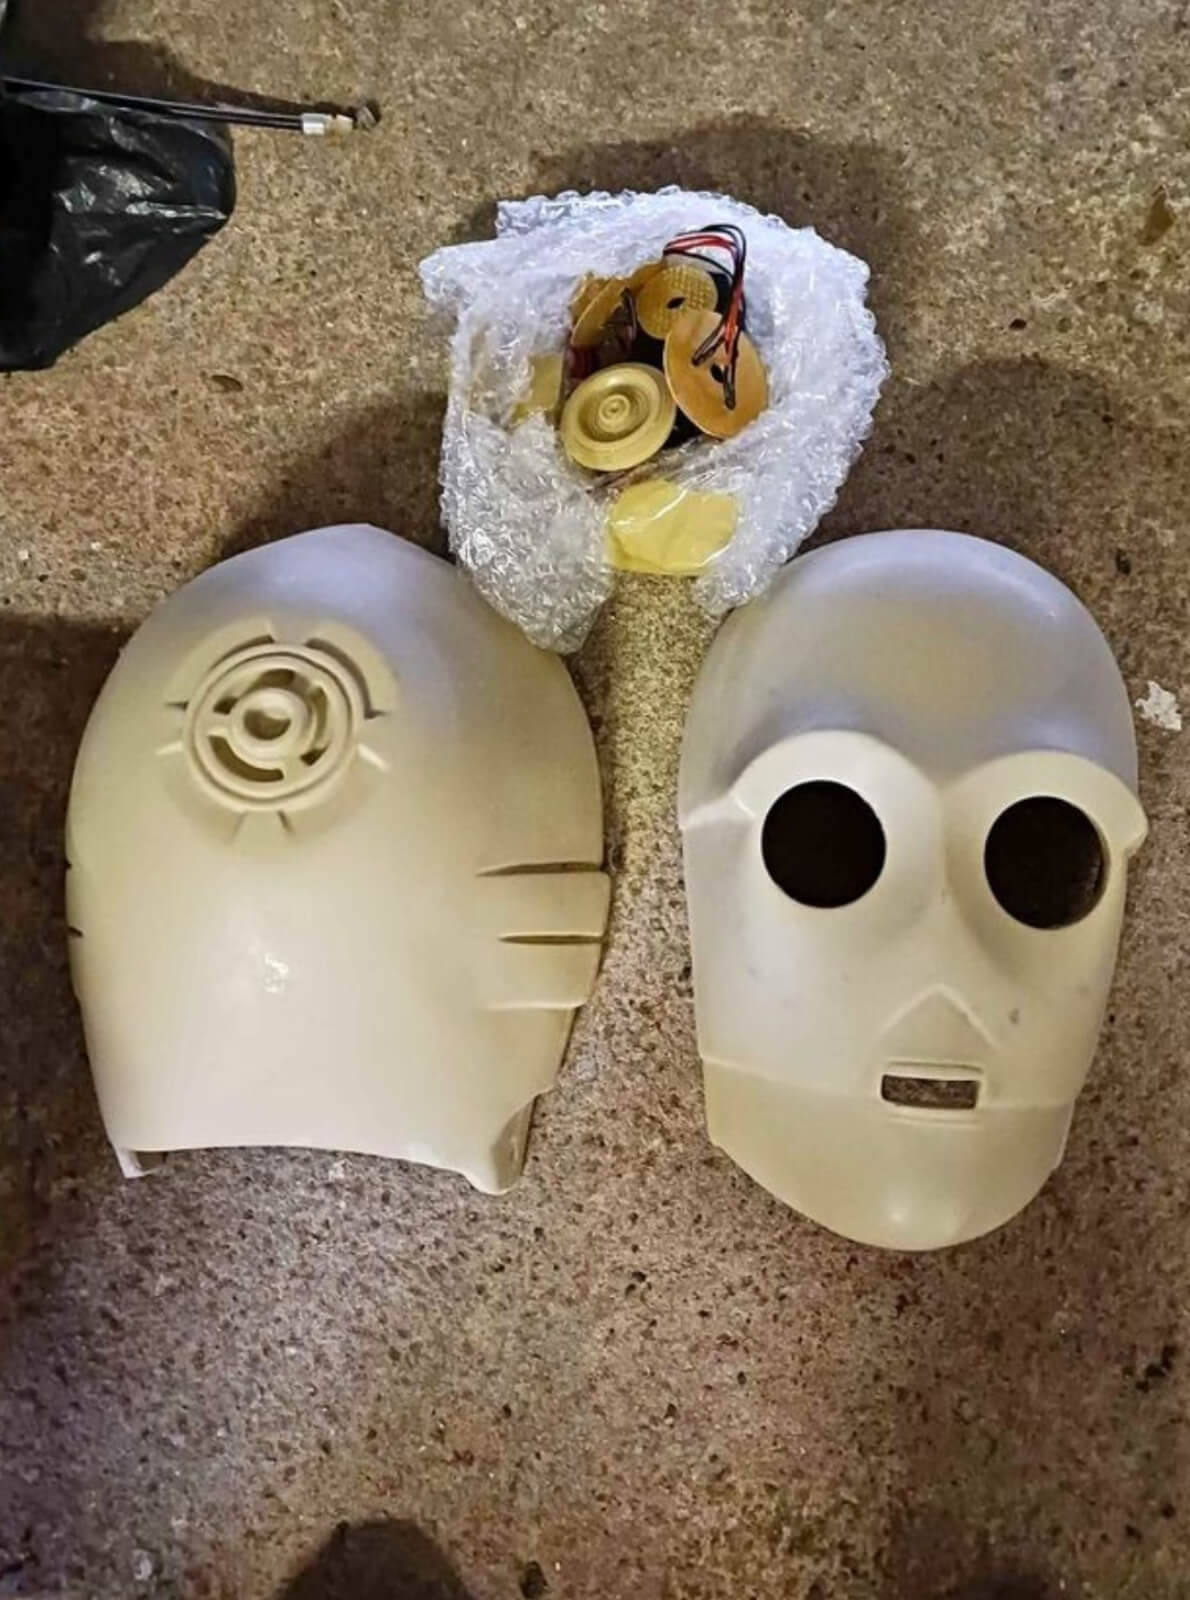
In this intergalactic-inspired project, we set out to replicate one of the most recognisable robot faces in movie history – C3PO. Having purchased the blank bust as an unfinished project, we felt confident we could bring it to life with the products we supply at DC Paint Solutions. However, it was clear from the outset this project wouldn’t come without its challenges, as there was evident damage at the rear of the head. Find out how we successfully transformed the bust below:
Materials & Tools List
Repair
Before any work could begin on the bust, we needed to repair the damaged area. We used sanding pads to wear down the dent and smoothen the surface. After cleaning the sanded area, we applied U-POL Plastic X Filler to fill the indent and restore the head to its original spherical condition. Once this had cured, we sanded the filler back, starting with 80 grit, then used lighter and lighter grit paper until the bump was smoothed out. After all this, we could finally begin painting the bust.
Paint
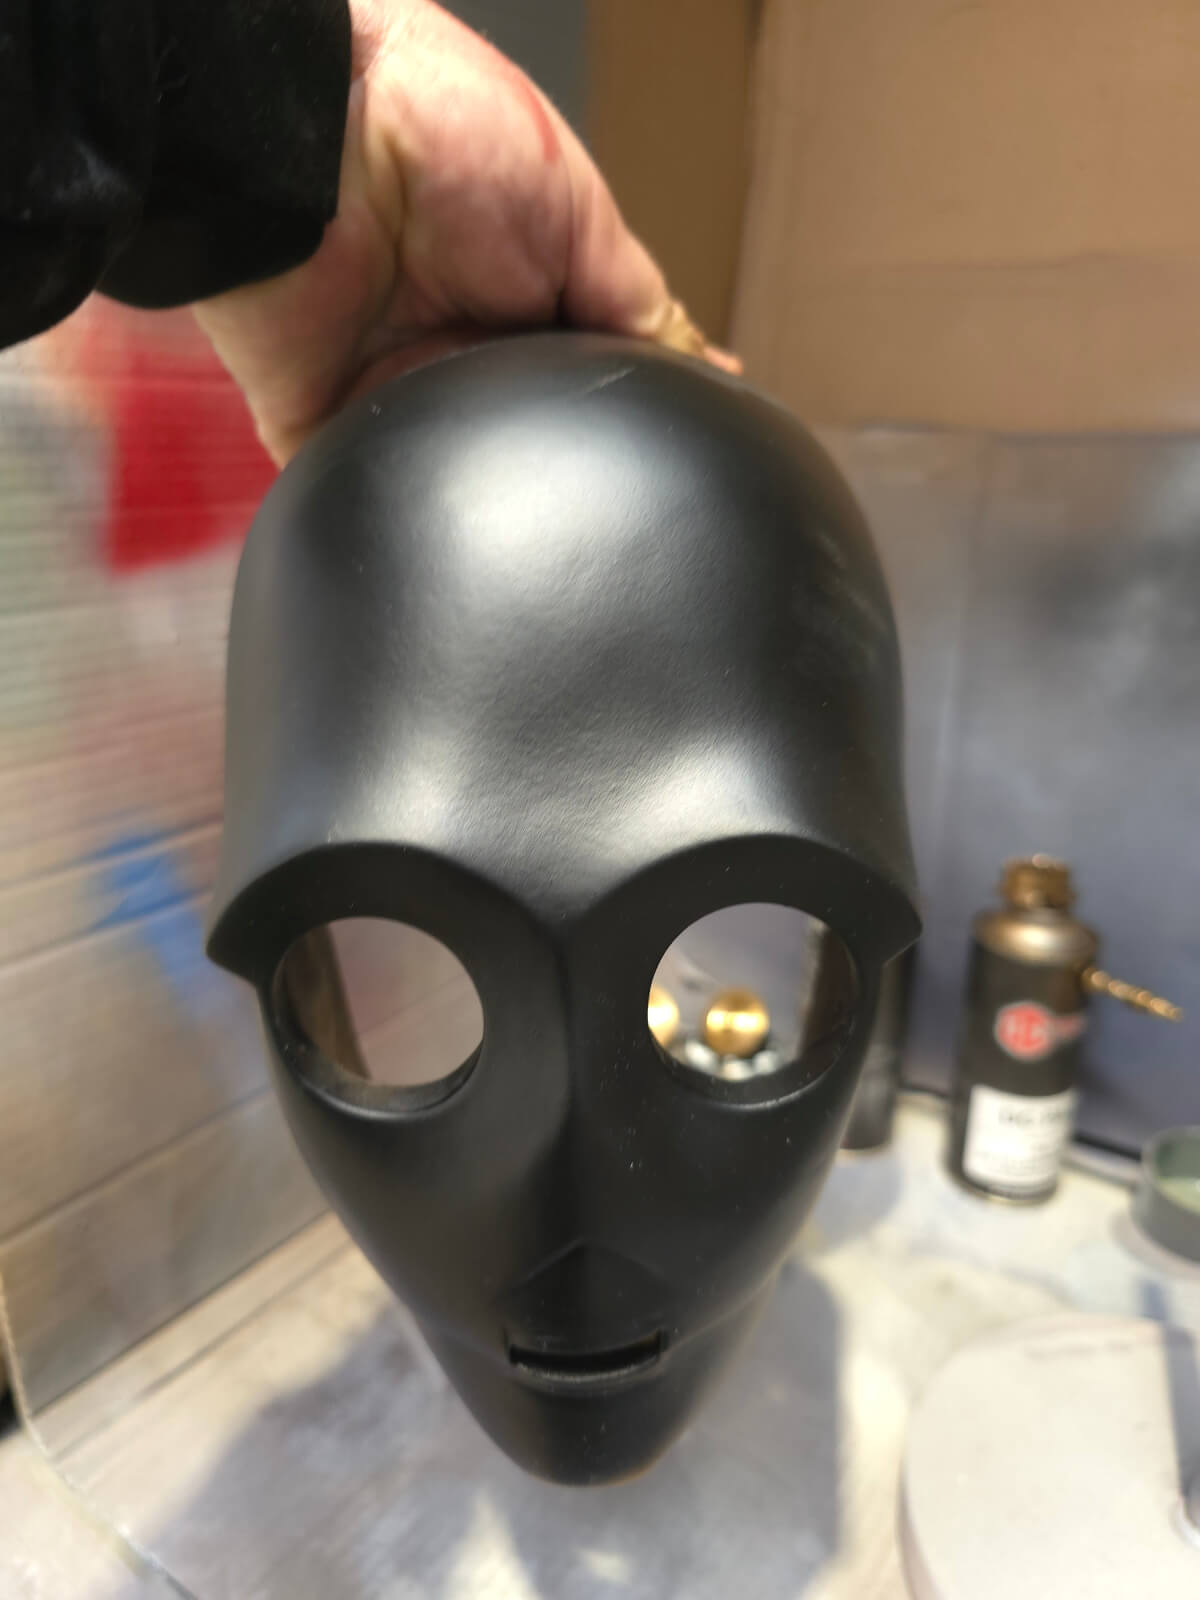
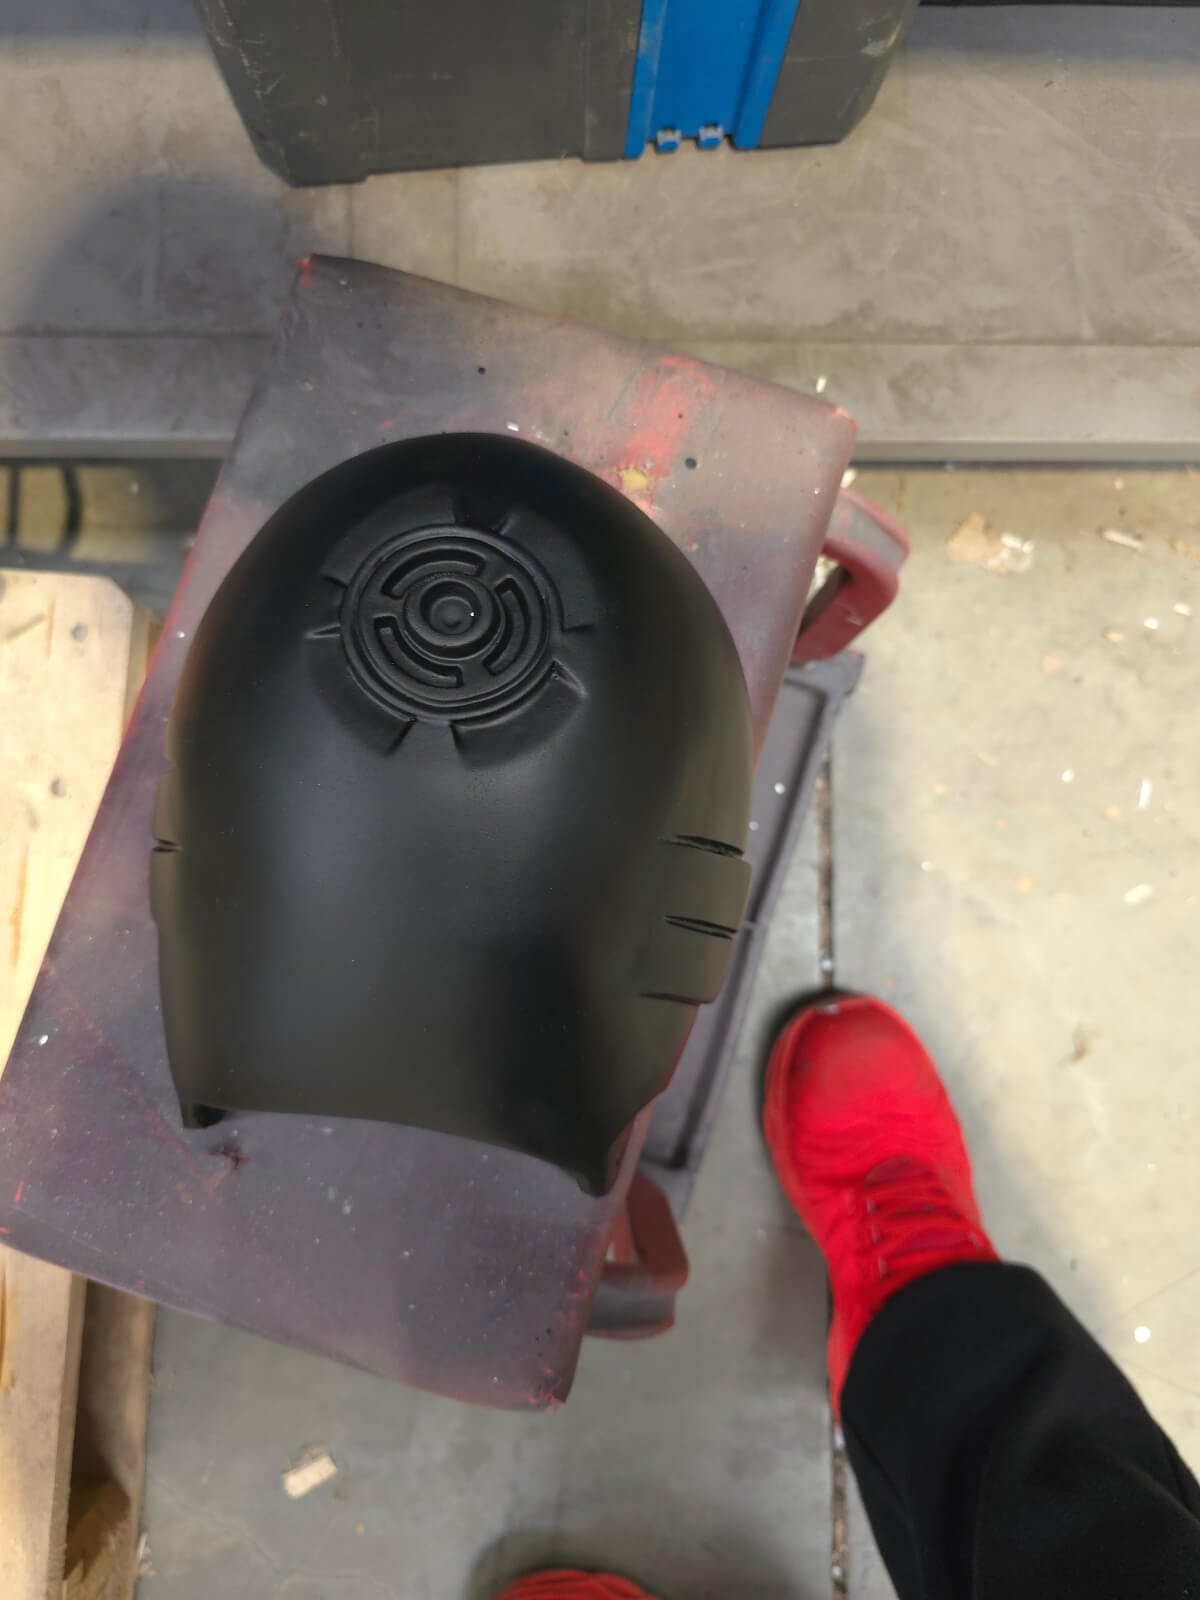
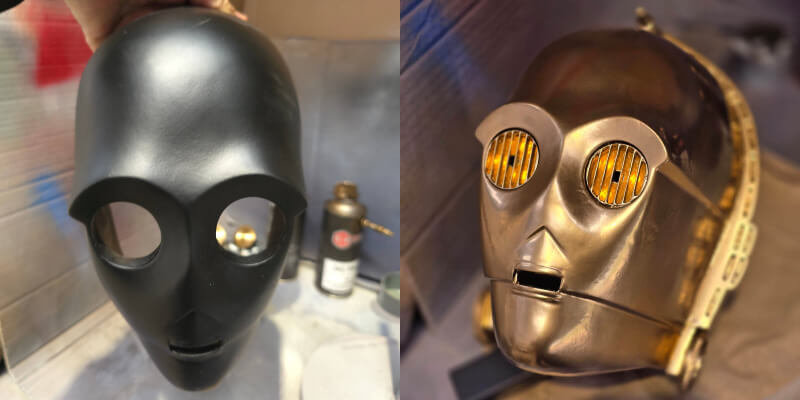
To start the painting process, we coated the head in a layer of 2K Black filler primer. This helps reveal any small imperfections that we might have missed in our initial inspections. Once applied, we left the primer to cure overnight.
Top Tip: When you plan on applying a chrome top layer, always apply a black ground coat. This will help add depth to the chrome.
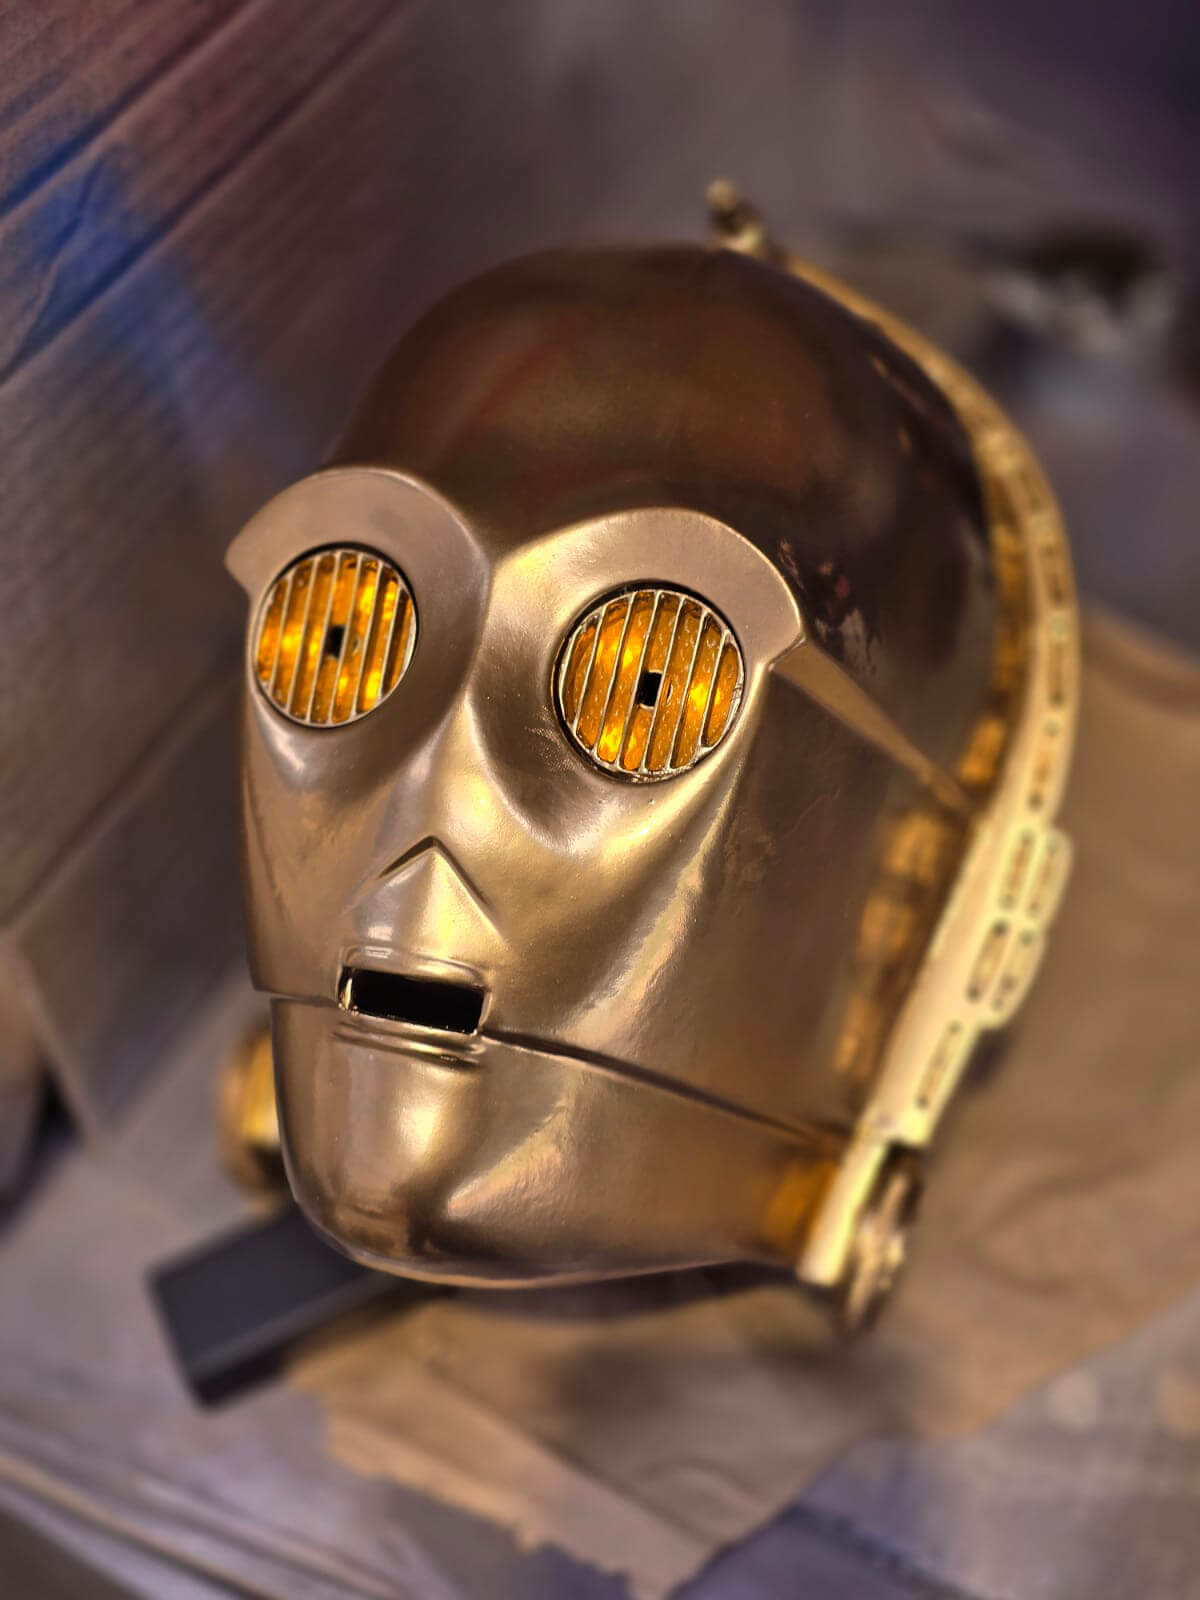
In the morning, we sanded the bust one more time to make sure it was smooth all over. Once it was ready, we re-installed the electrical system within the bust and sealed the two halves of the head together. The final part of the painting process was to cover the head in two coats of chrome gold paint before leaving it to cure overnight.
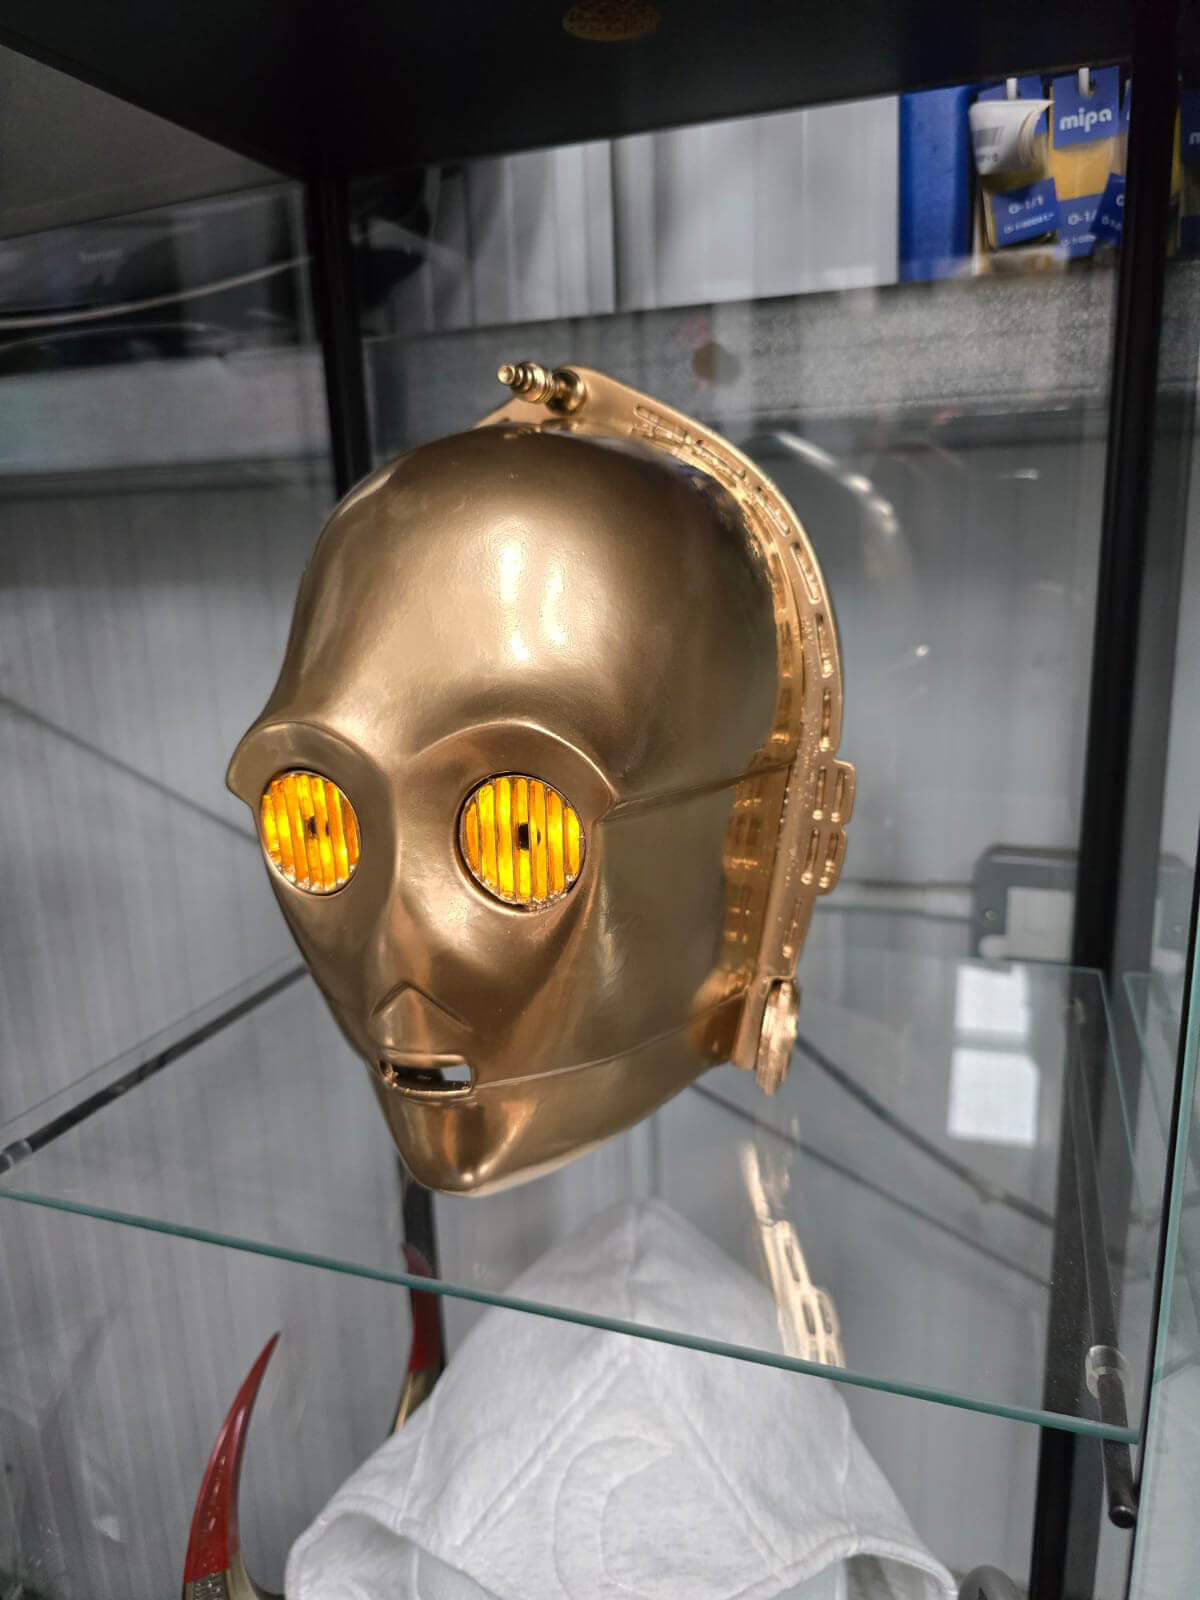
Final Results
As you can see from the gallery below, the final product looks fantastic. We’re delighted with this stunning piece of Star Wars memorabilia, and we hope you like the look of it too! May the force be with you!