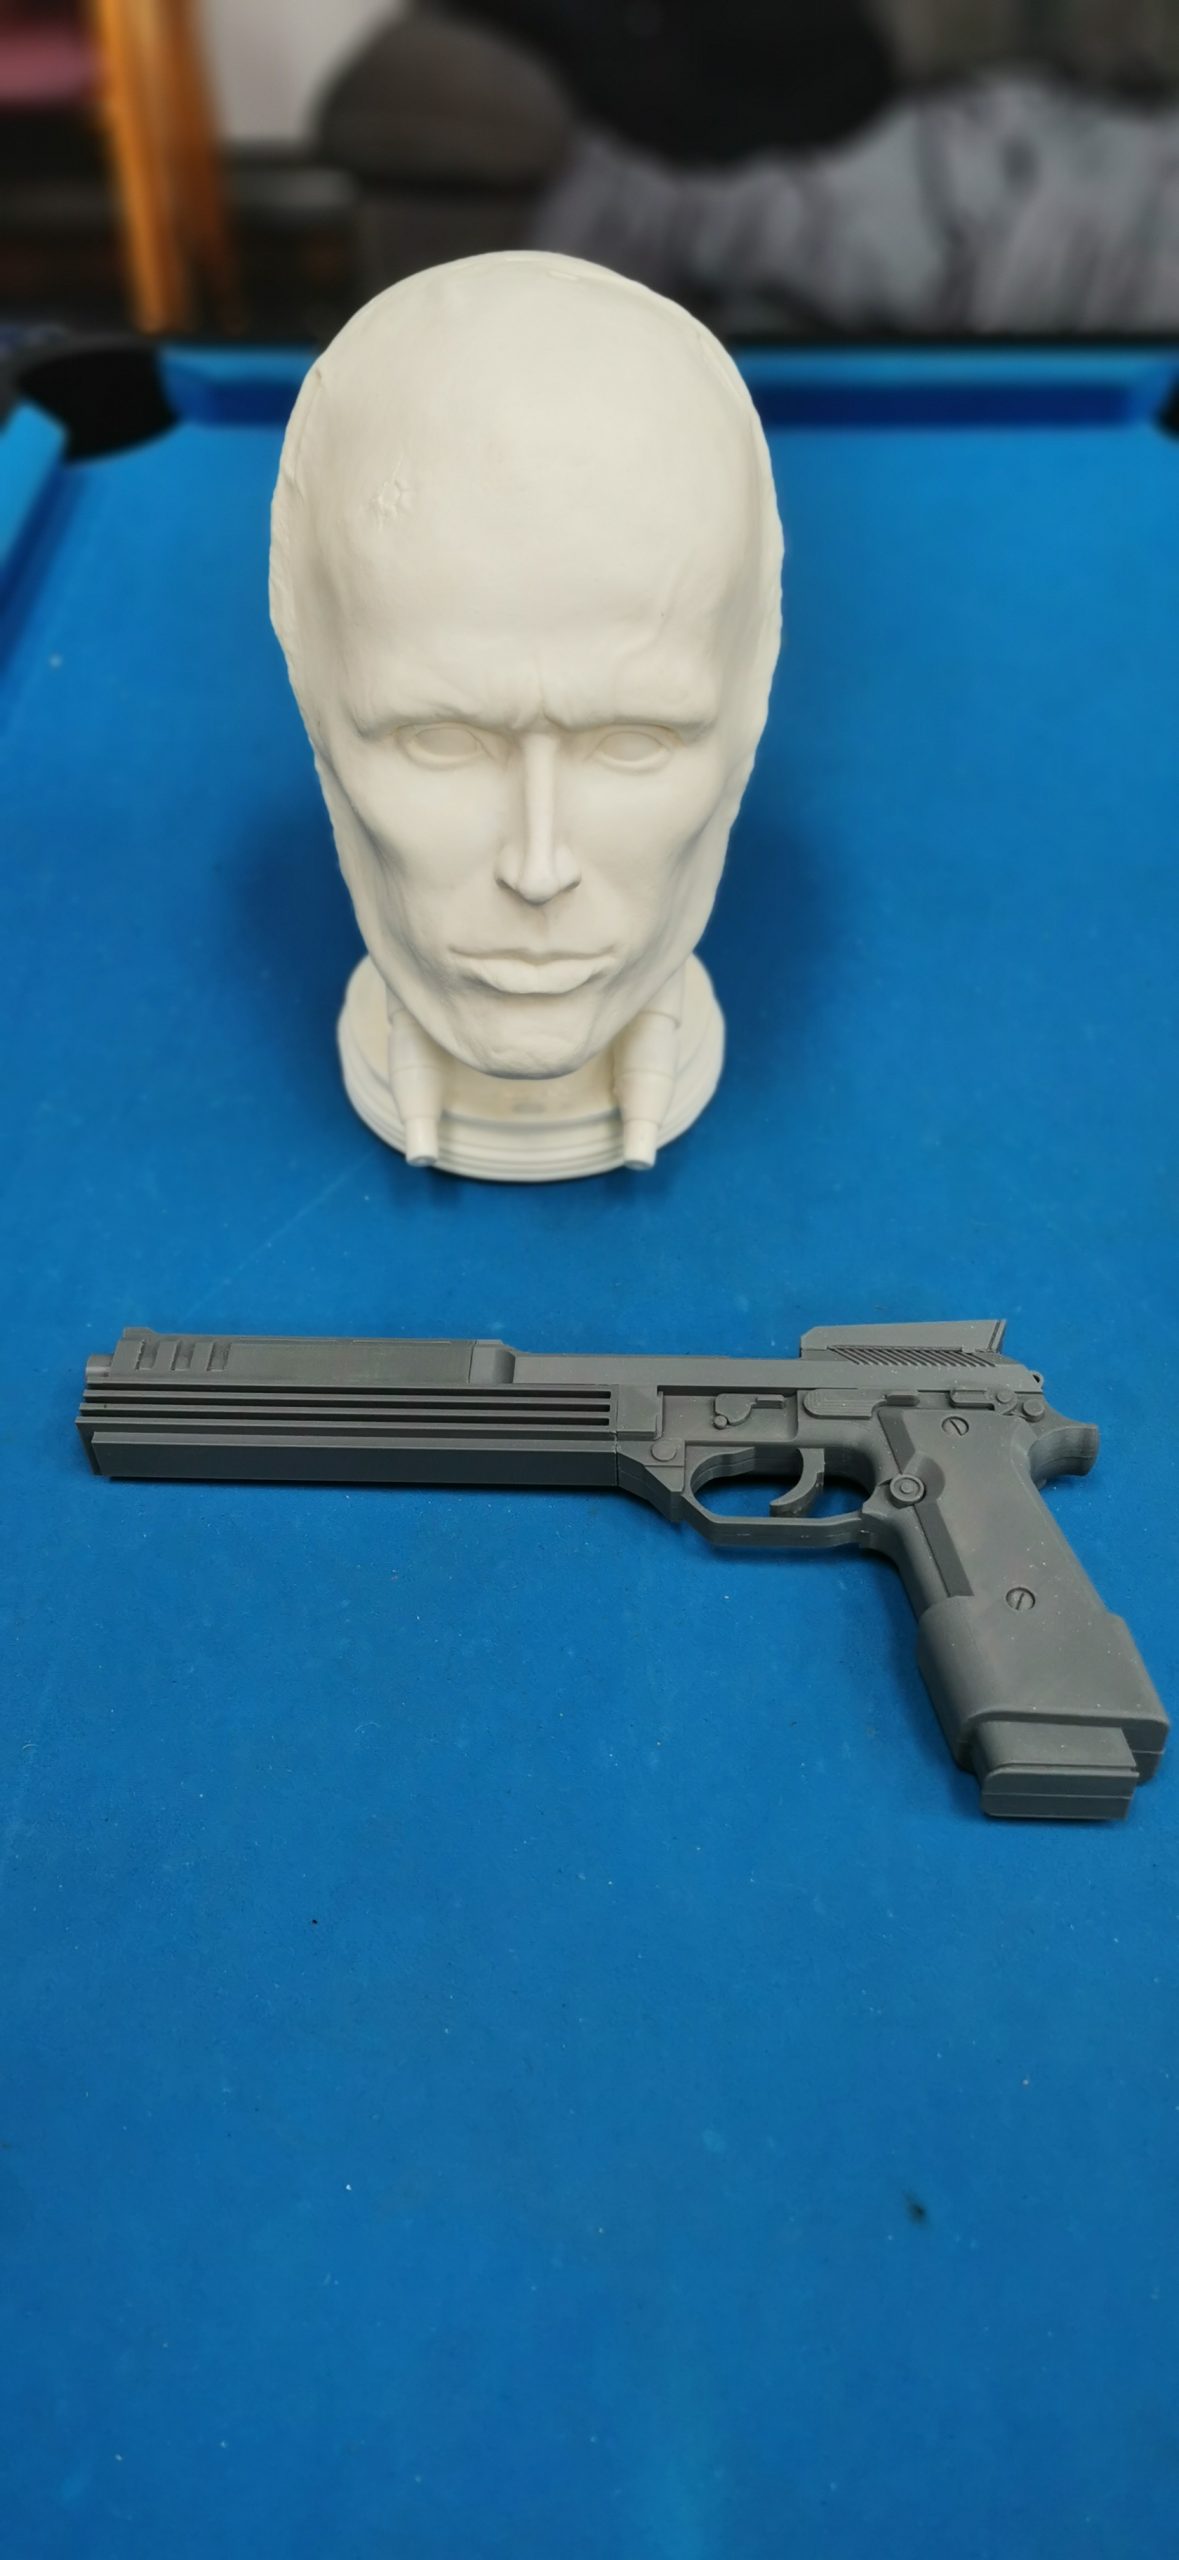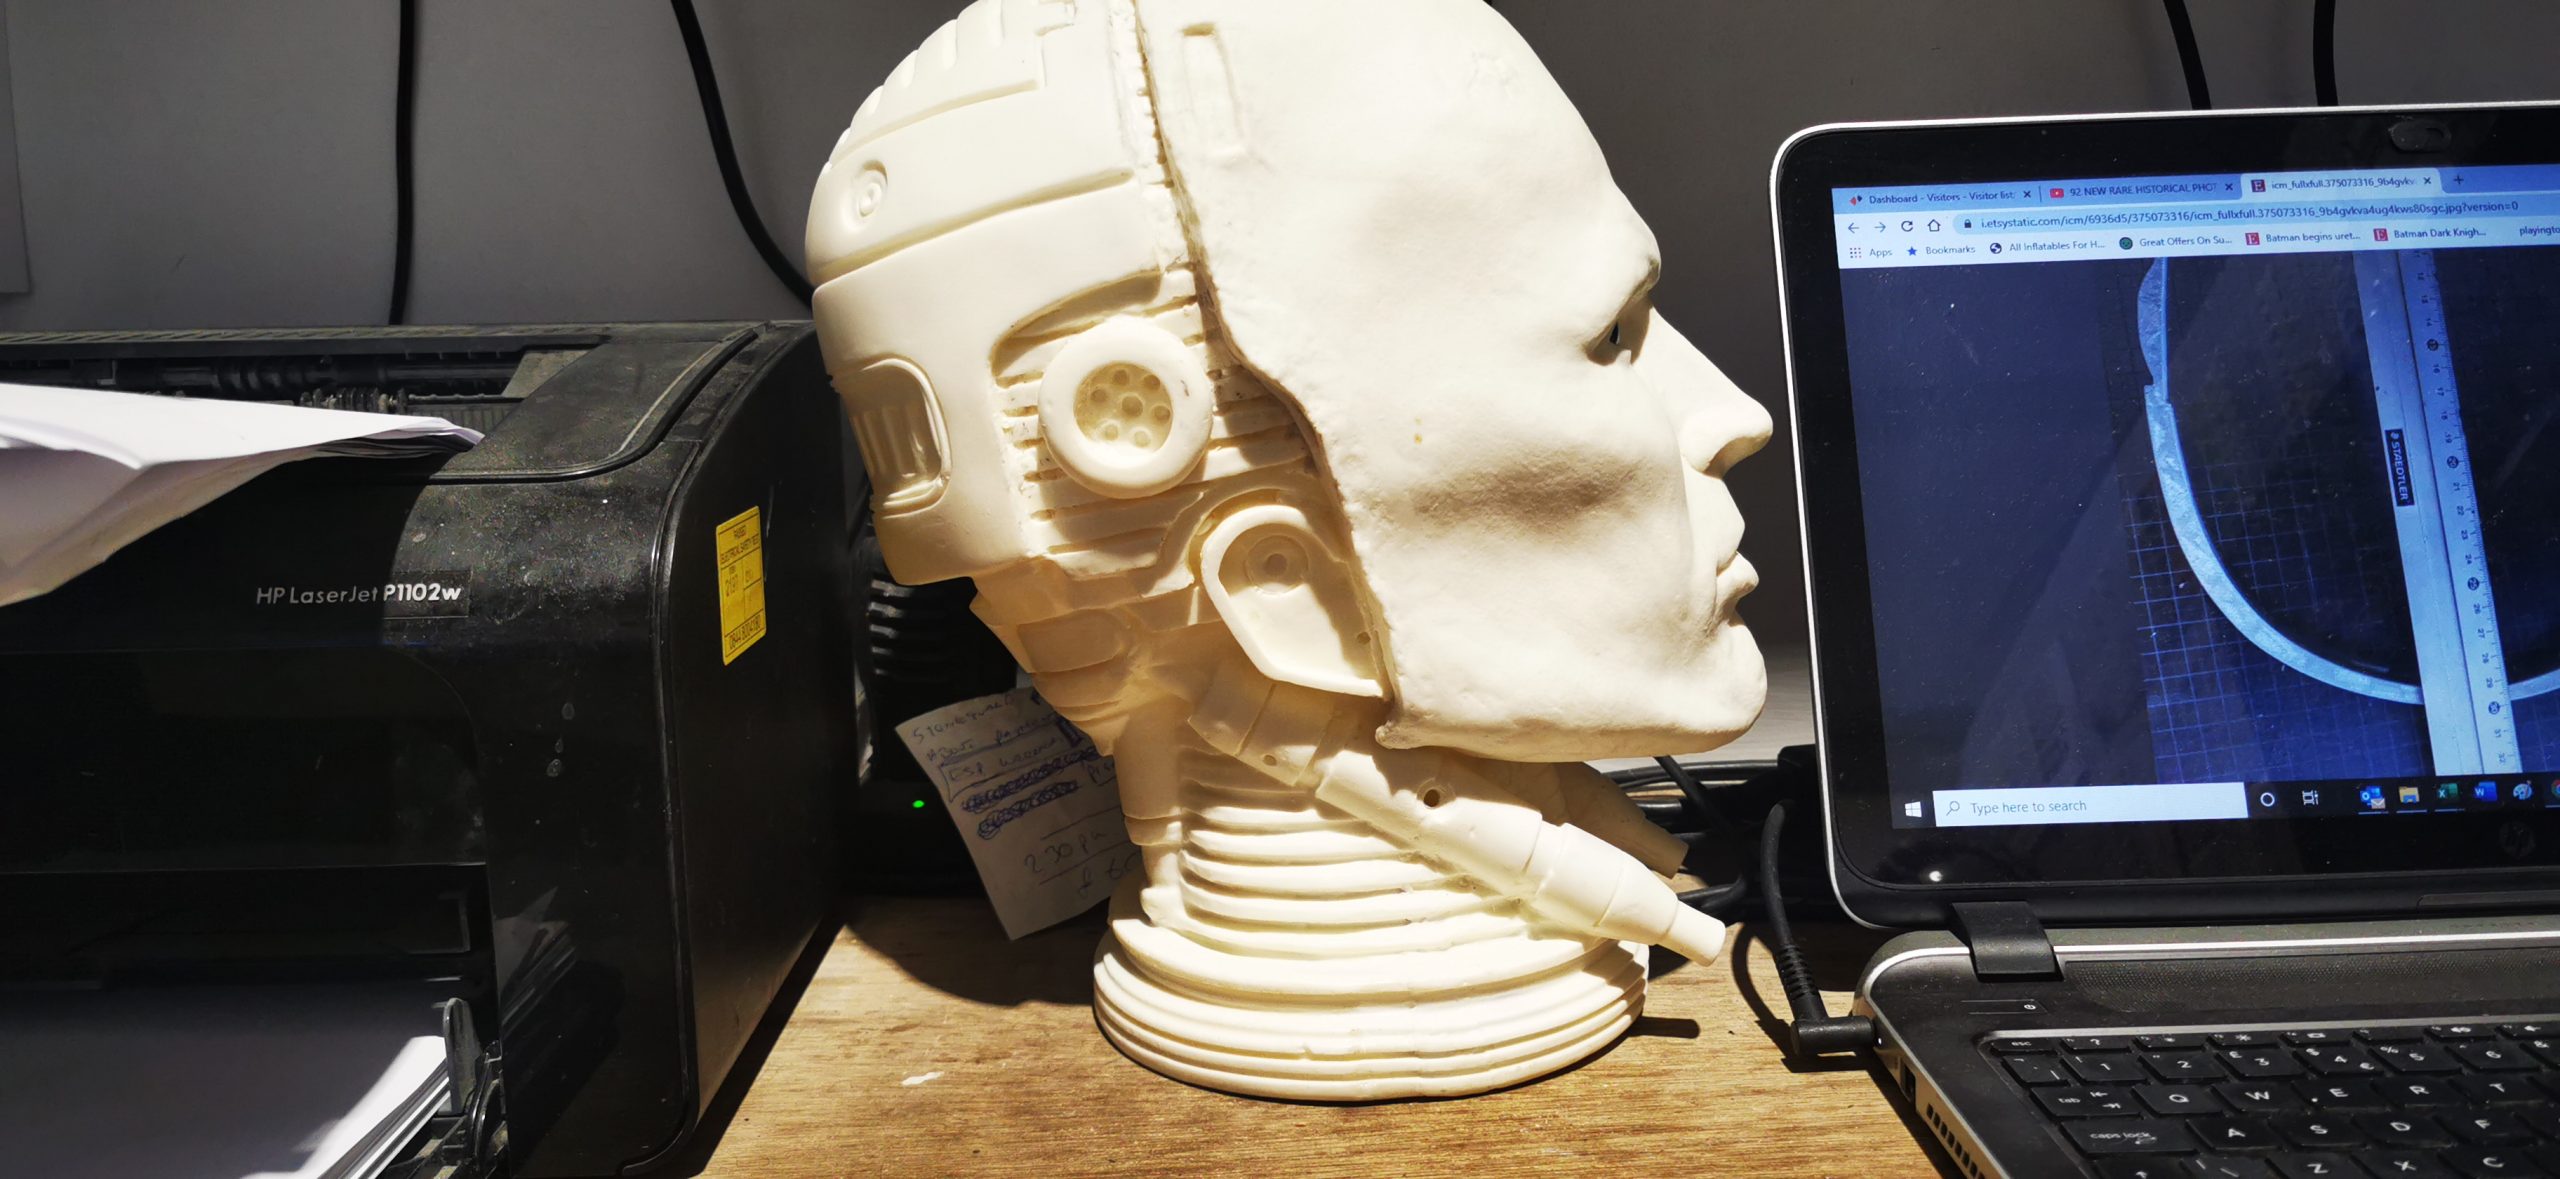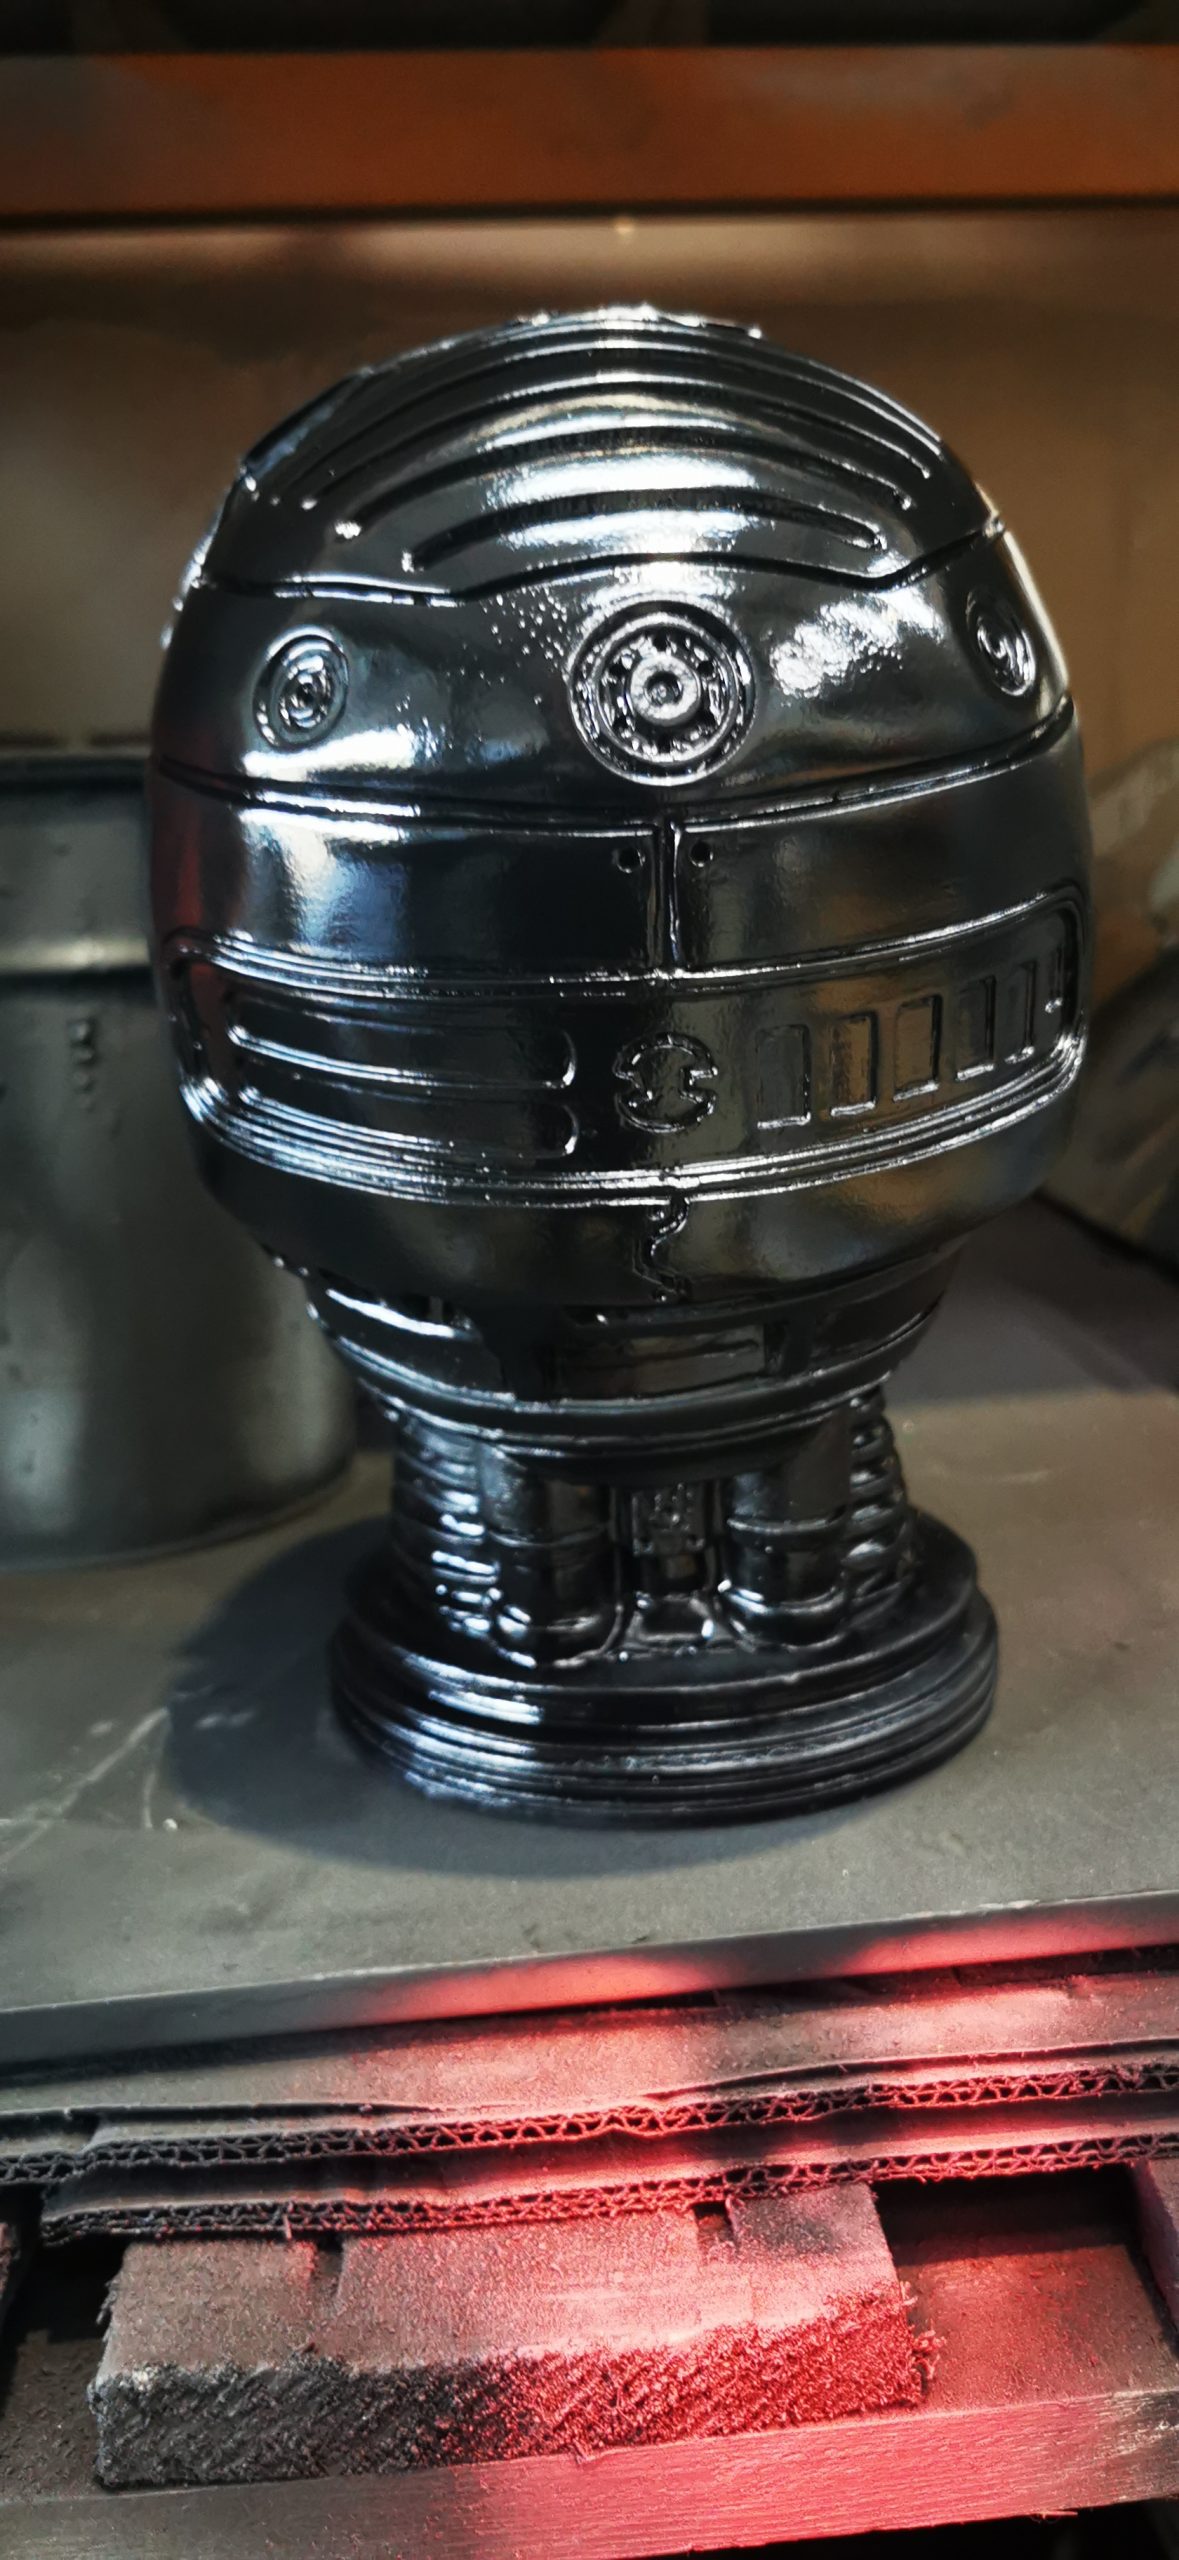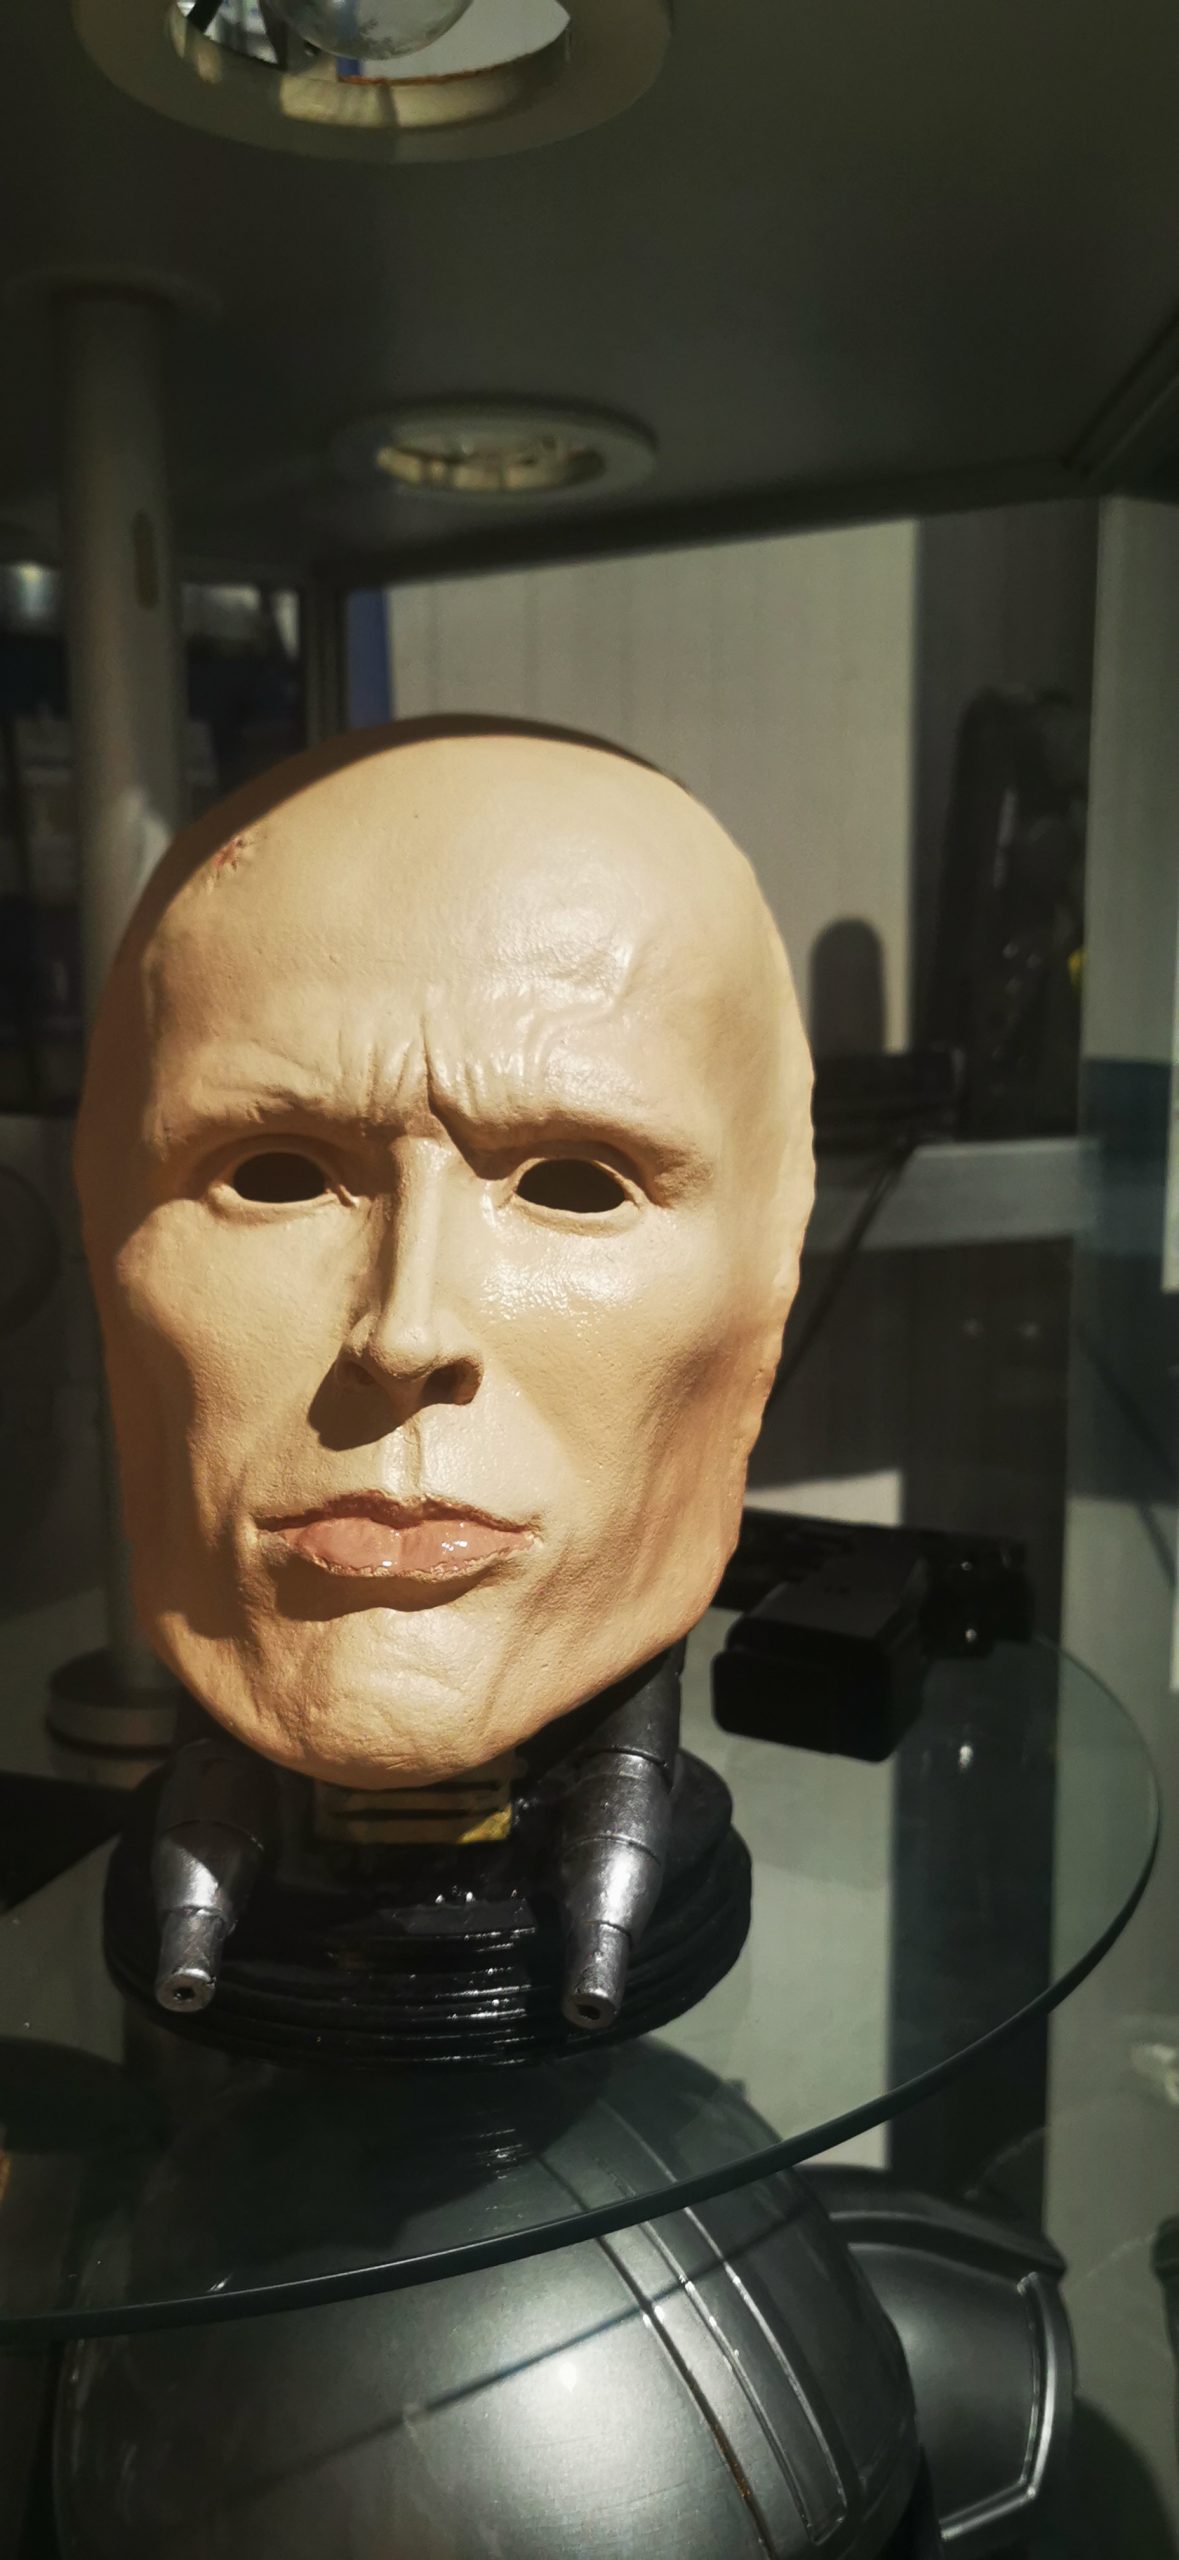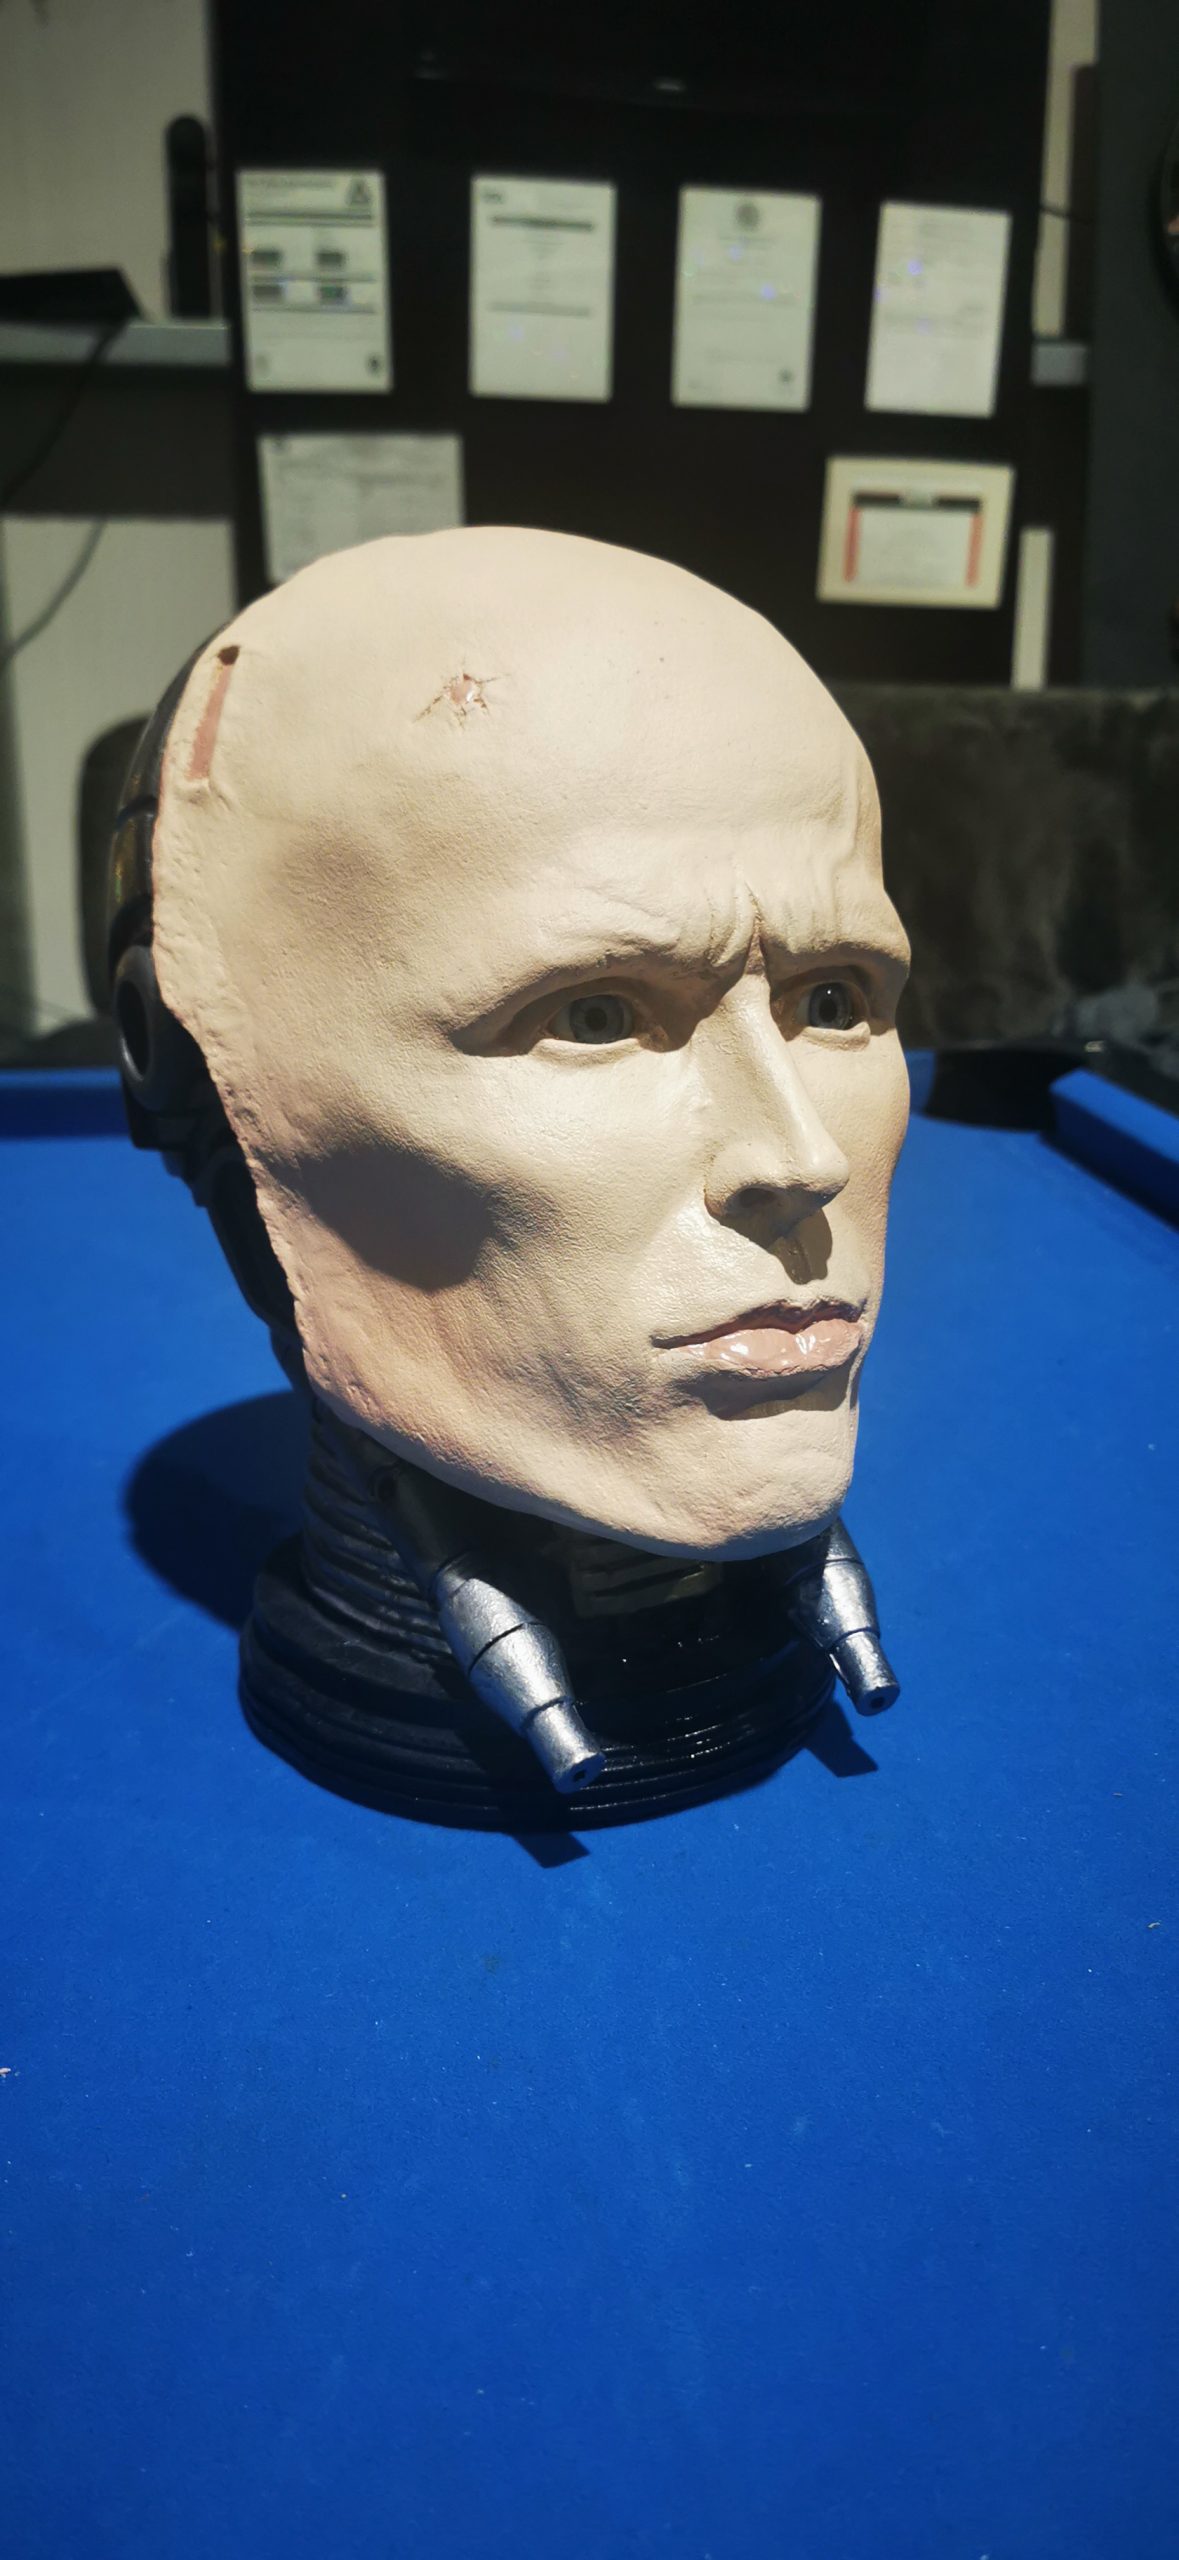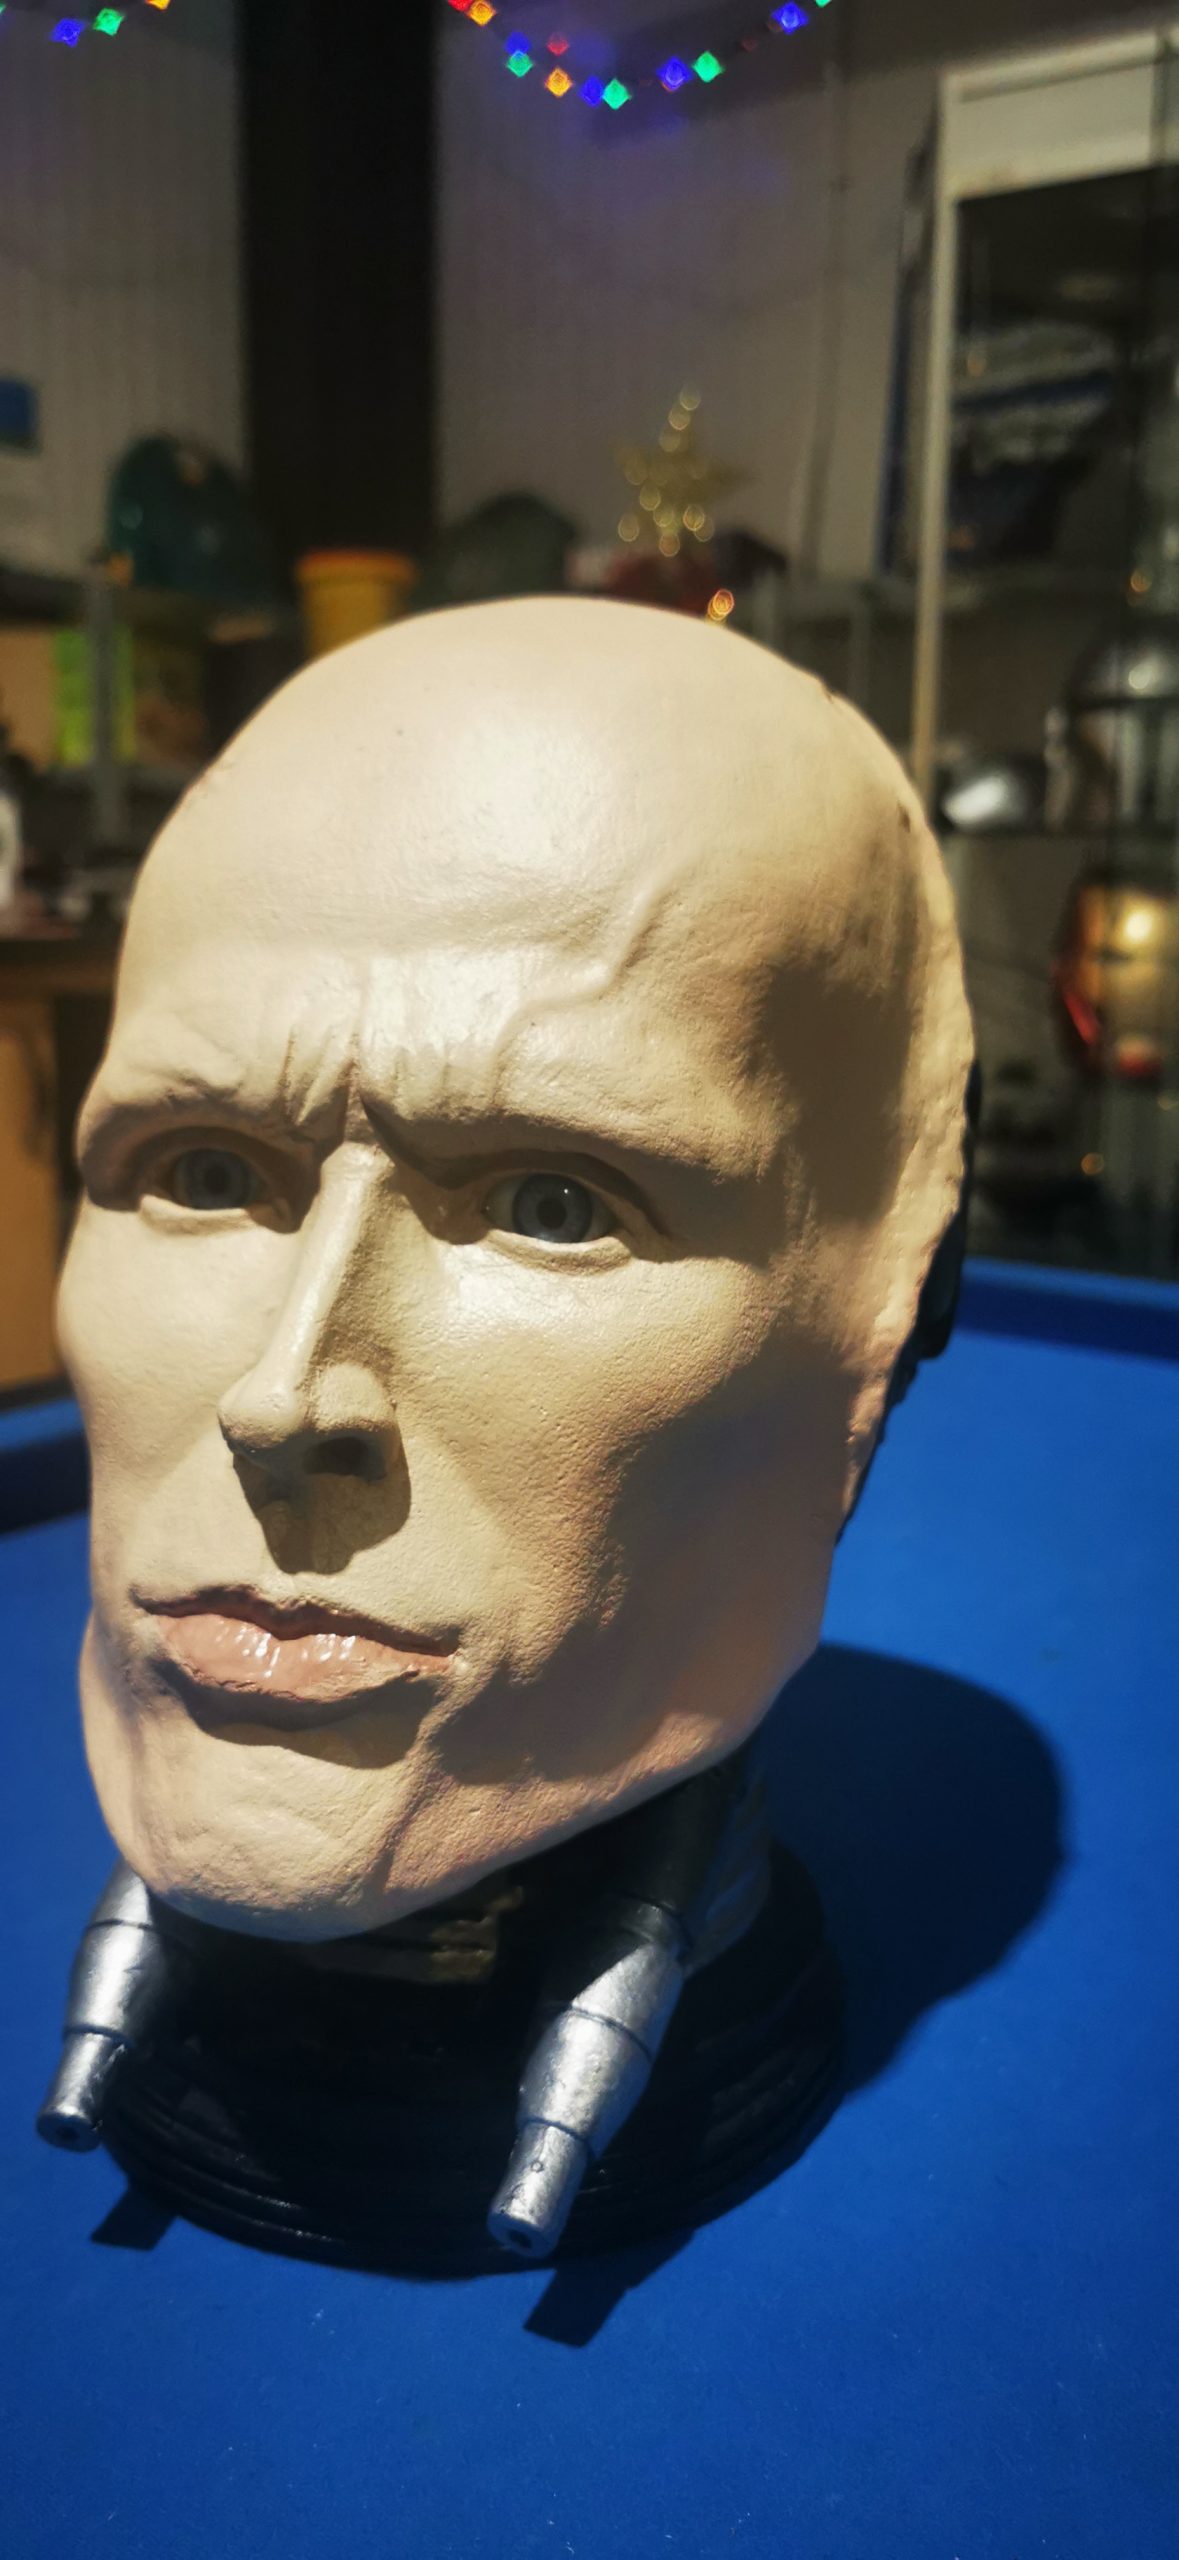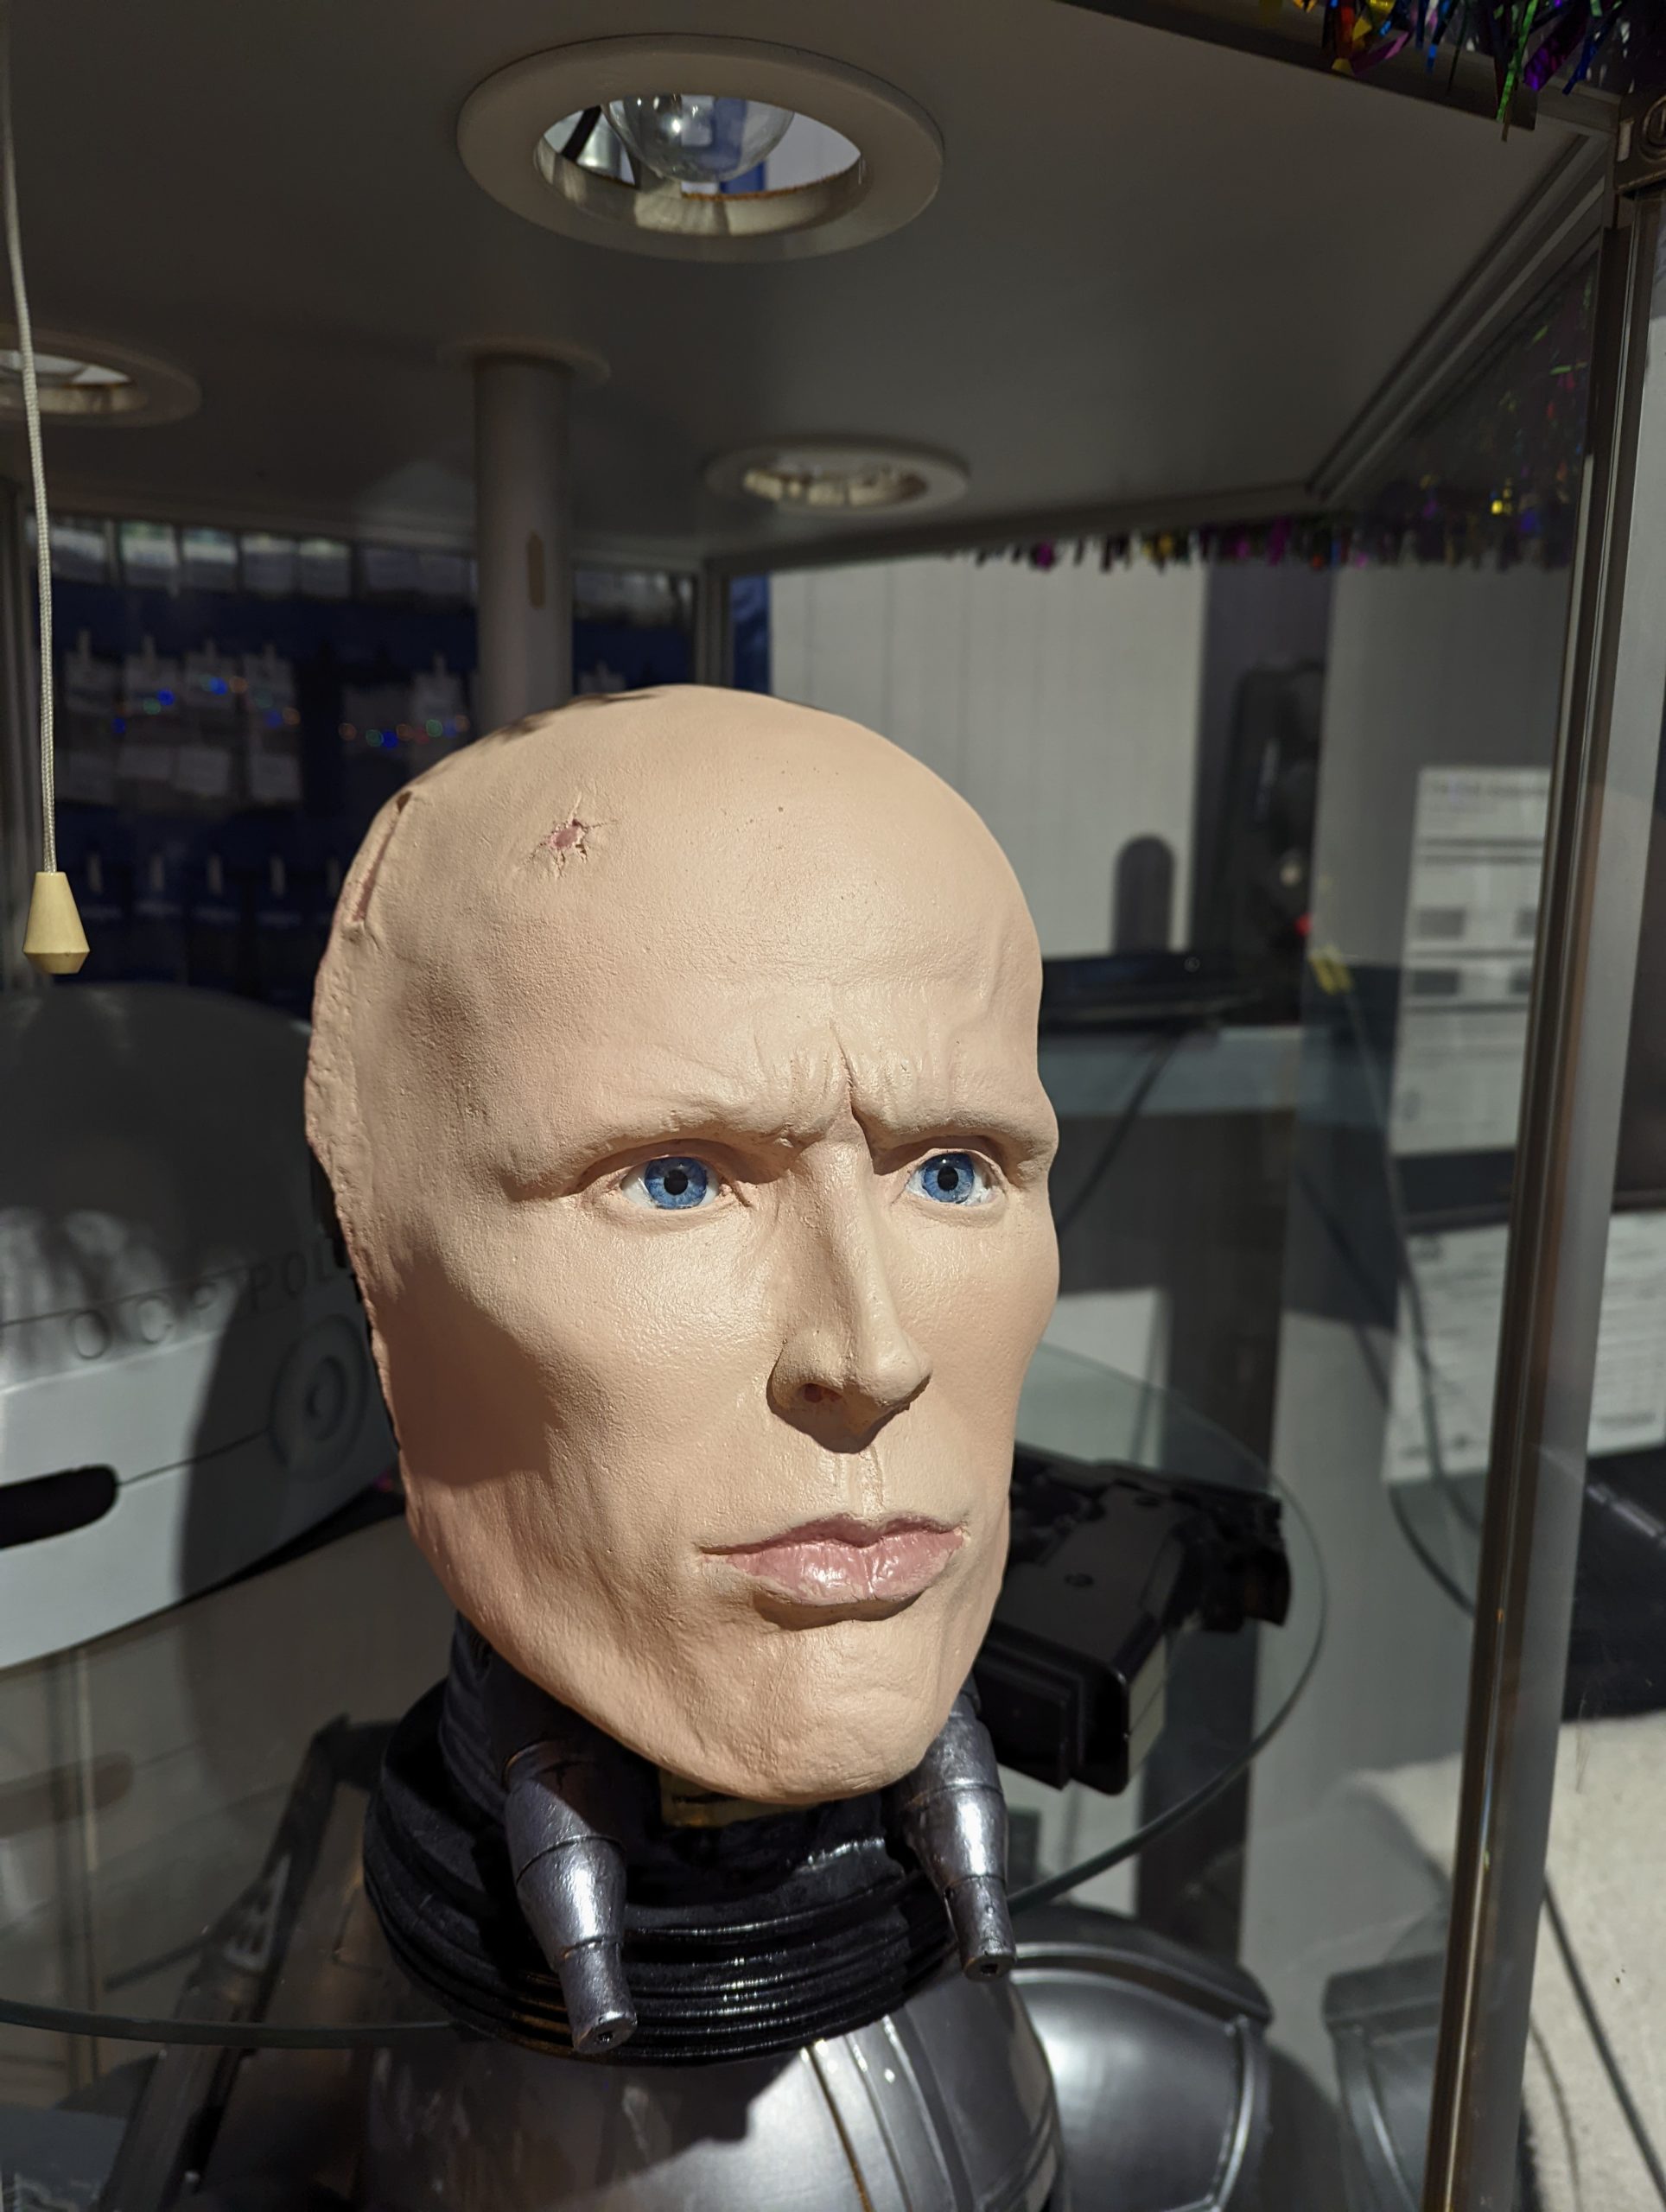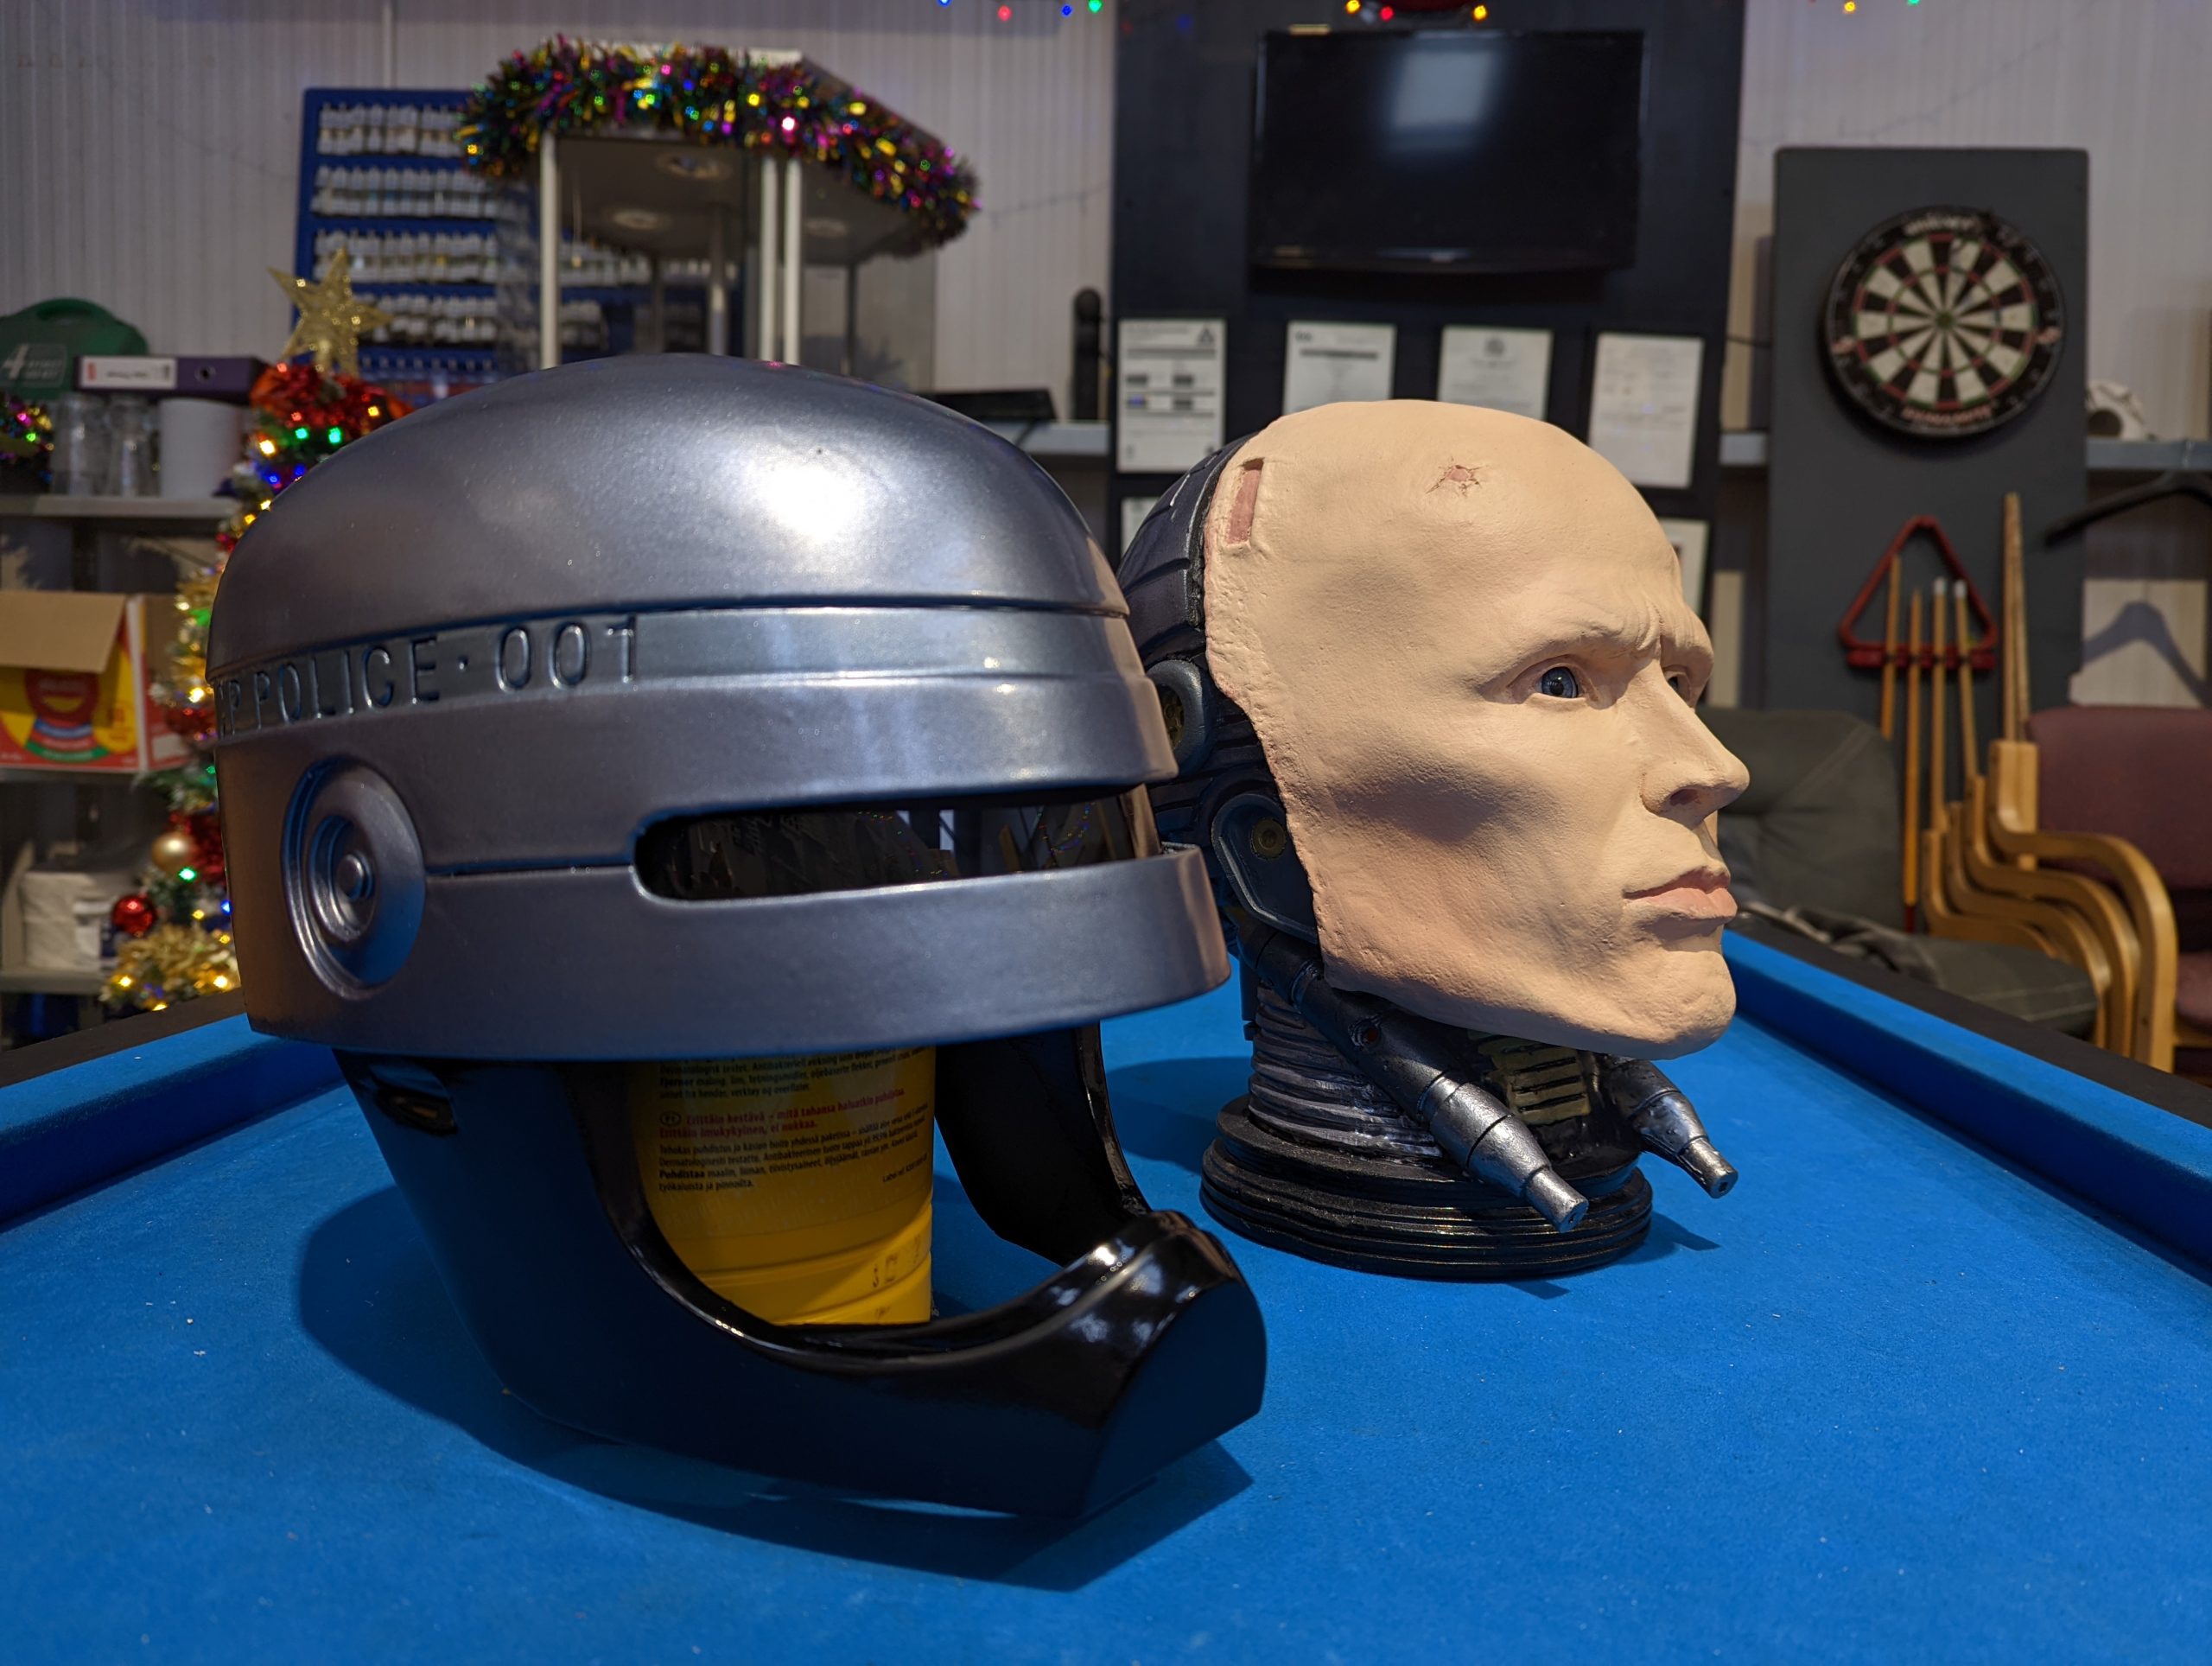
Although currently only half finished, this fantastic Robocop bust project was enjoyable and reasonably easy, making it perfect for you to try from home! This is how we have achieved our results so far.
Tool List:
- Multi Grade Sandpaper
- Masking Tape and Masking Paper
- 2K Black Filler
- RAL 9007 / 9006 / 1036 Metallic Paint 1K
- NCS 2020 Y40R 1K Paint
- NCS 2030 Y70R 1K Paint
- 2K Soft Touch Matt Lacquer
- 2K Gloss Metallic Paint
Prep:
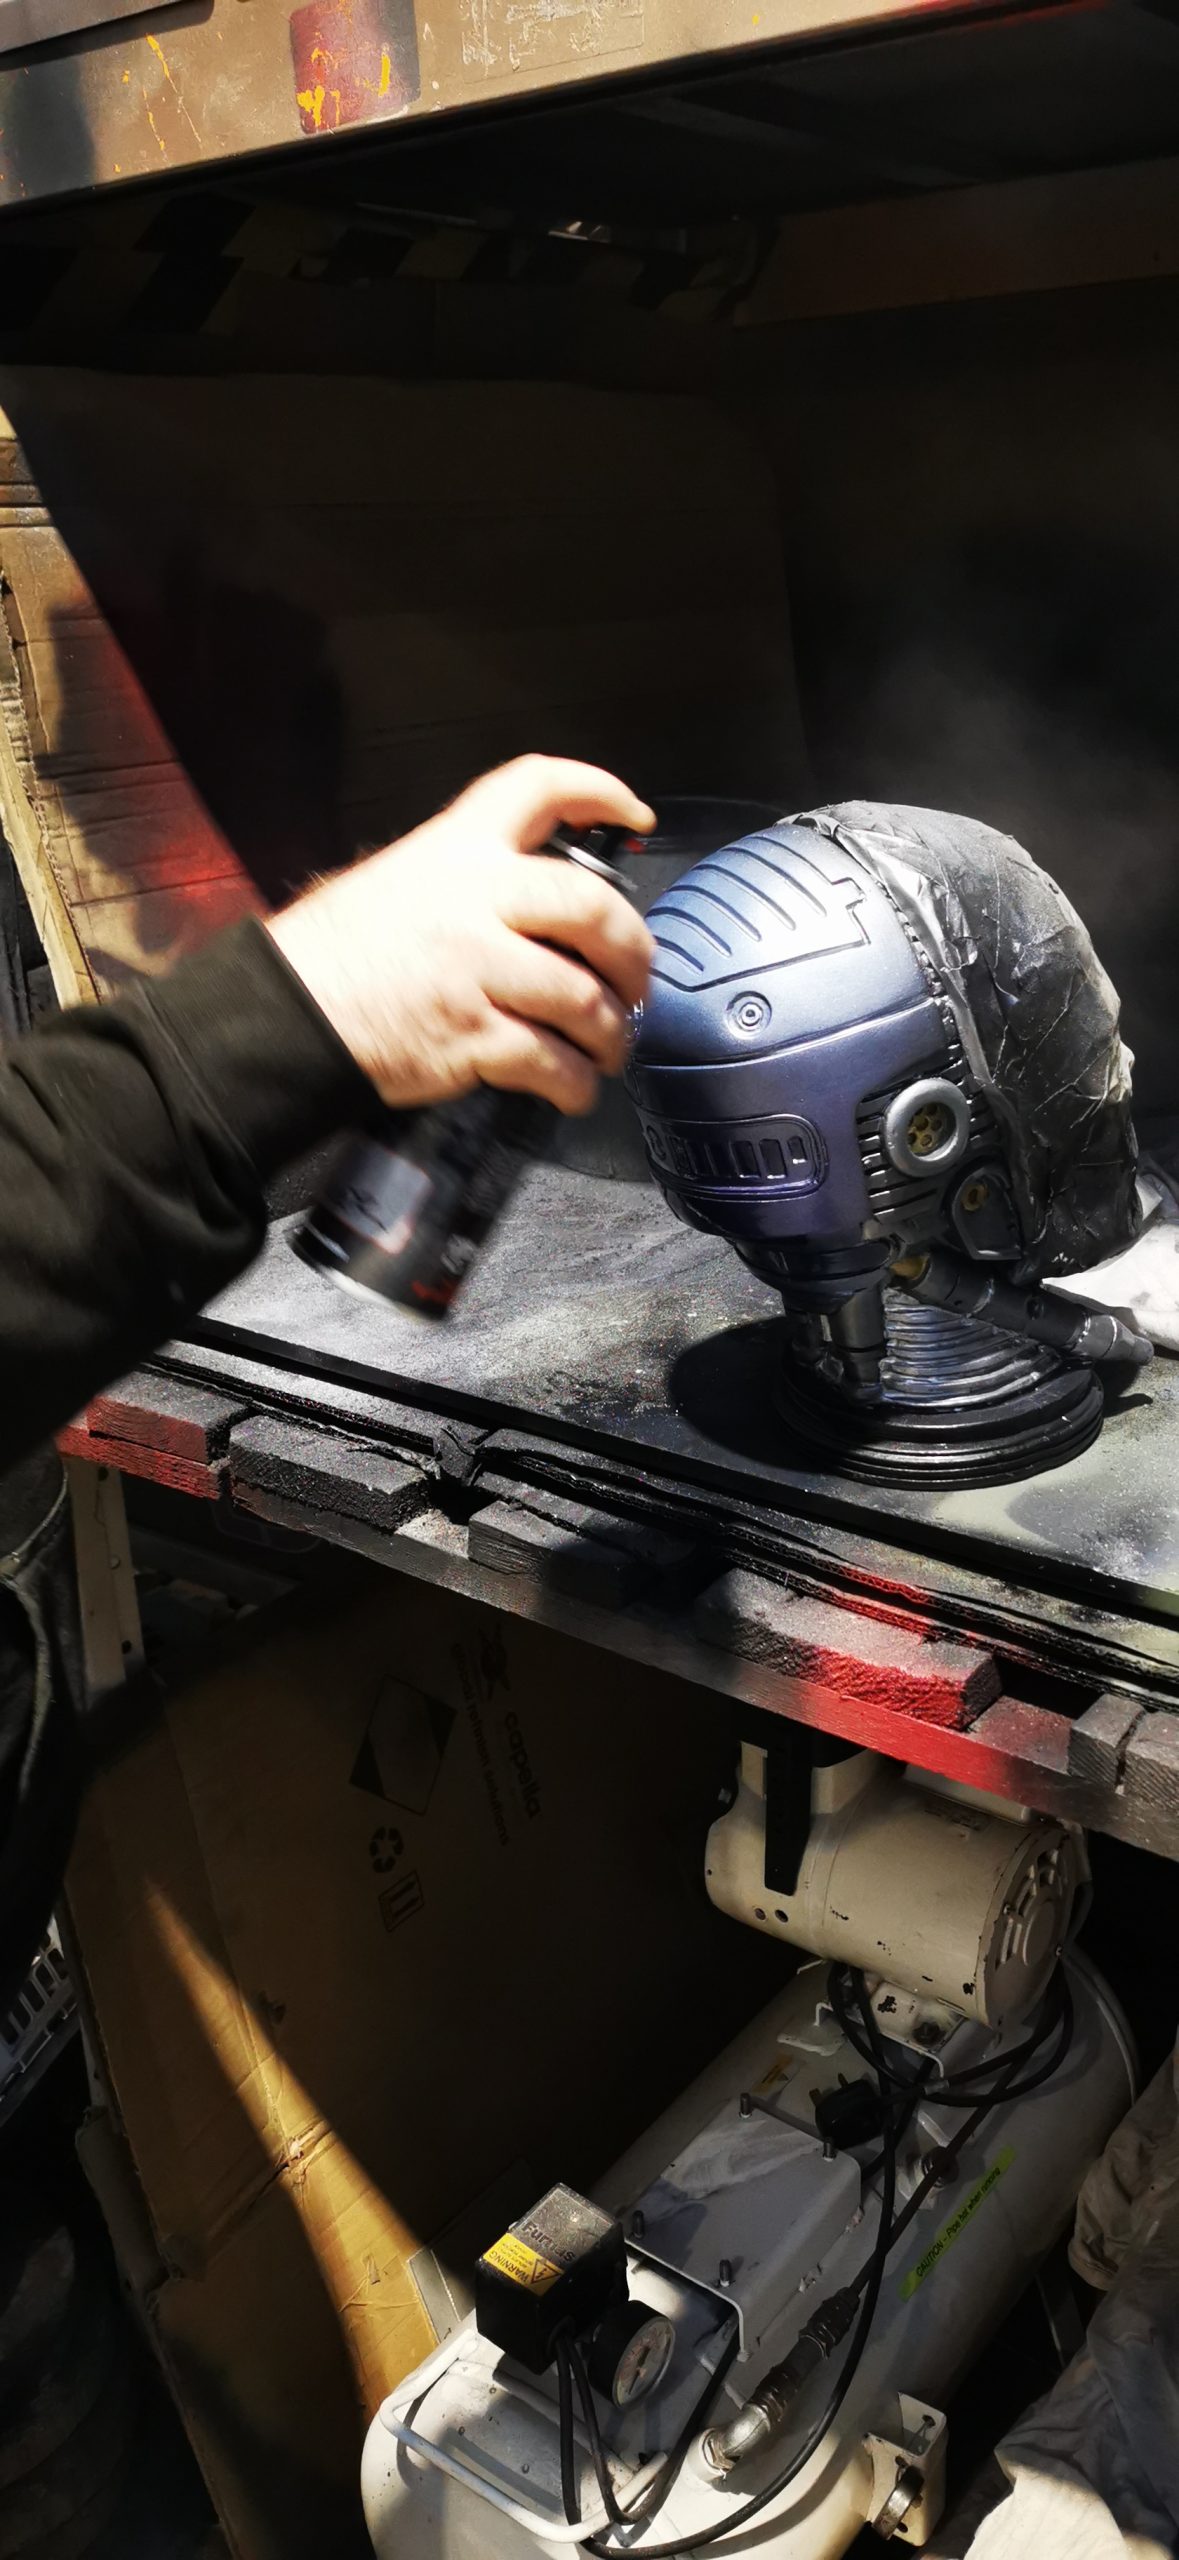
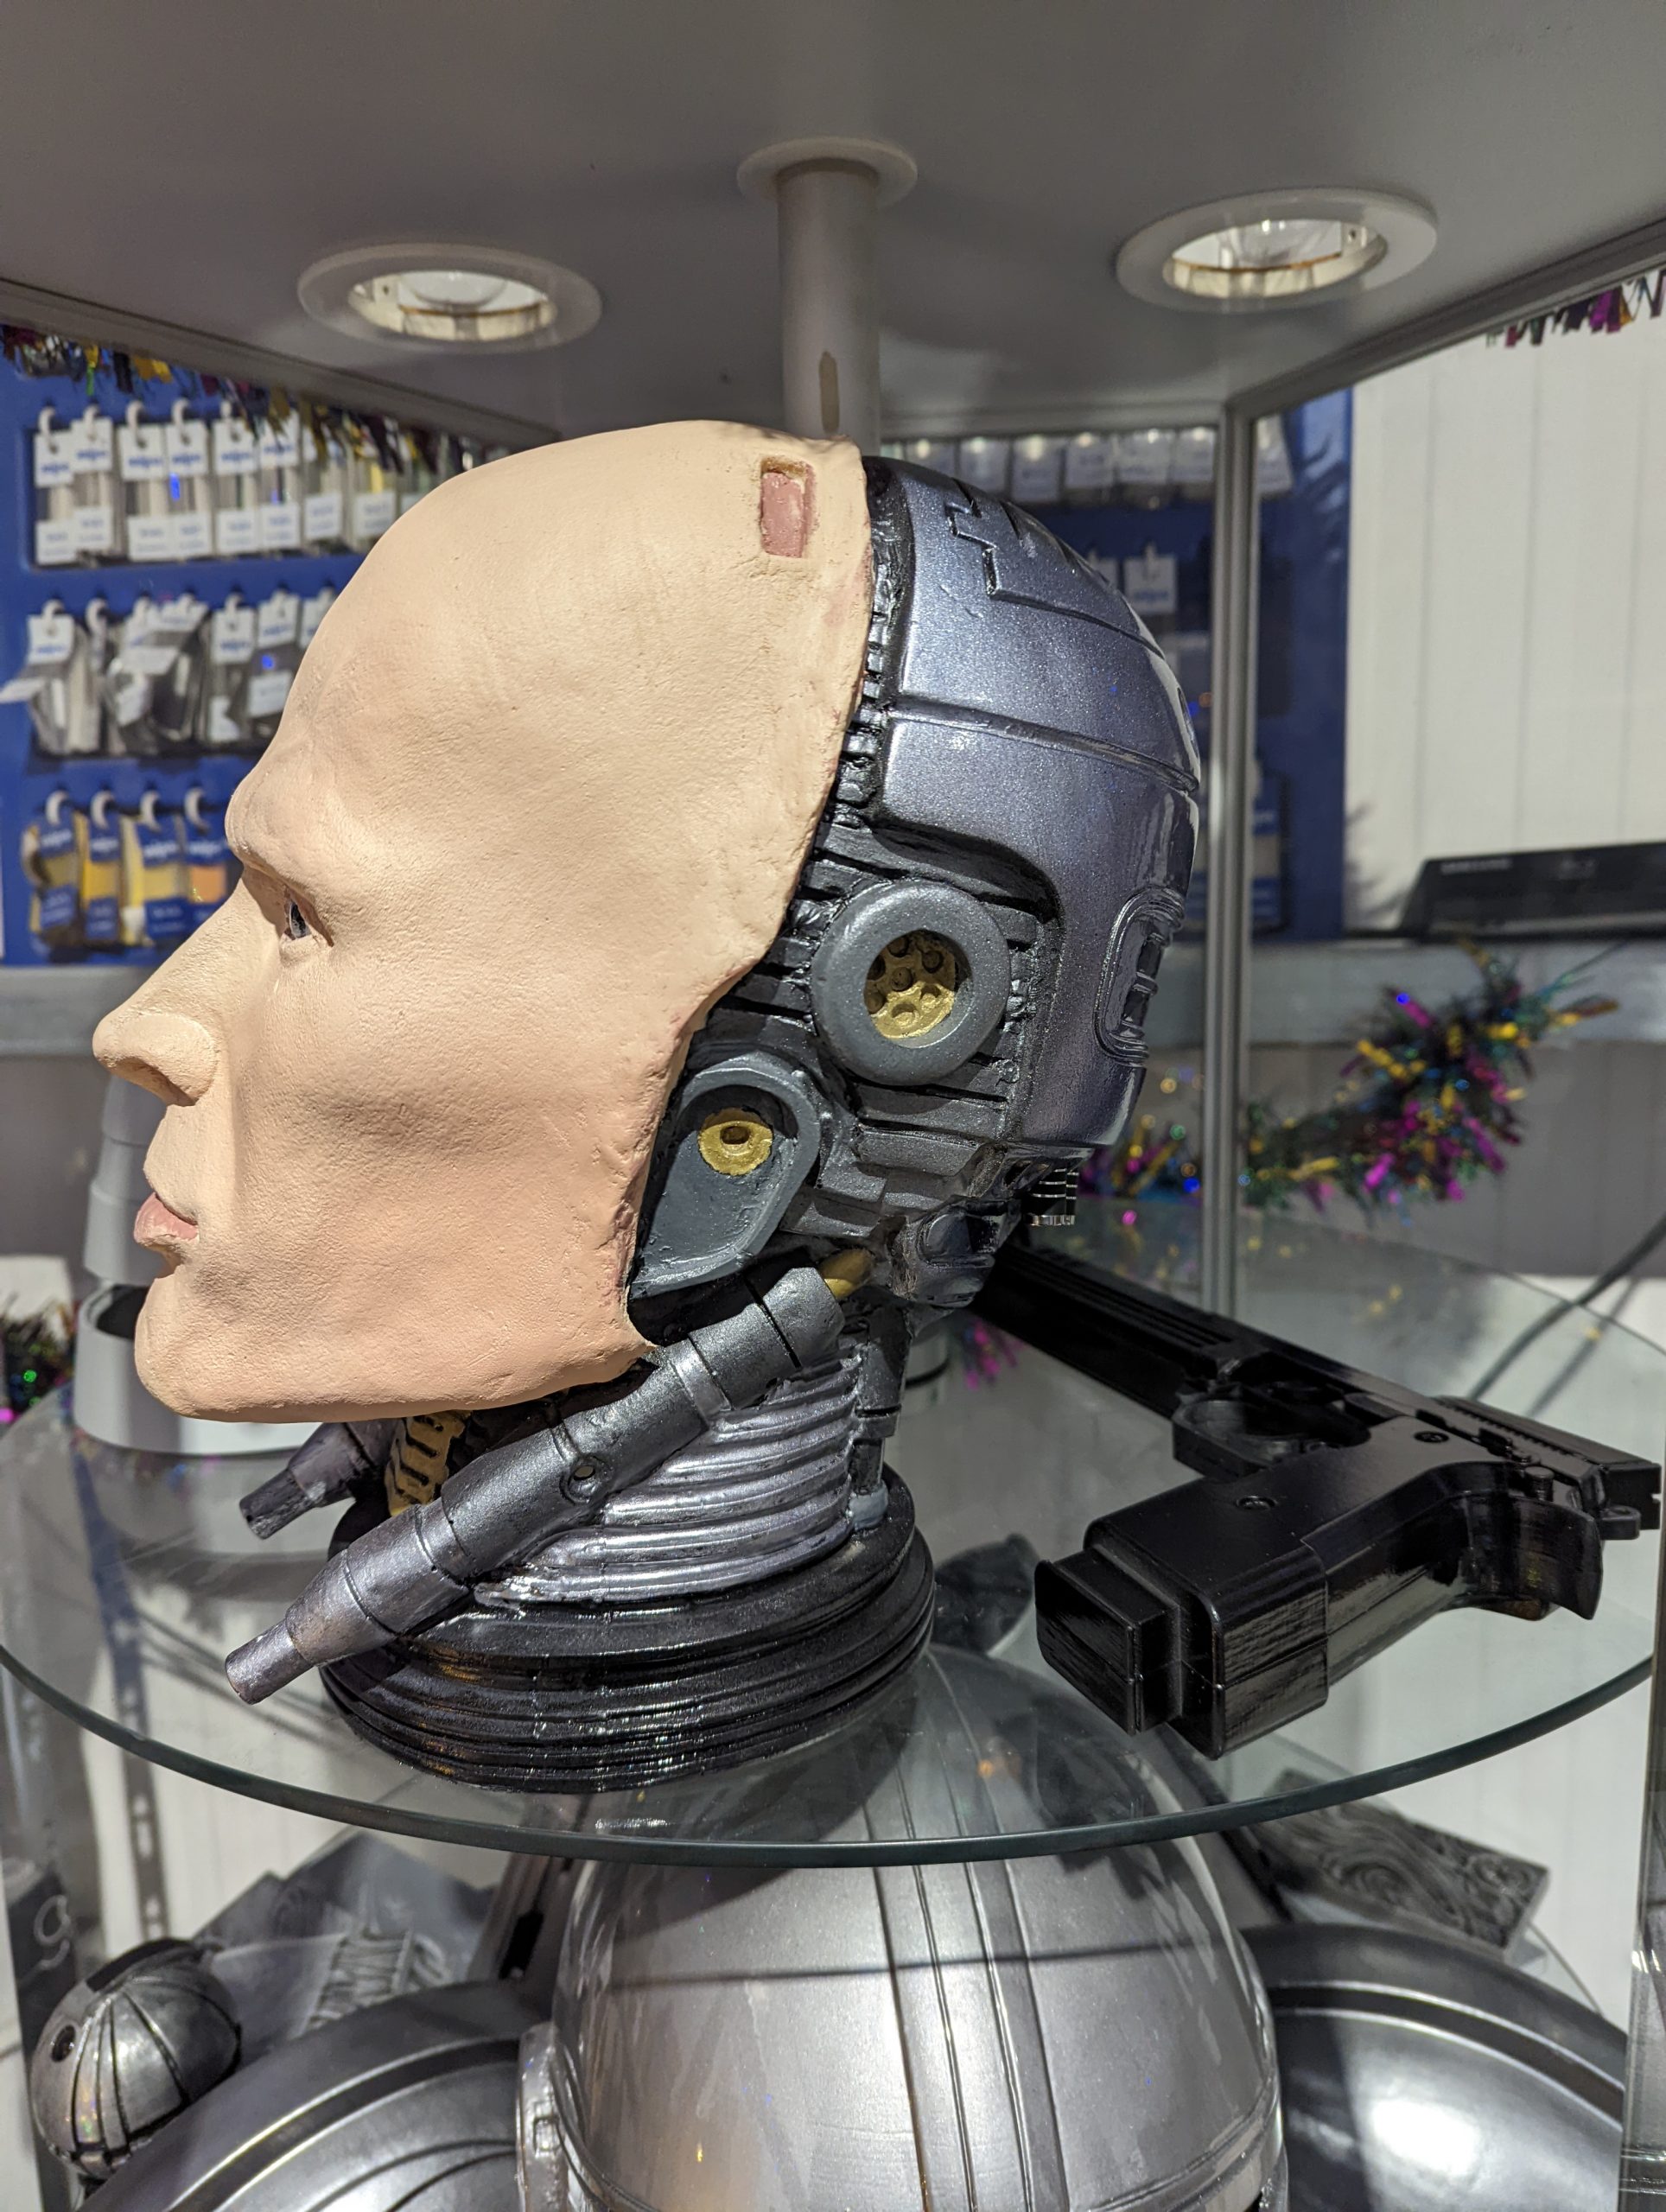
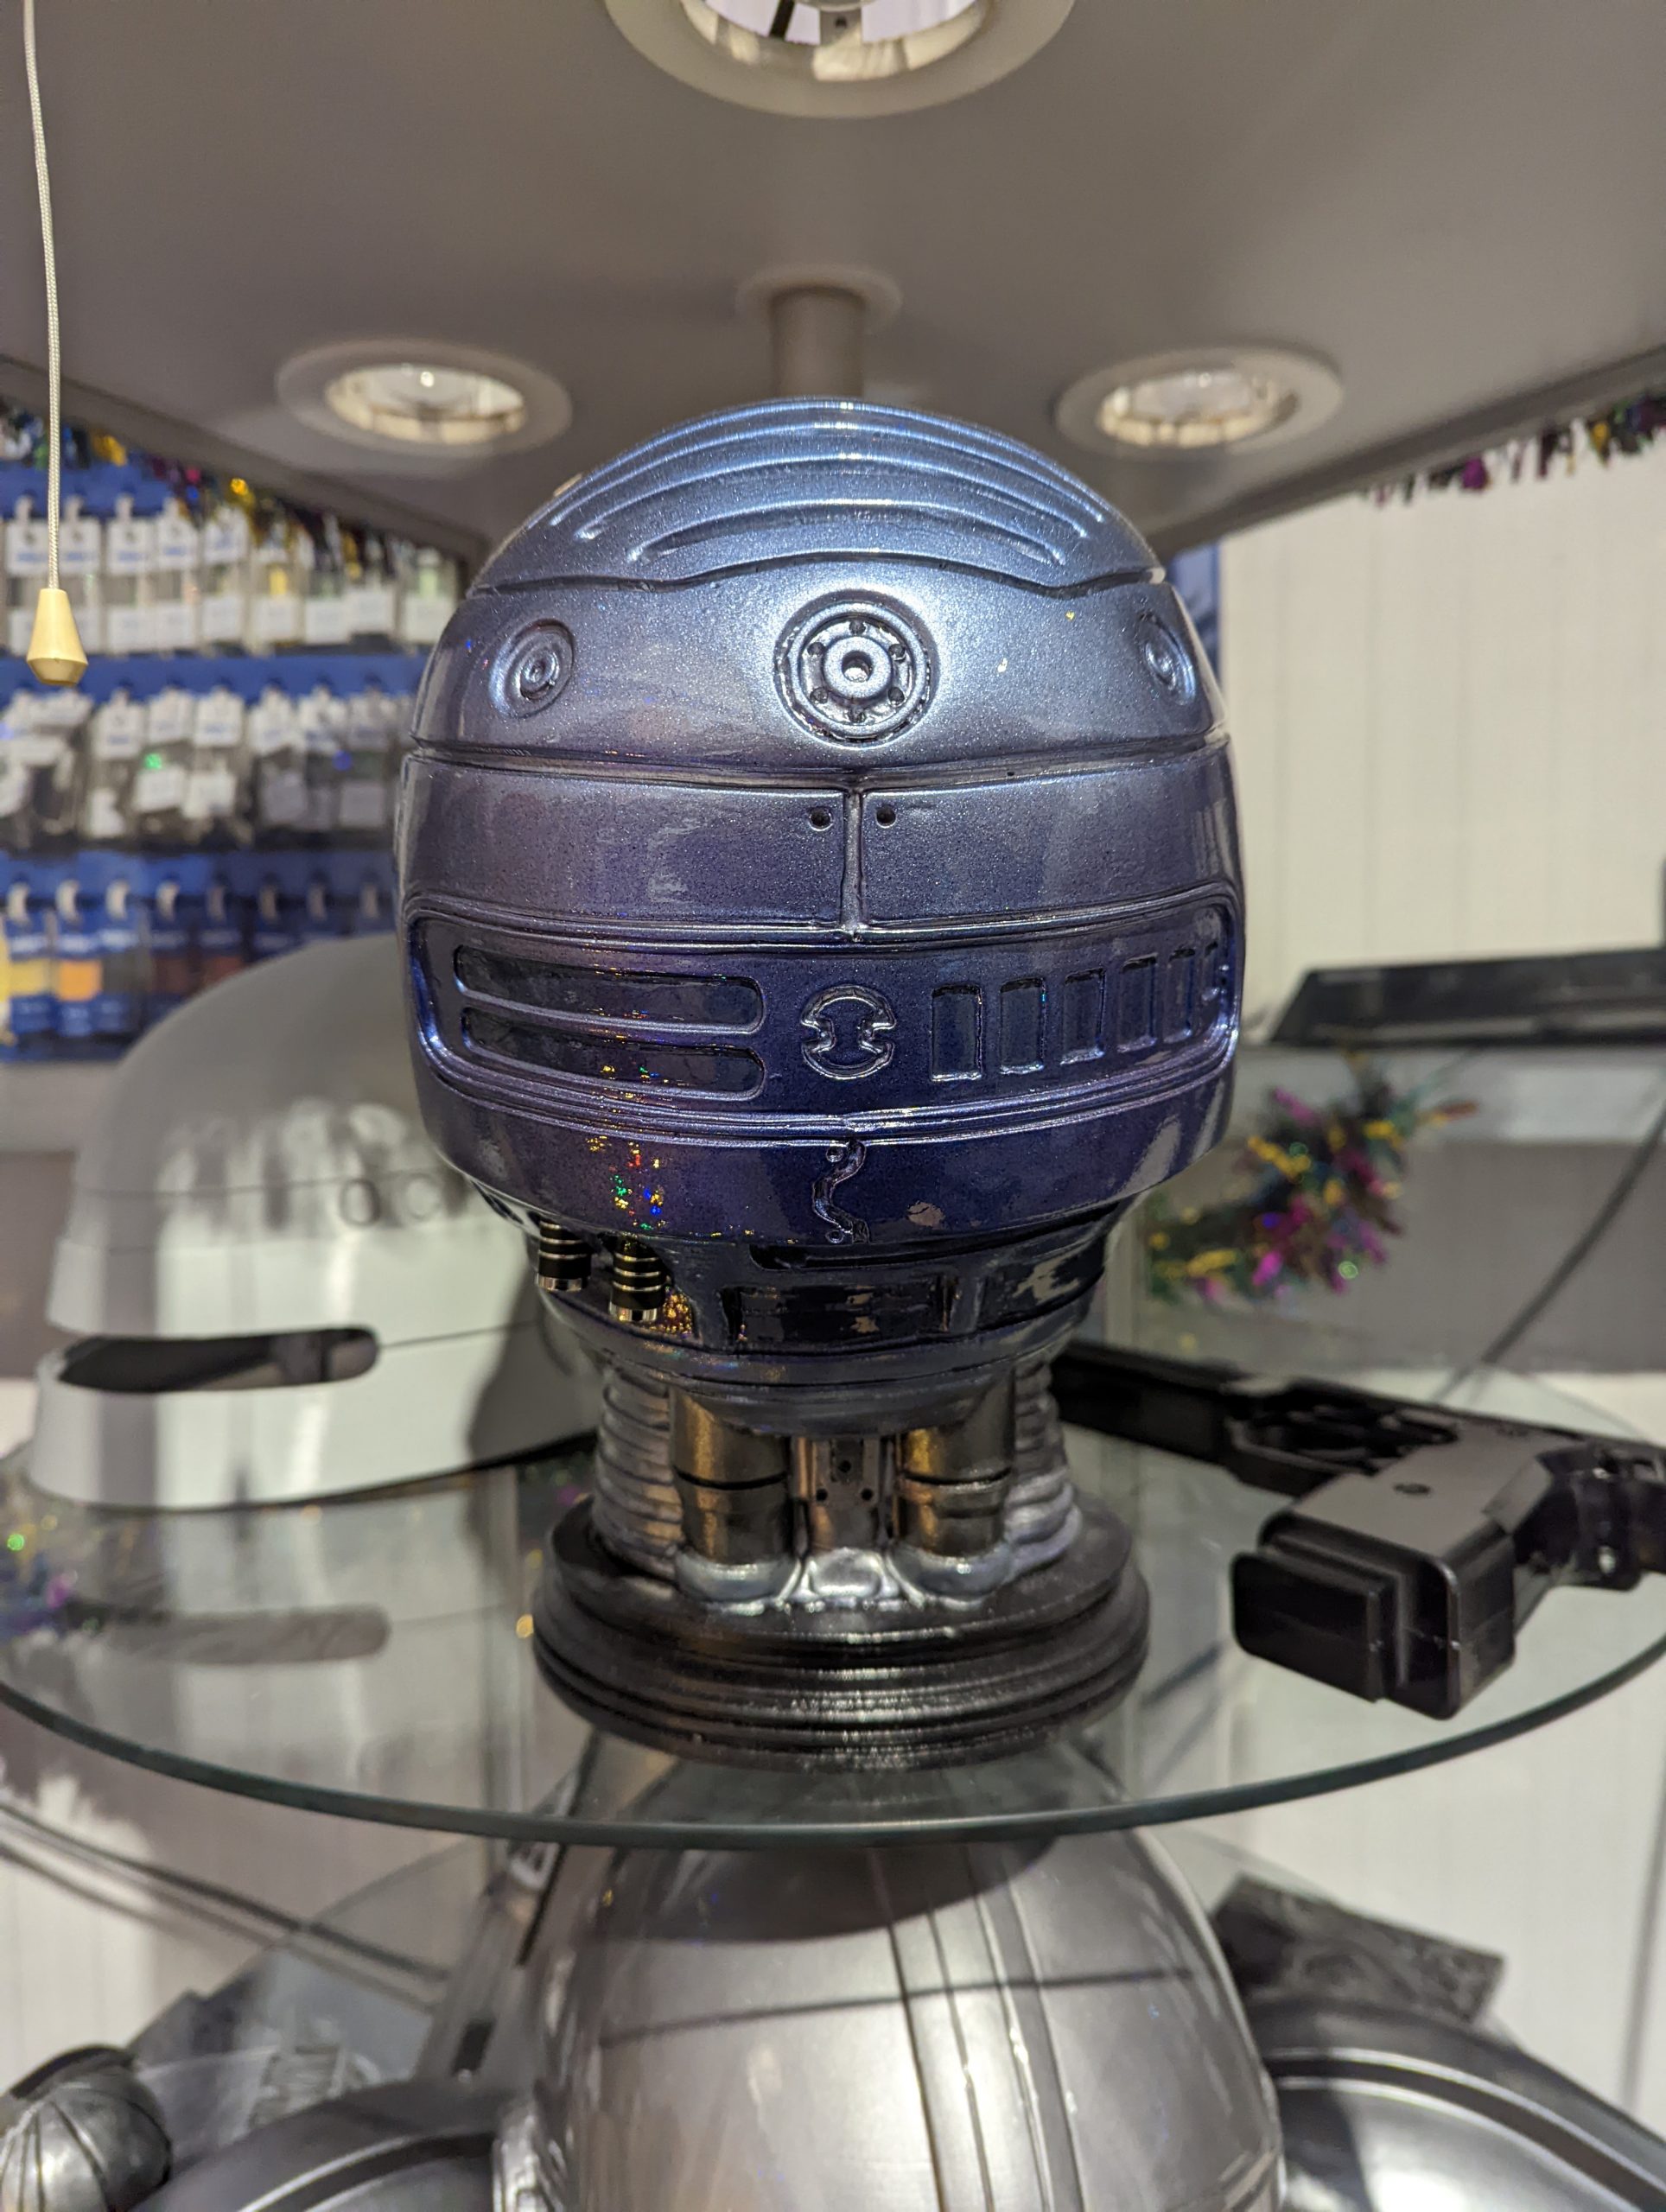
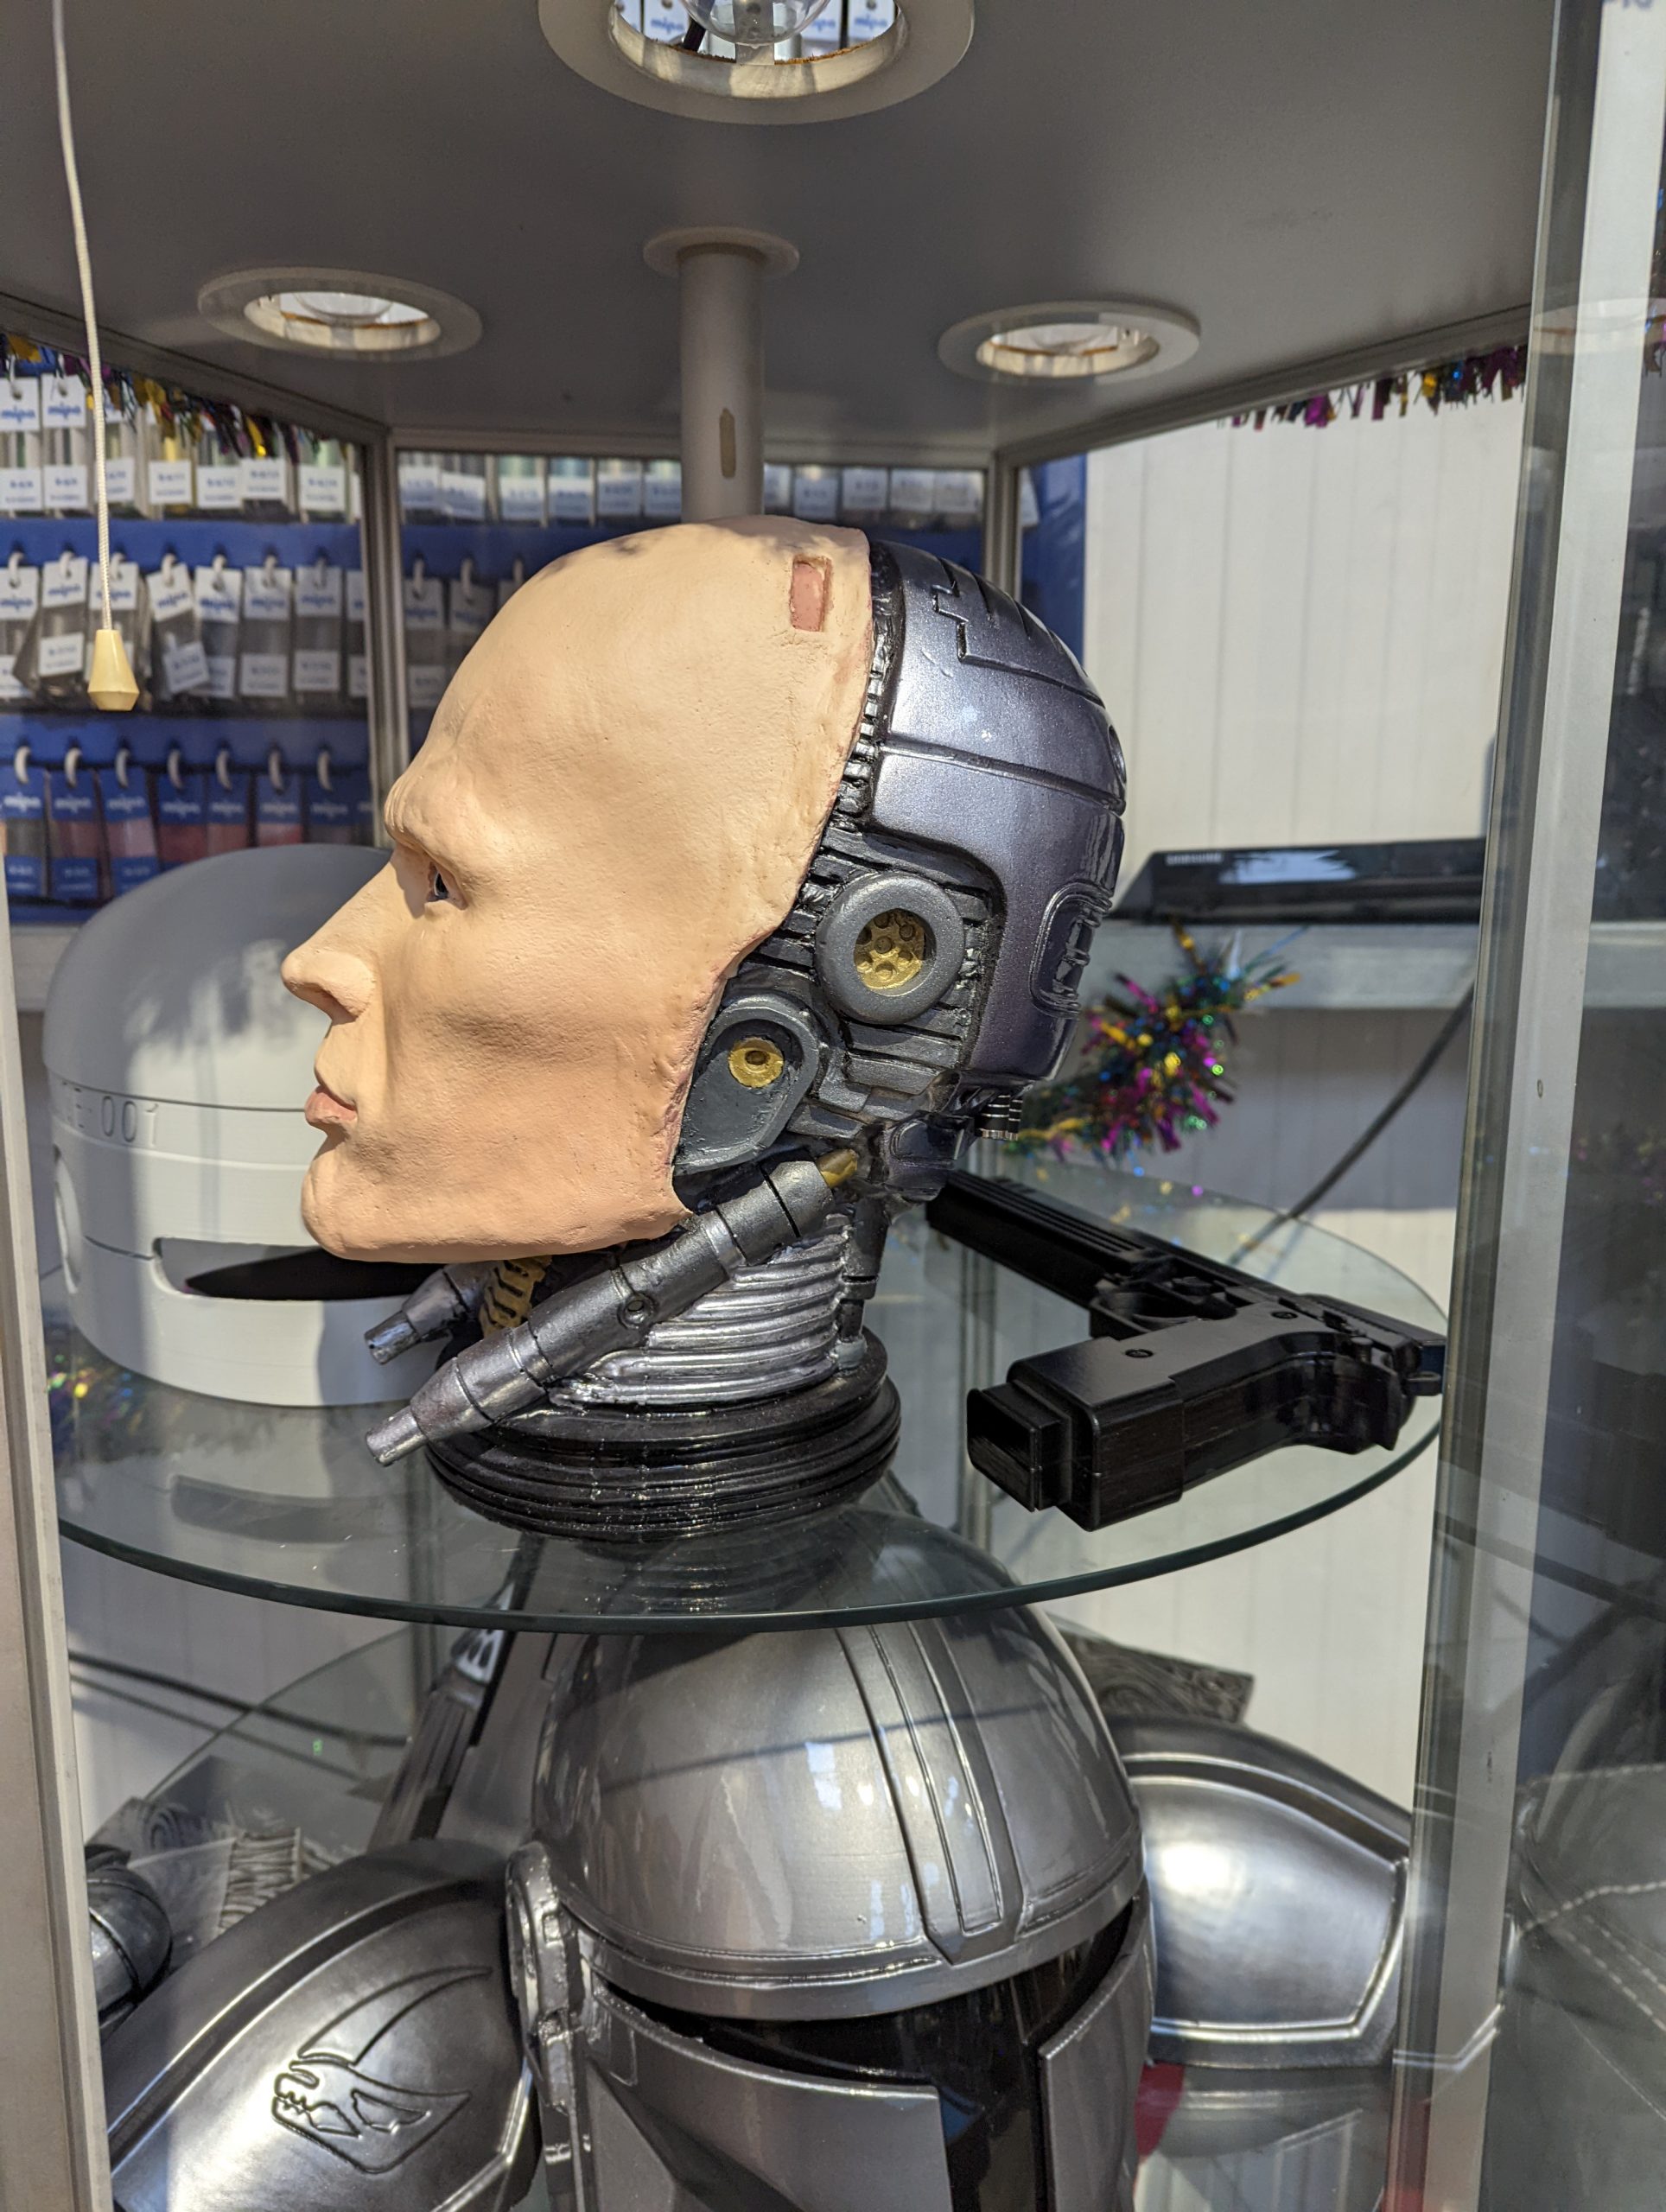
Rear Of The Bust: First, sand and clean the fibreglass and resin mould to remove any rough edges created from the mould. Then cover the front of the face using masking tape and paper. Add a 2K Black Filler to smooth the surface. Allow this to cure for around 1 hour, then, once fully cured; start to apply the base coat of colours.
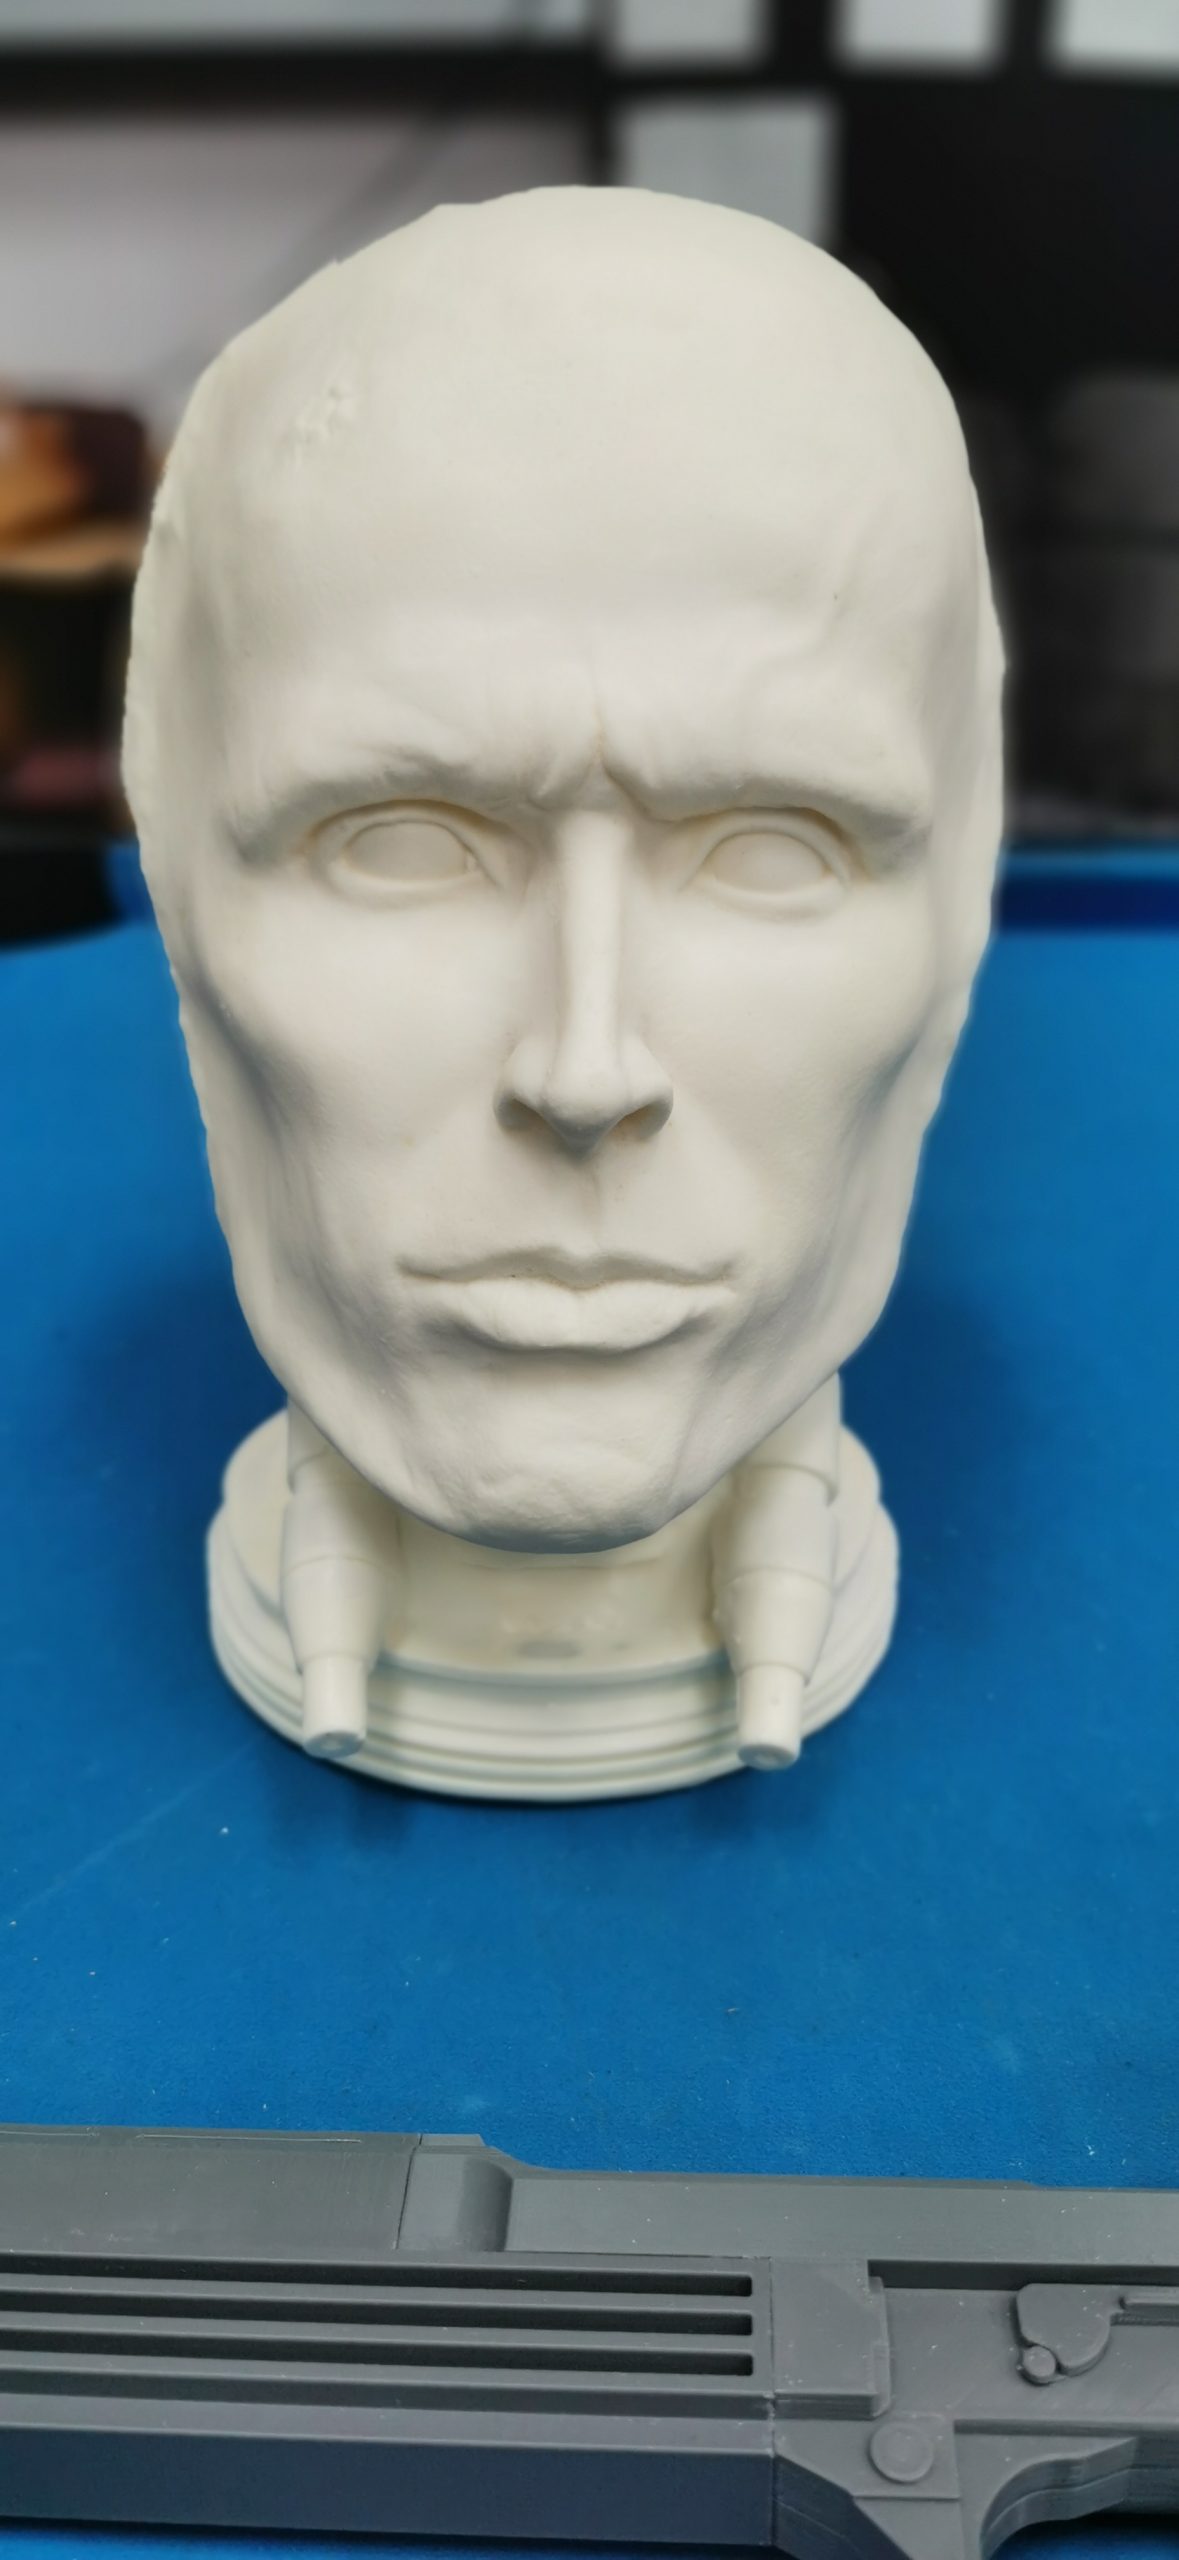
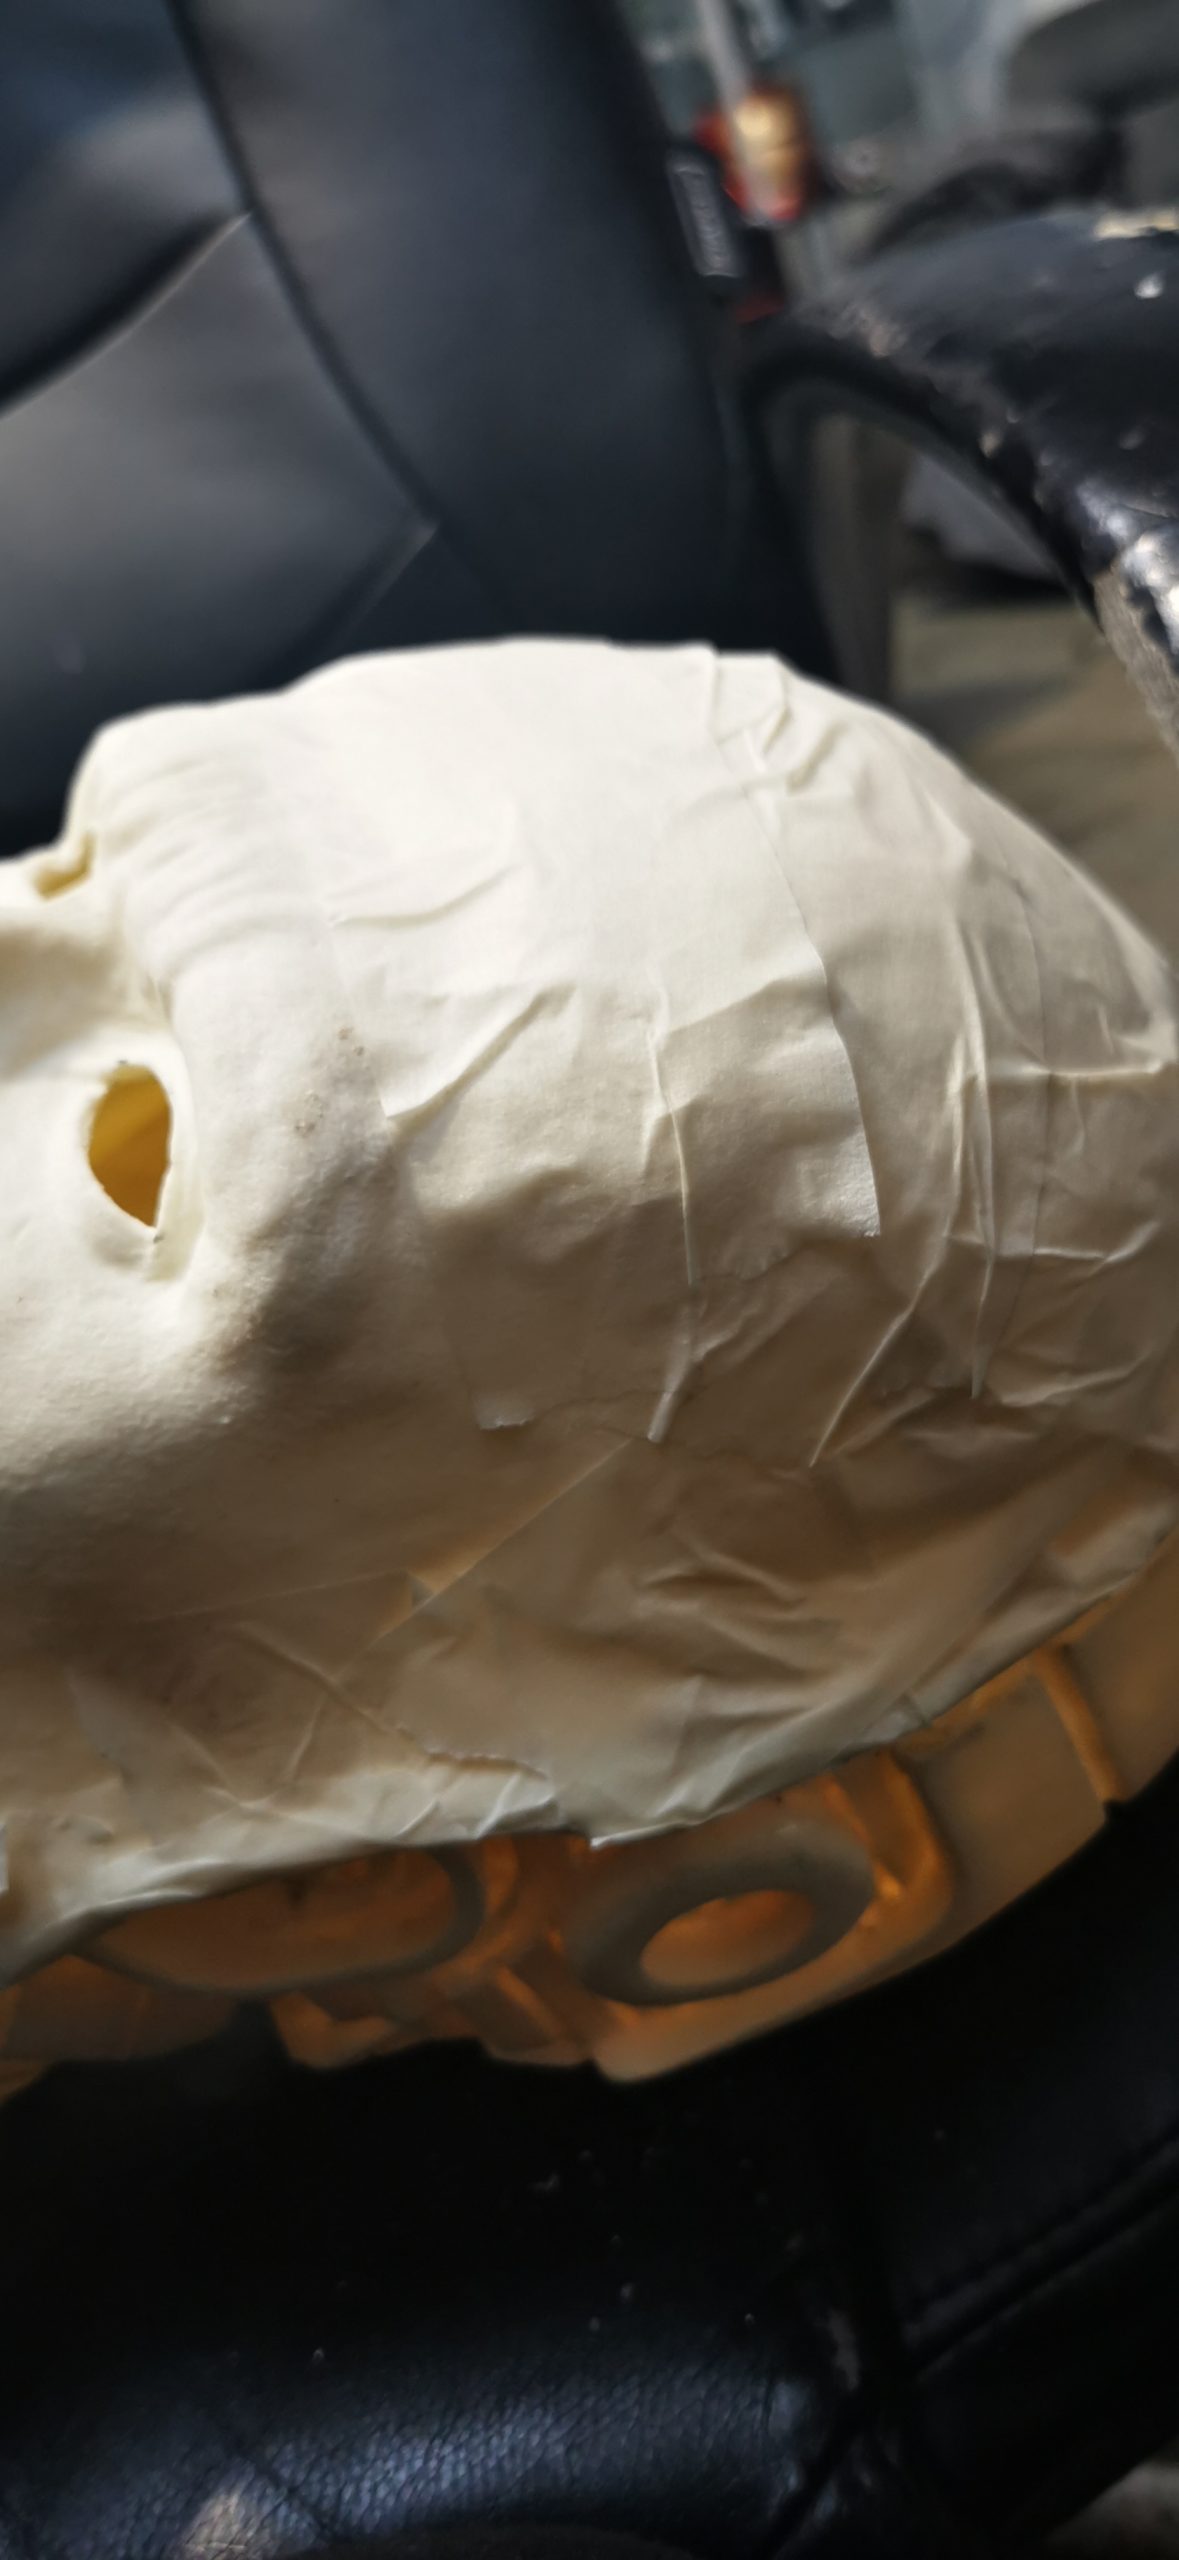
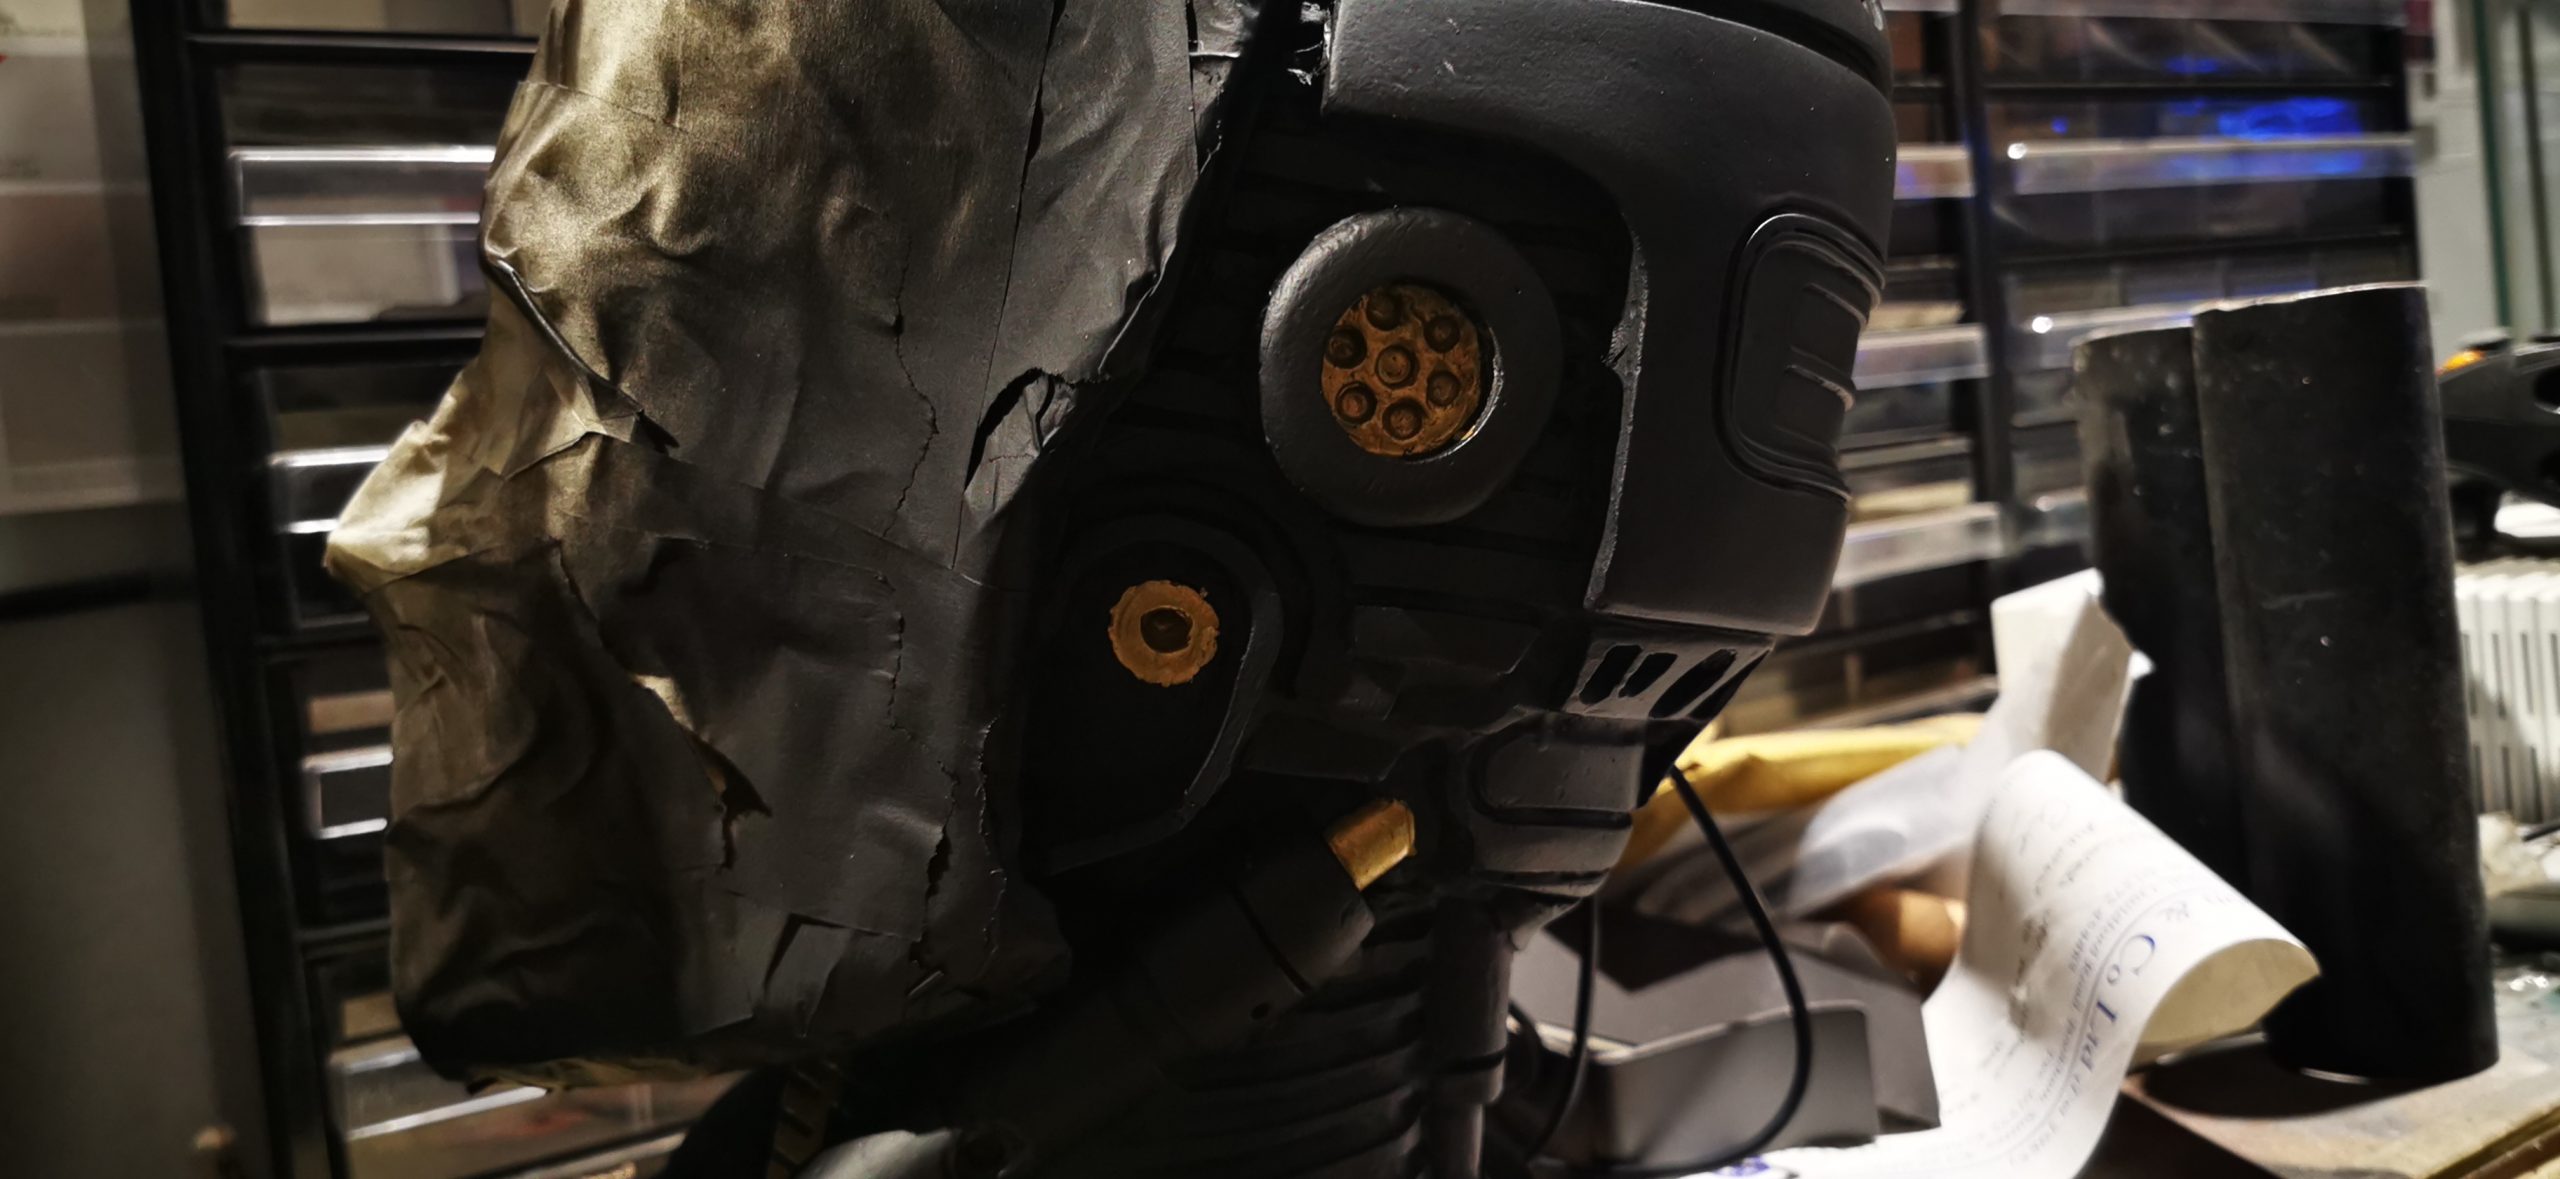
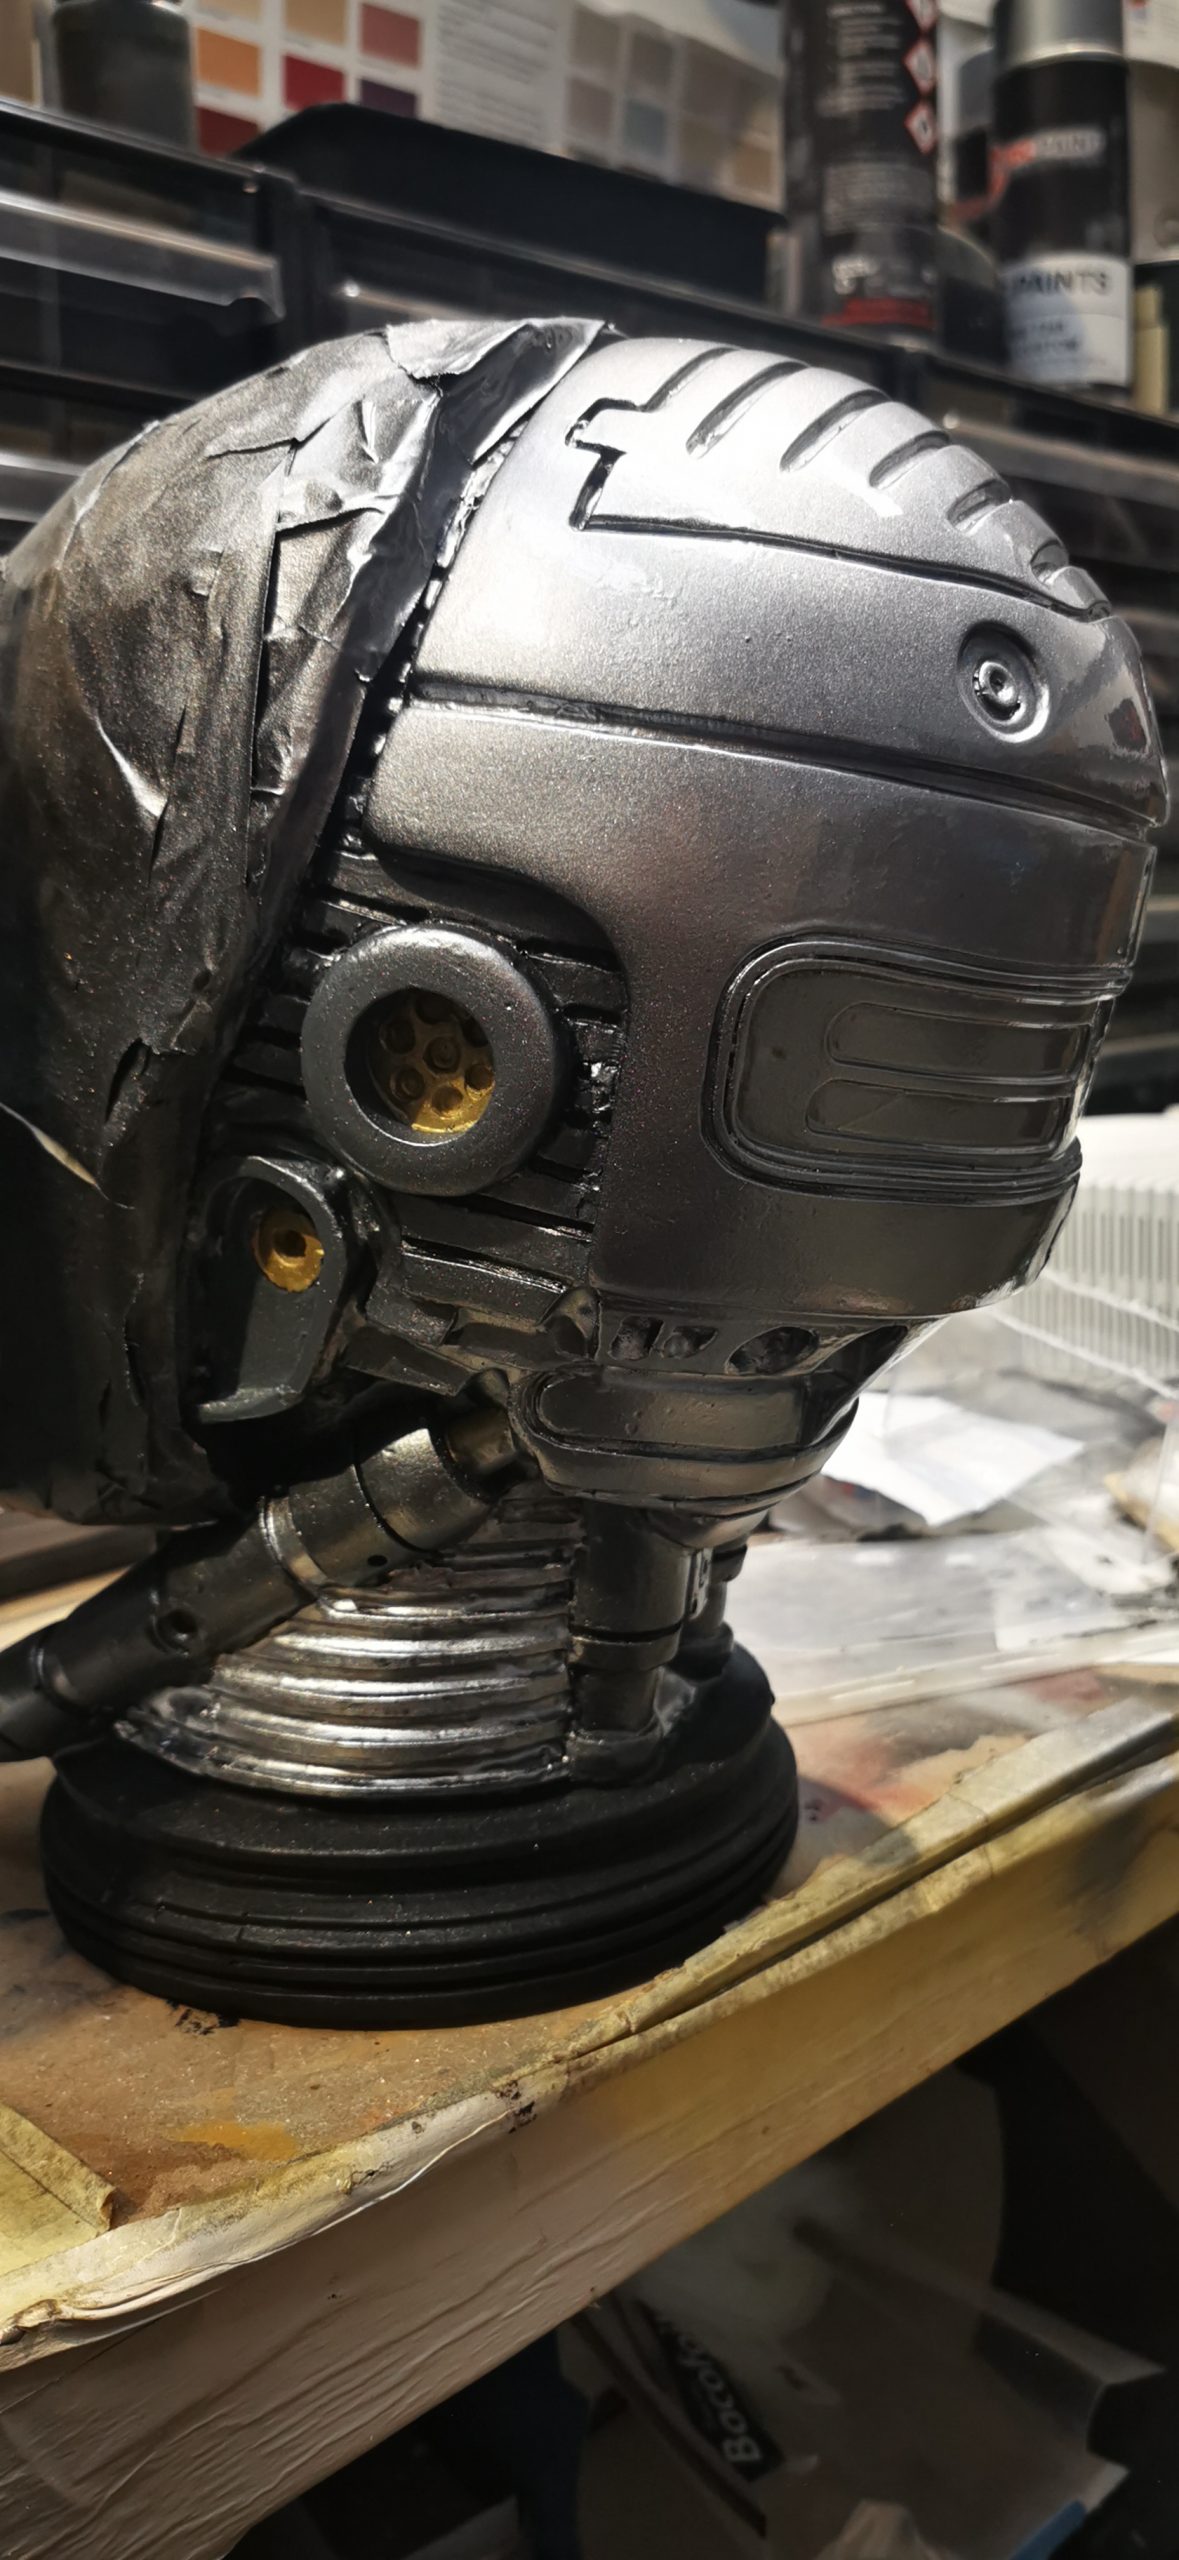
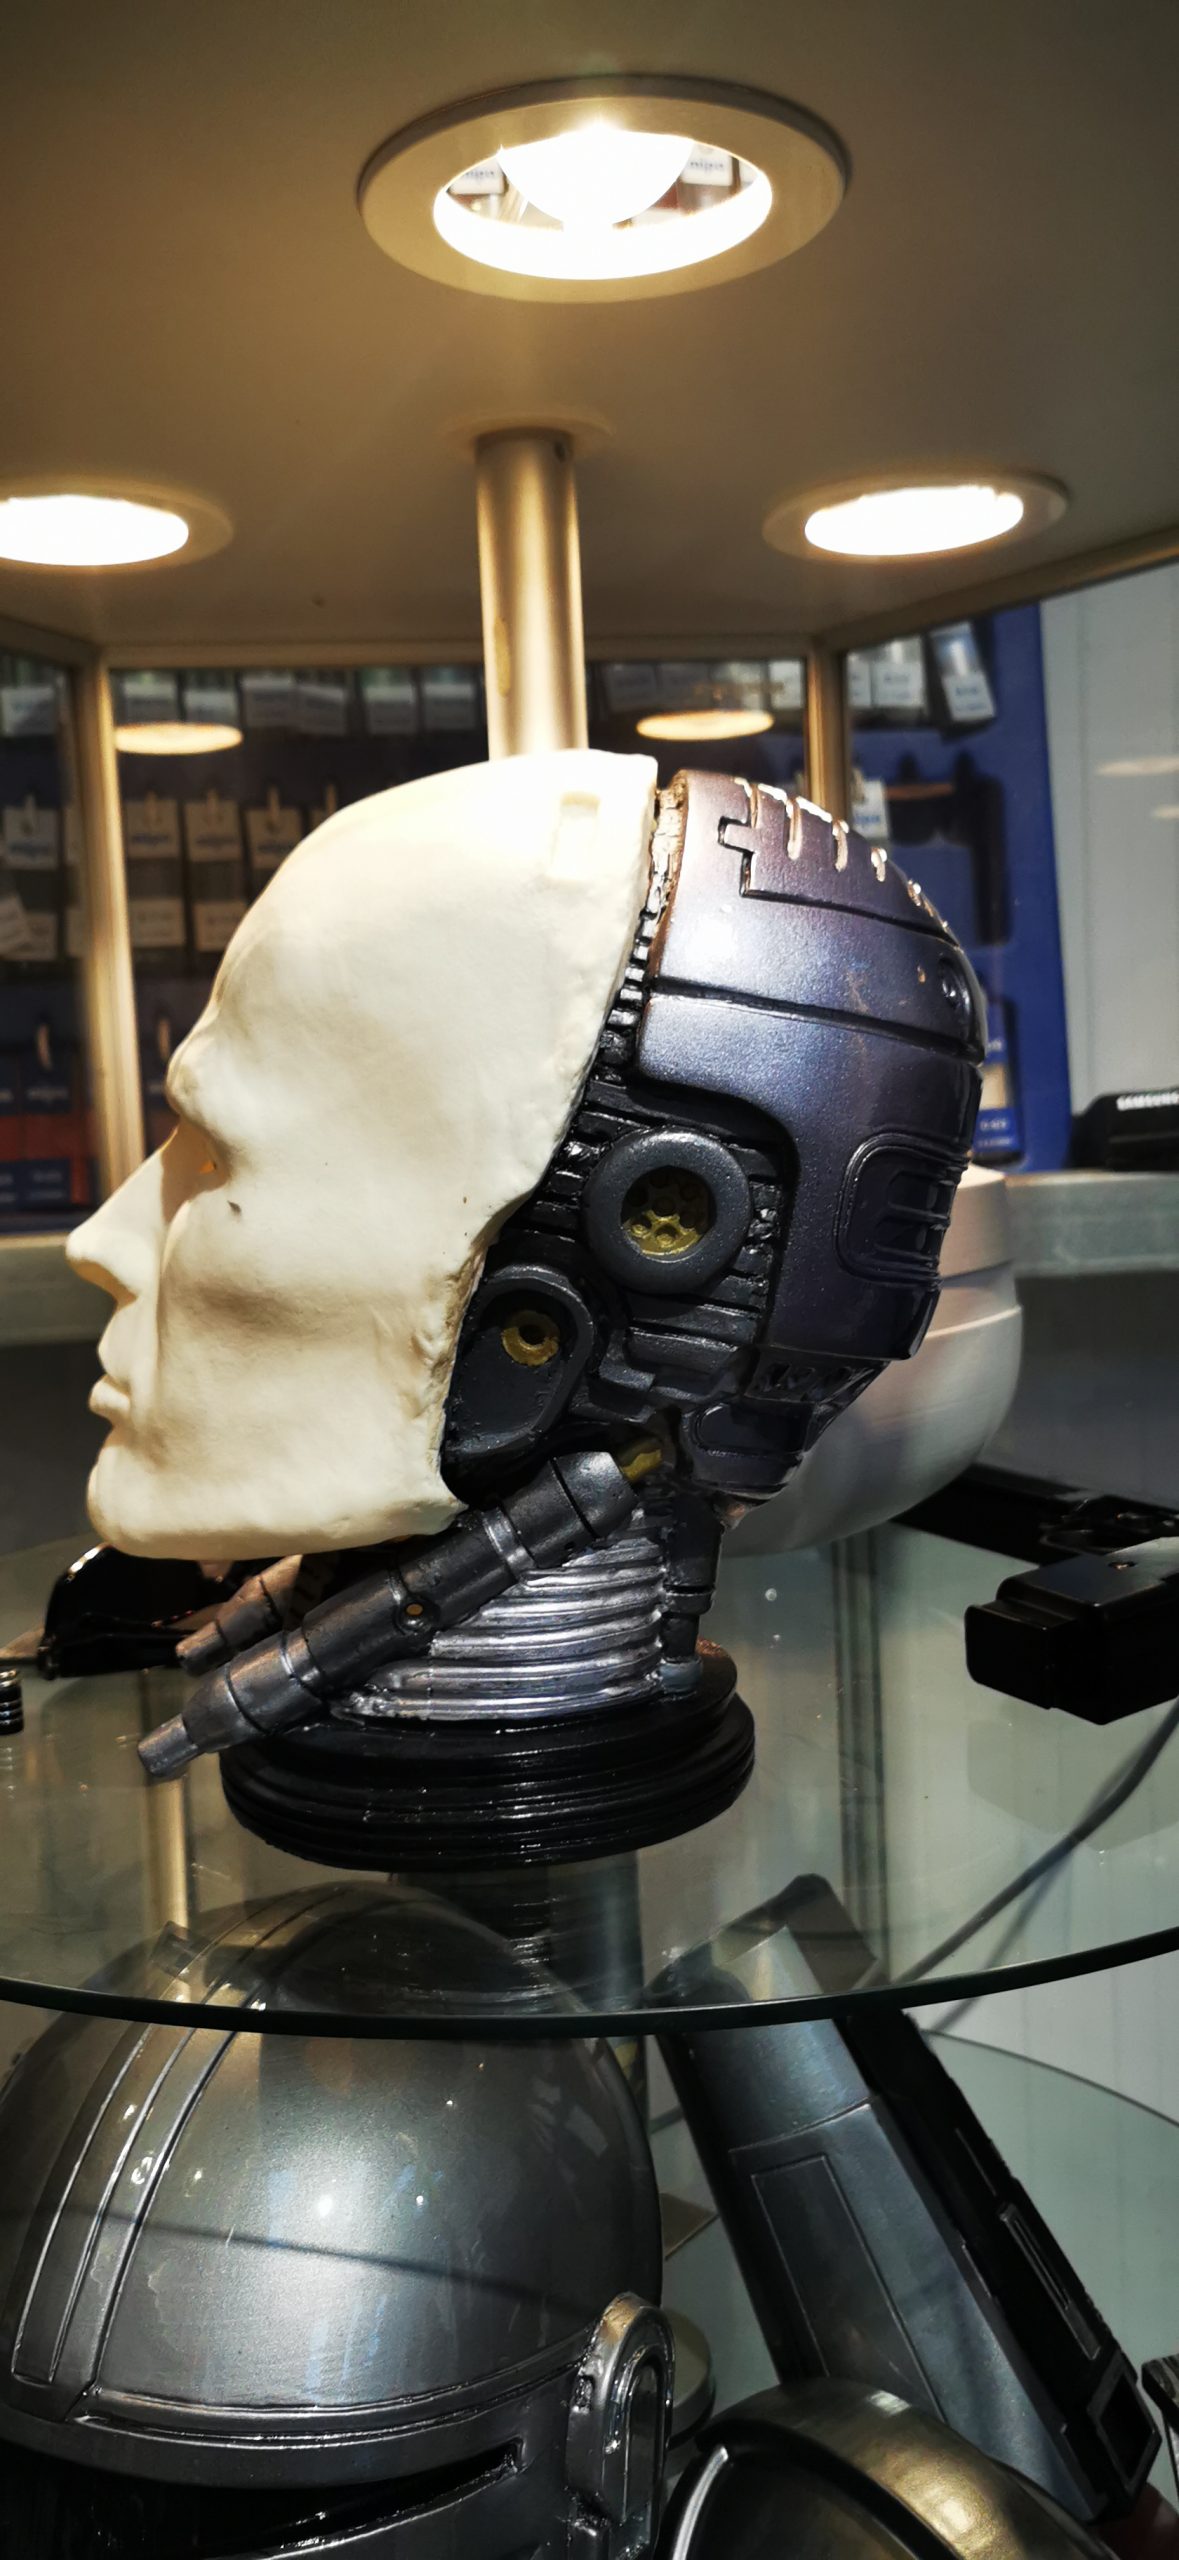
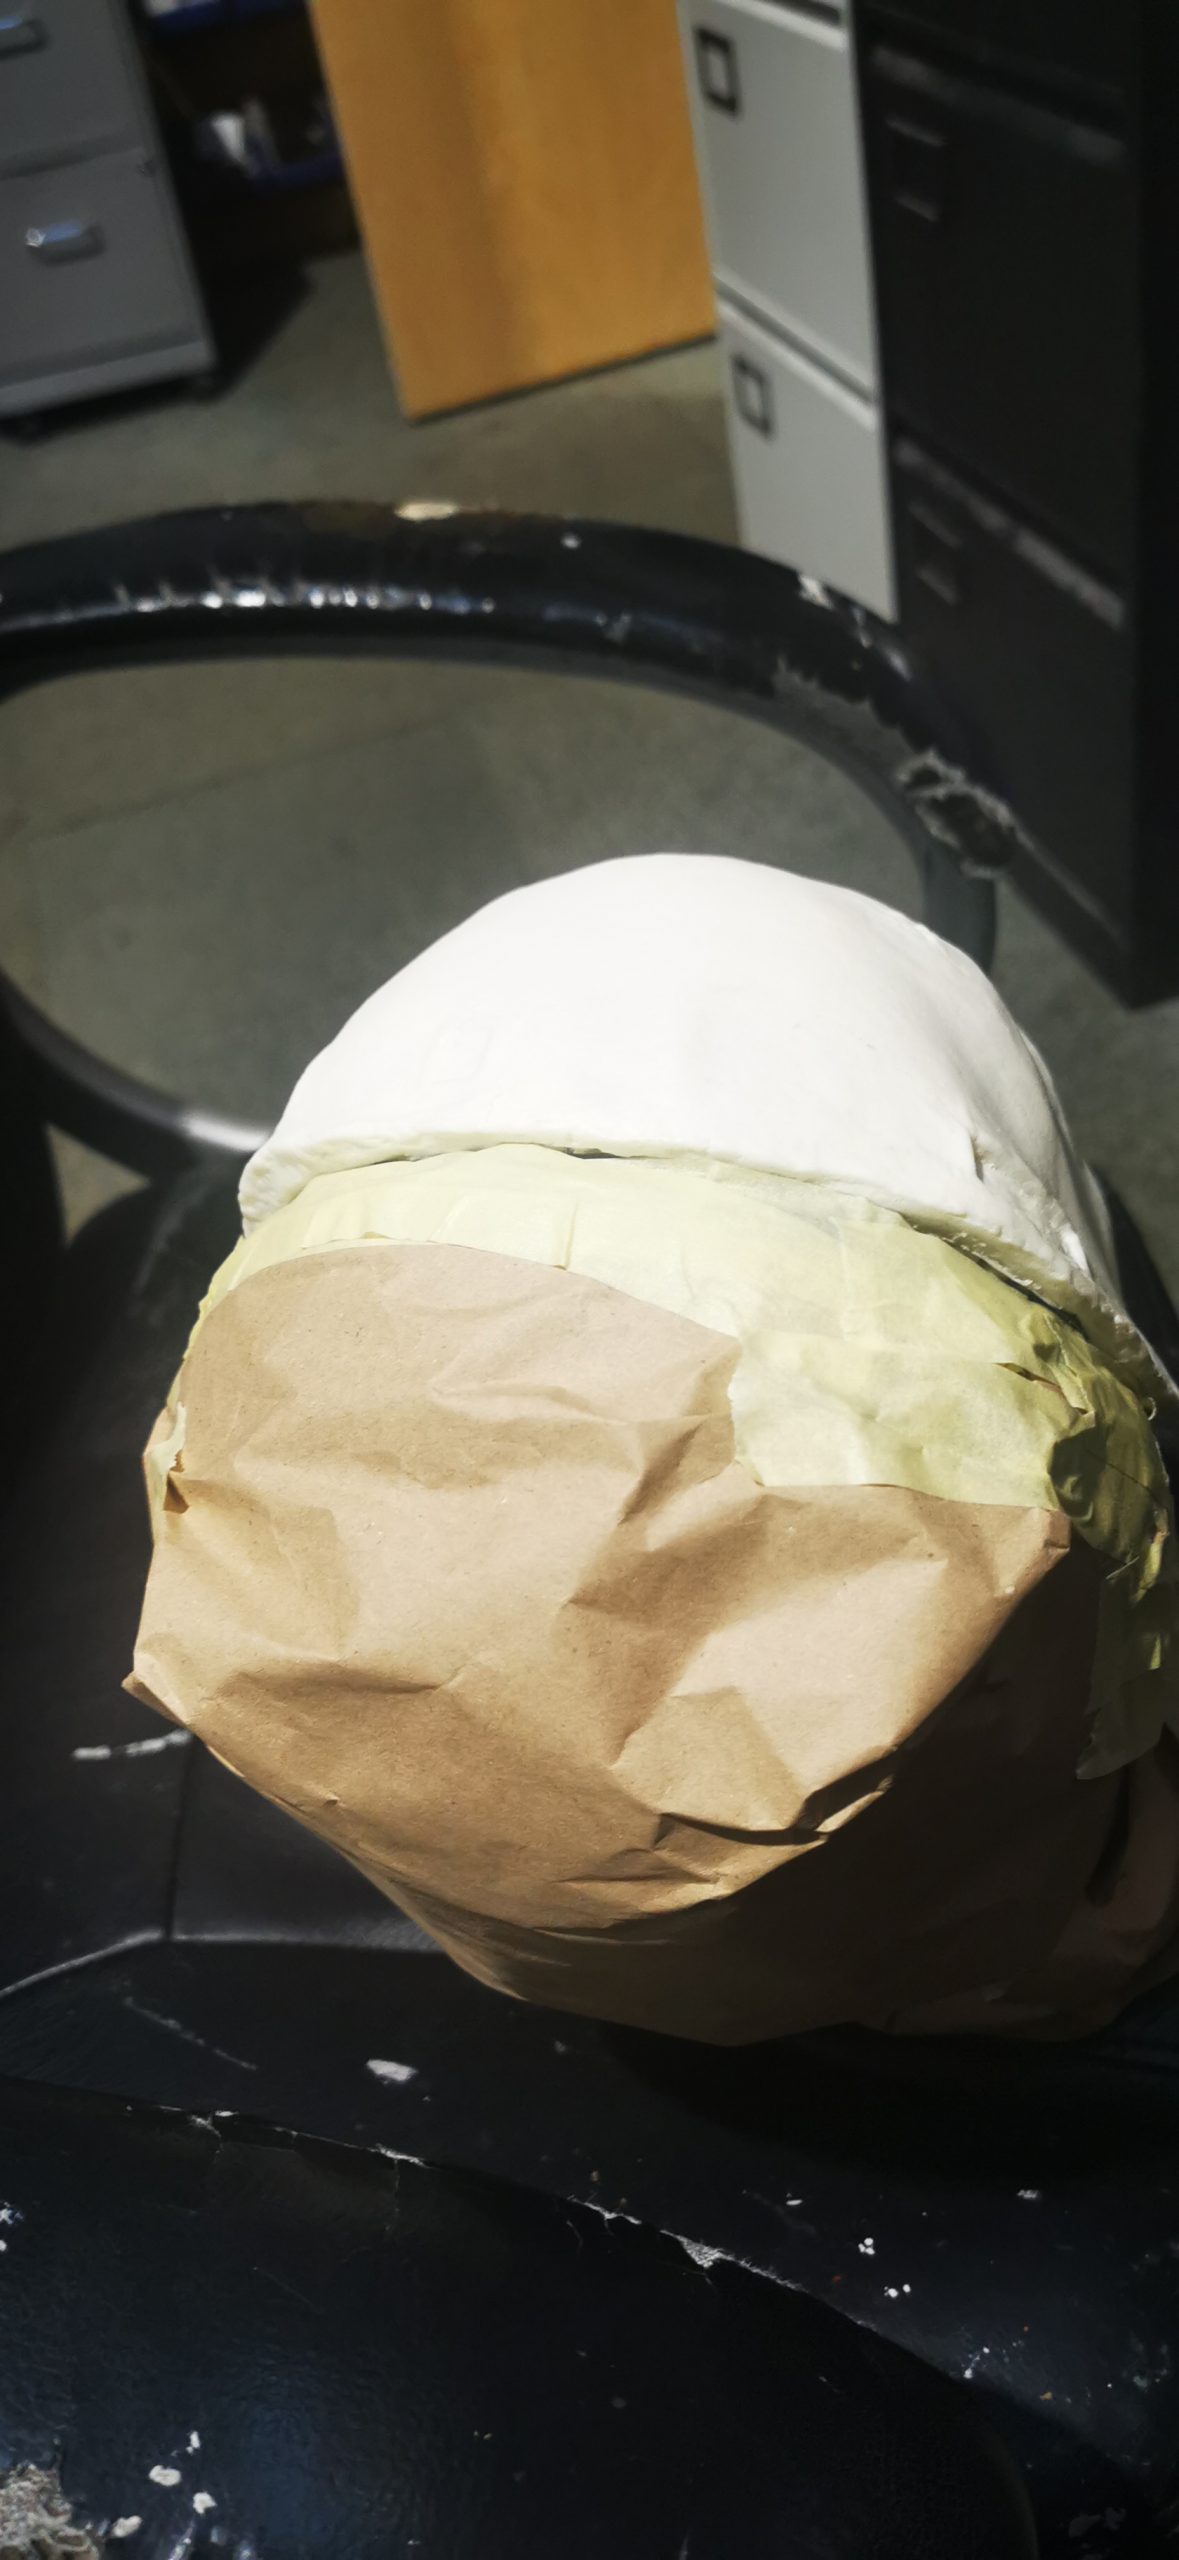
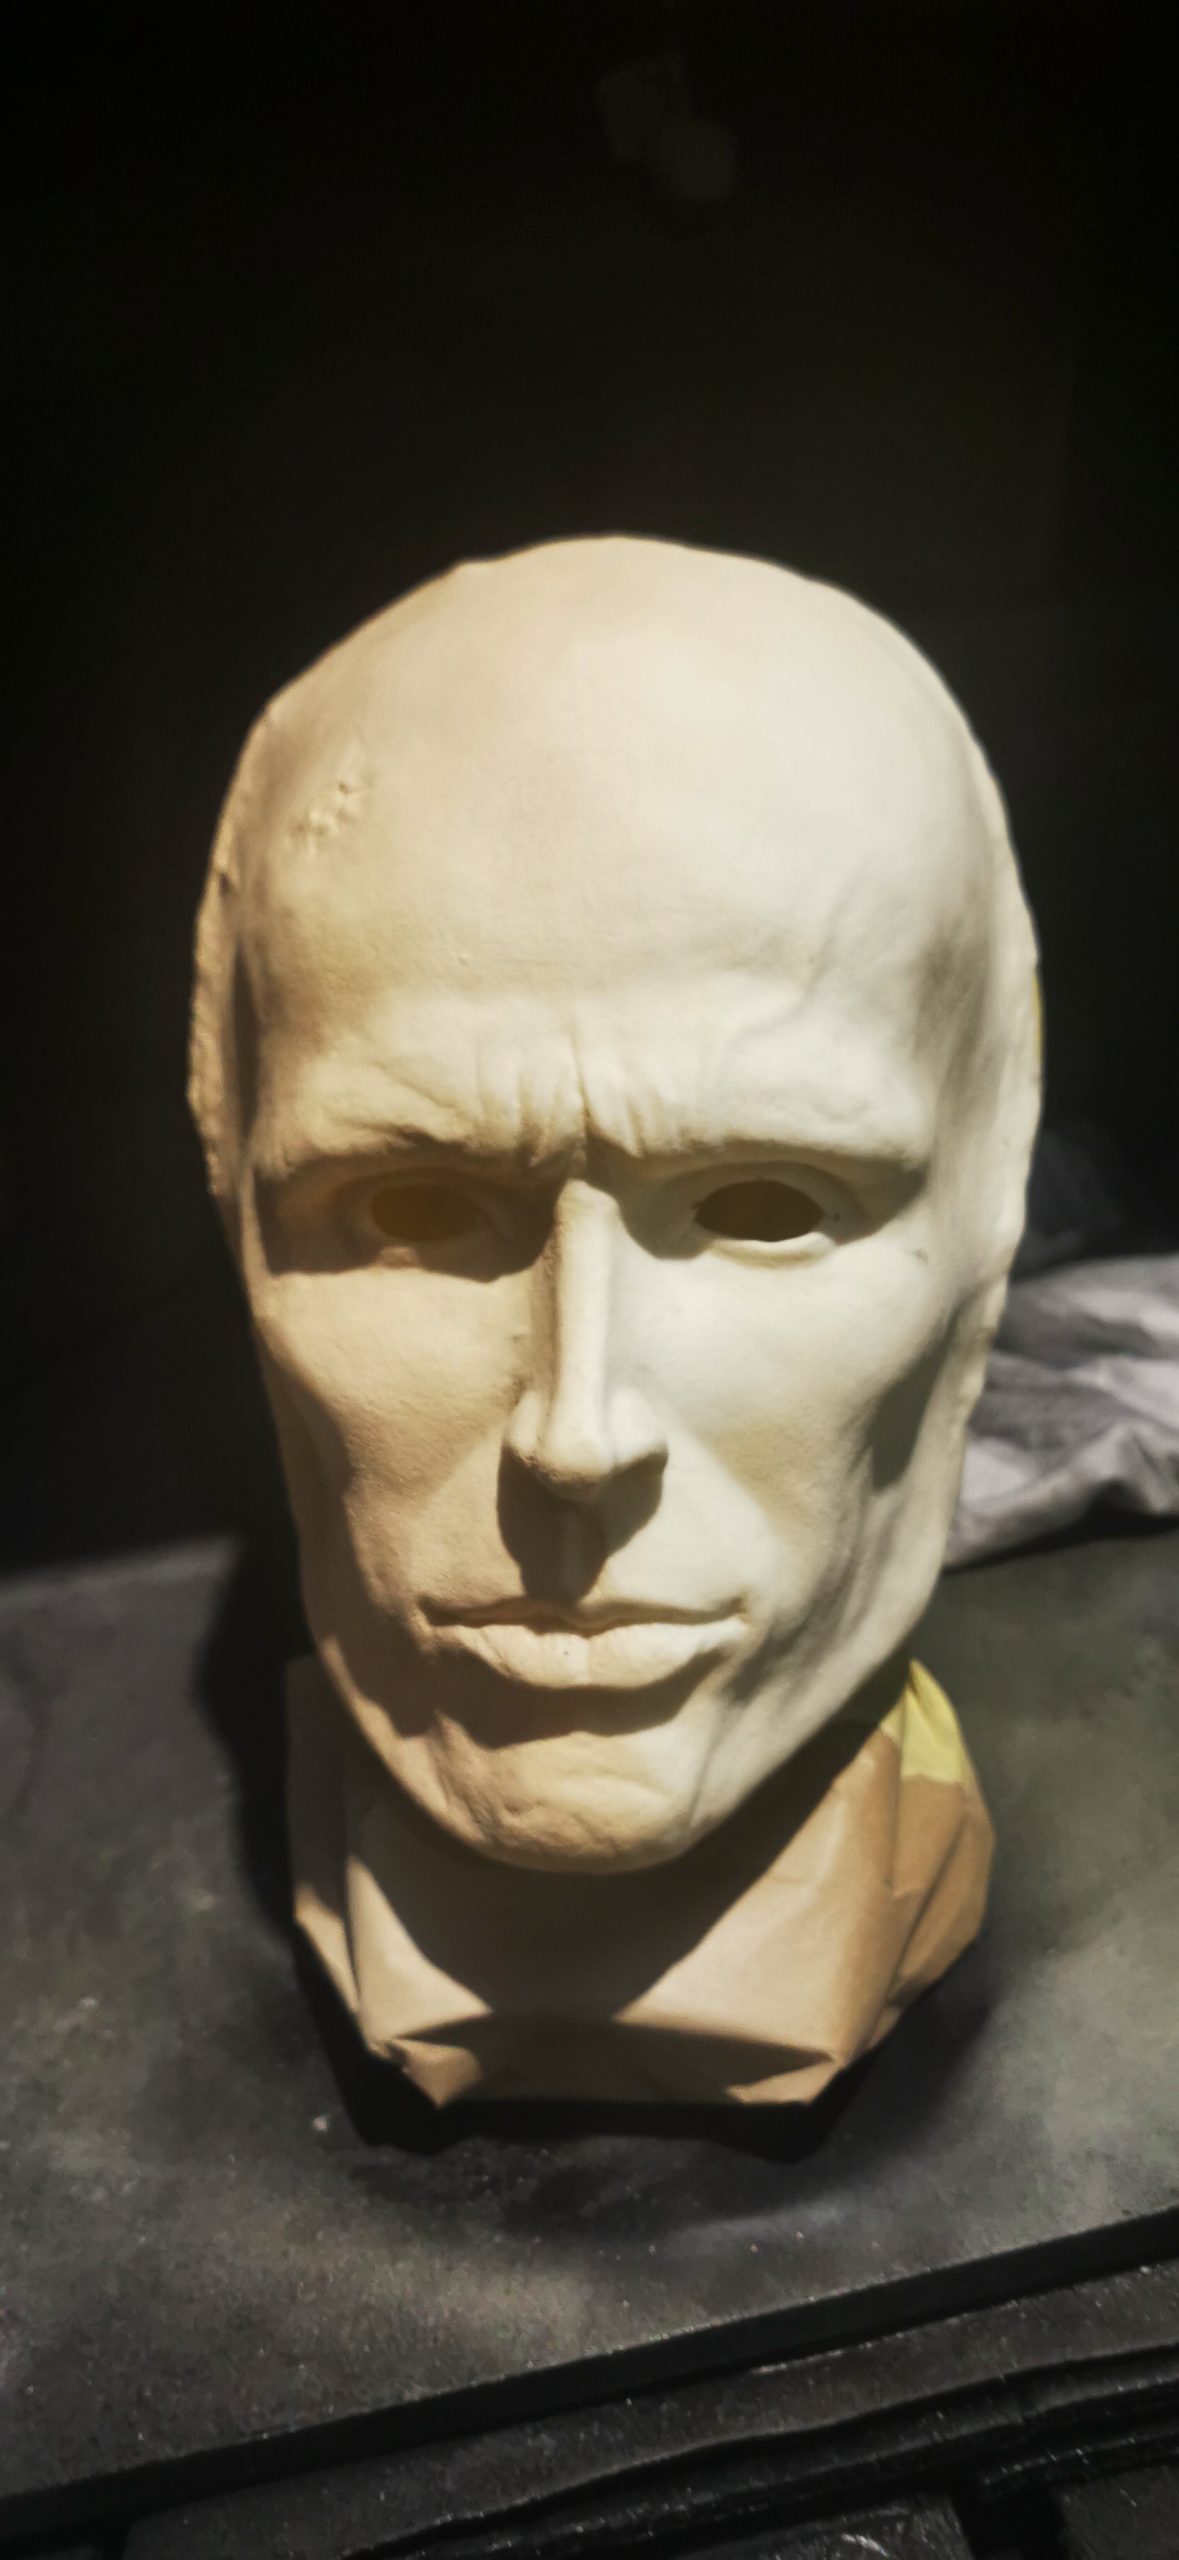
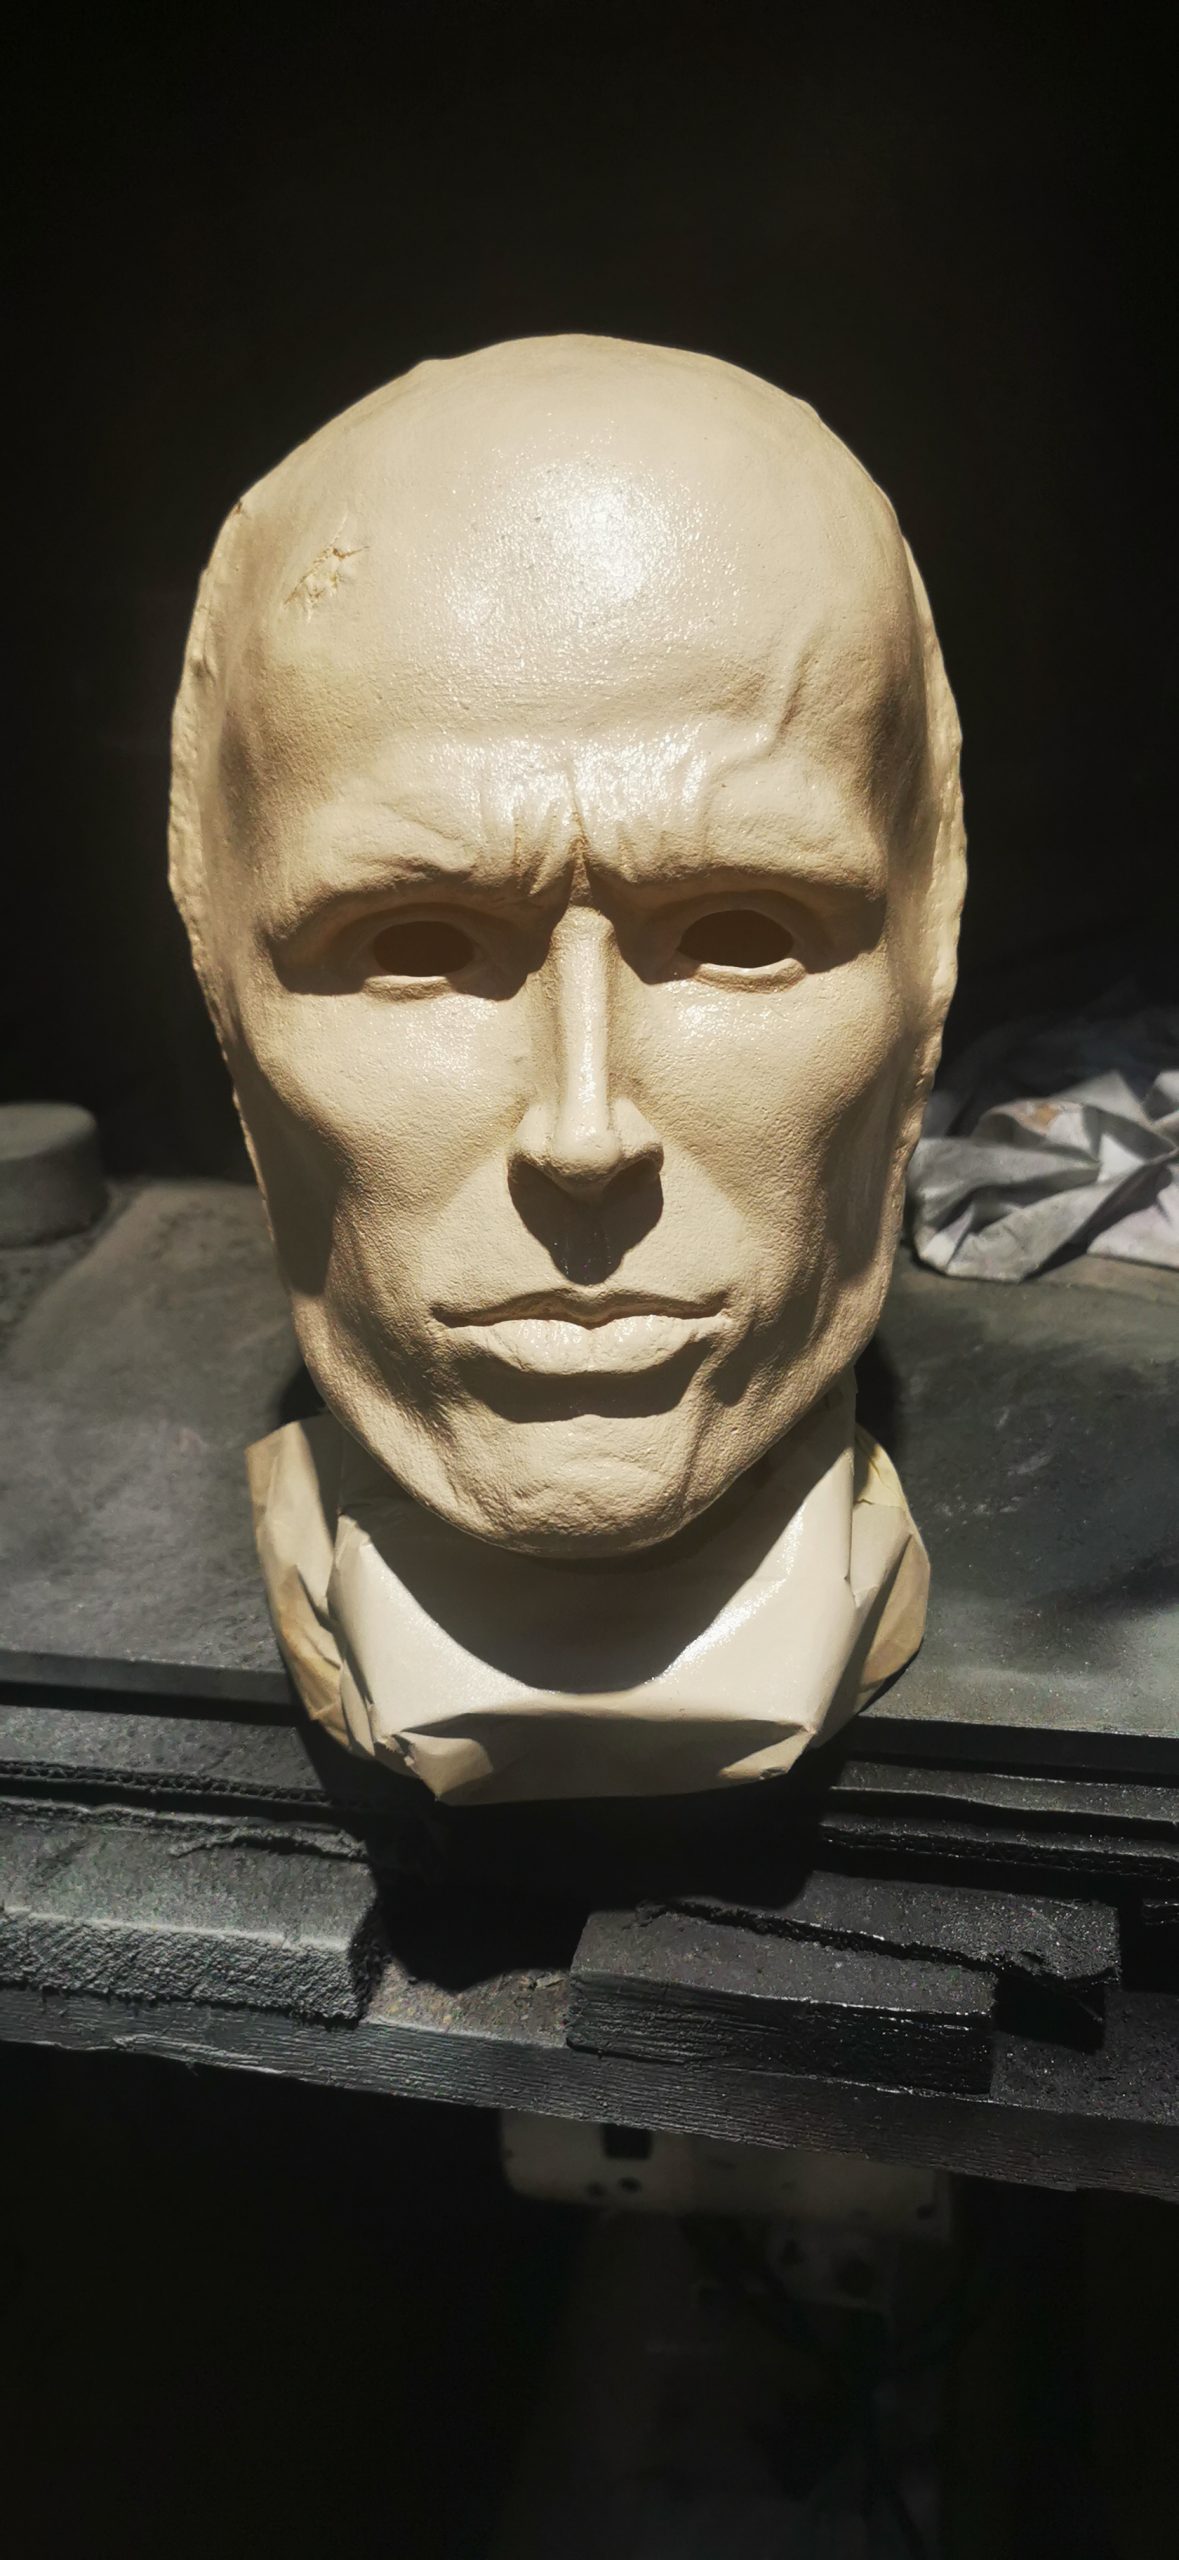
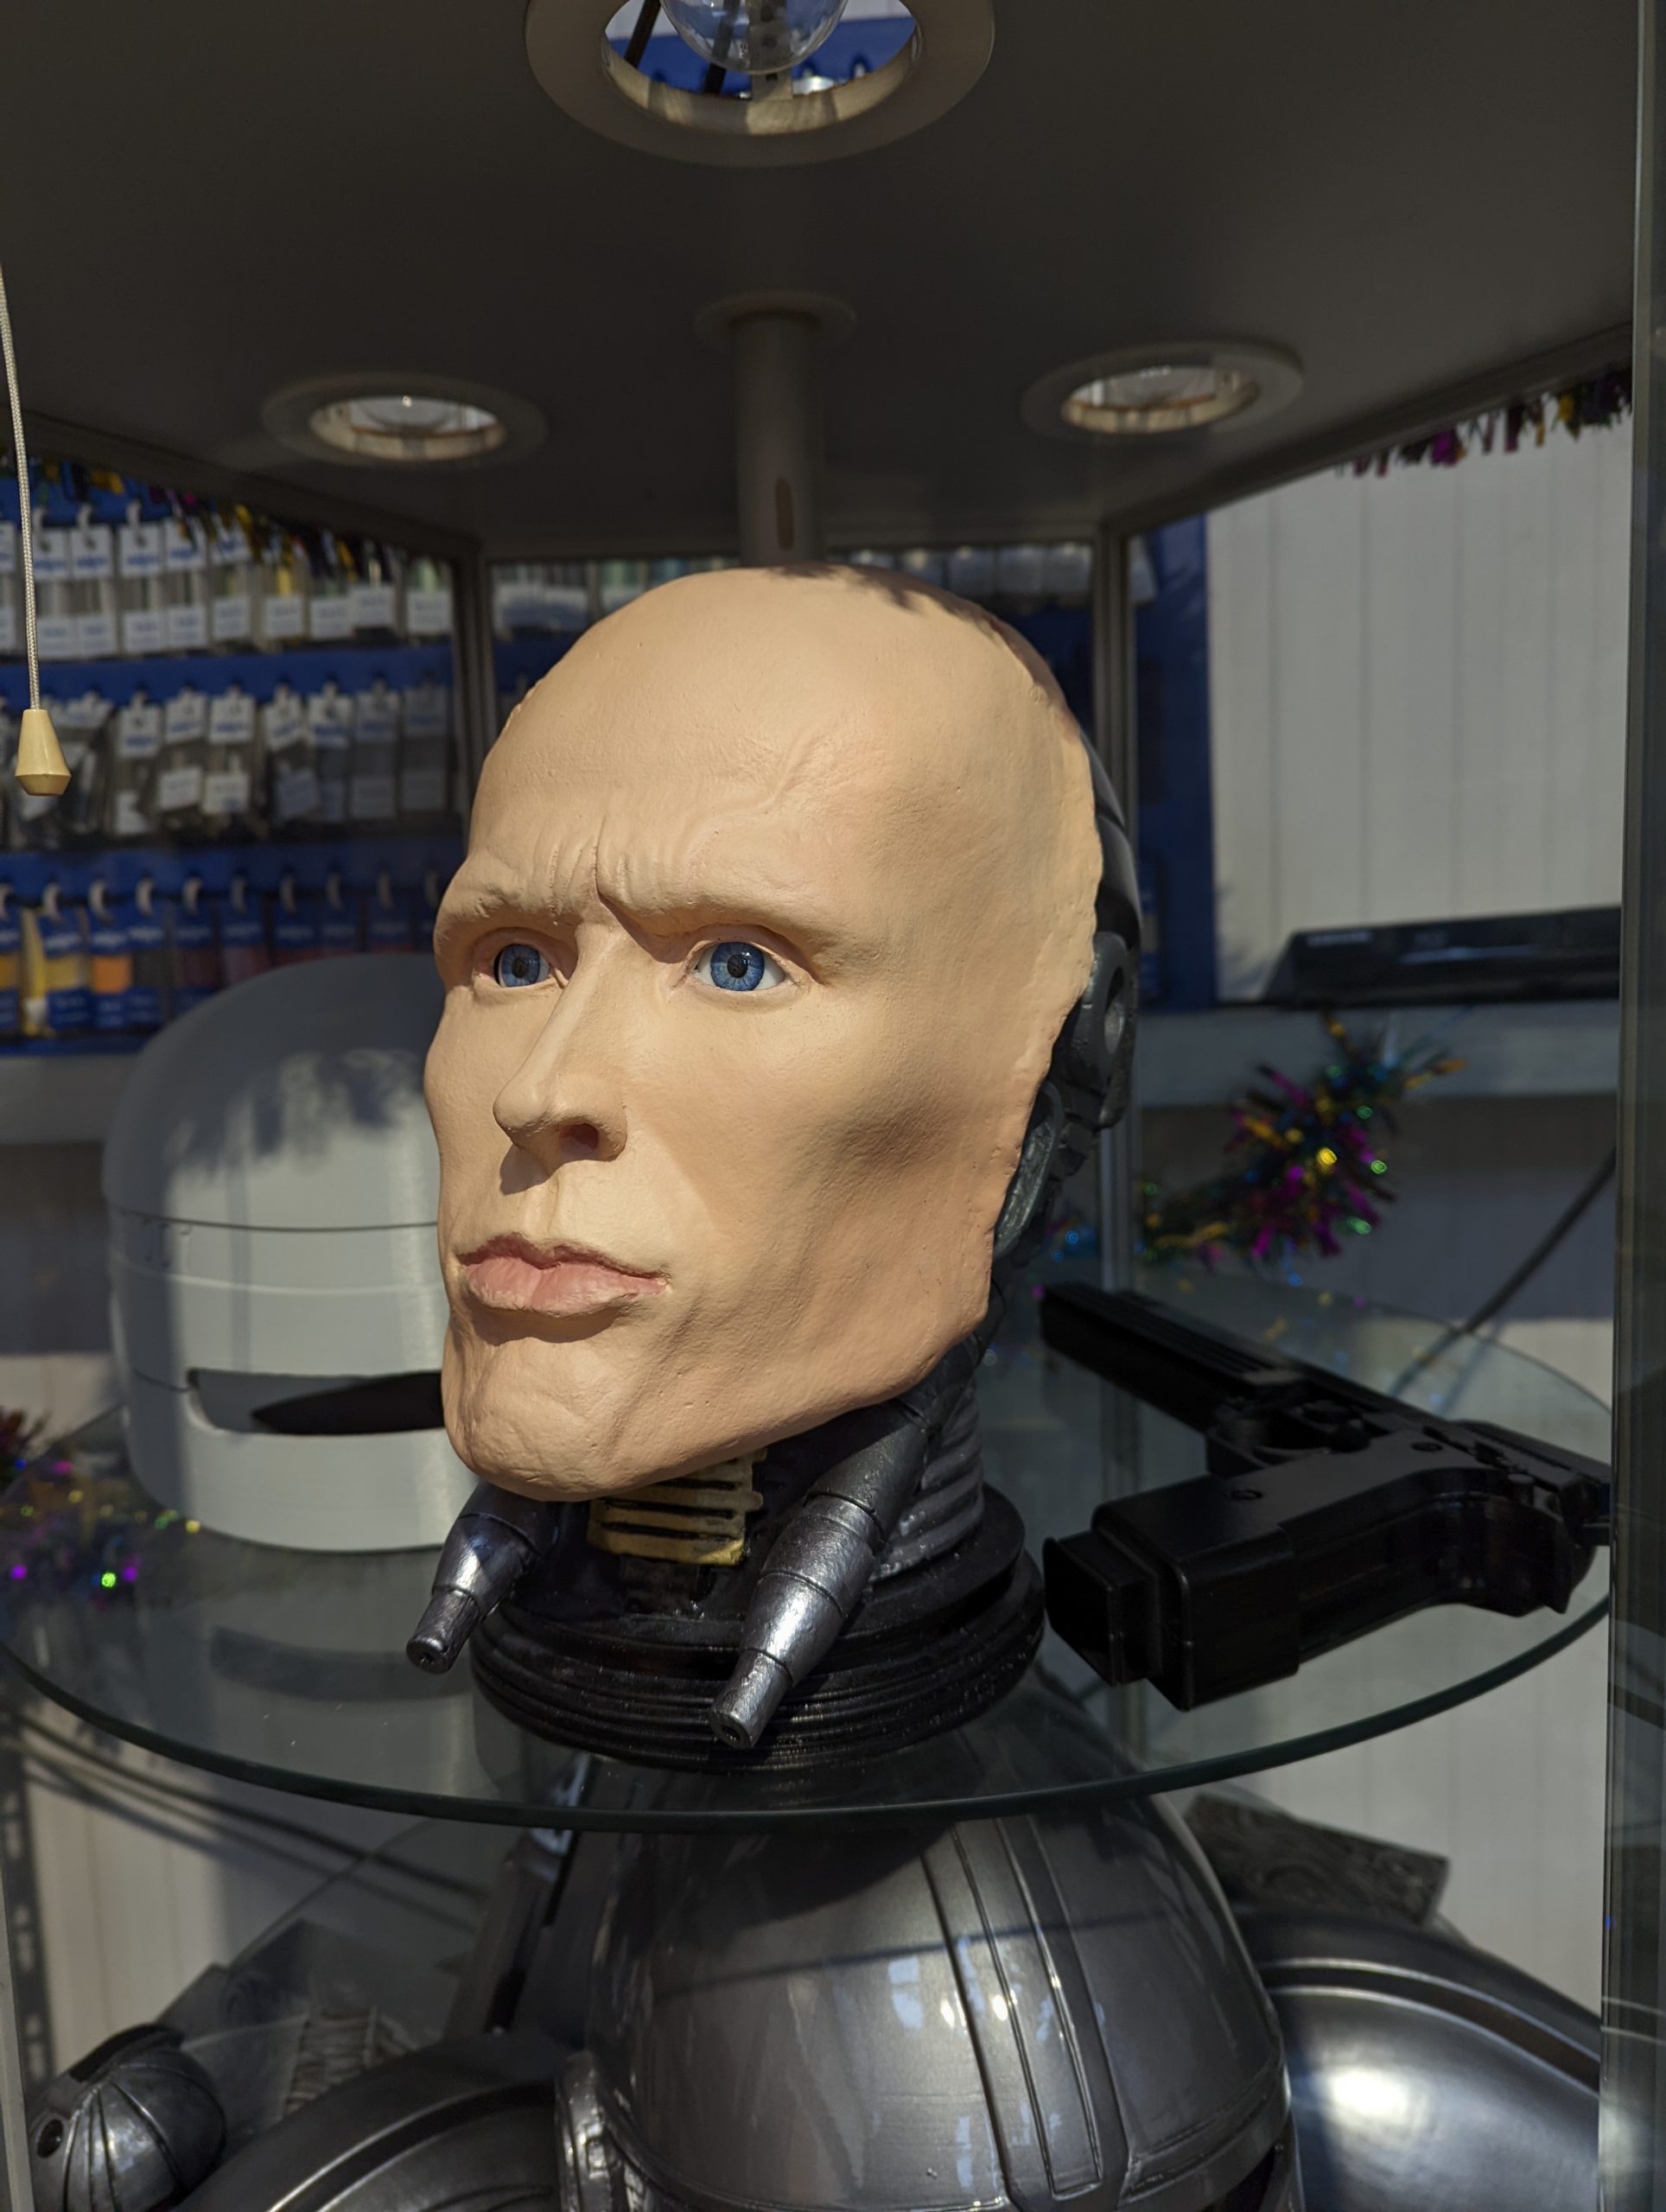
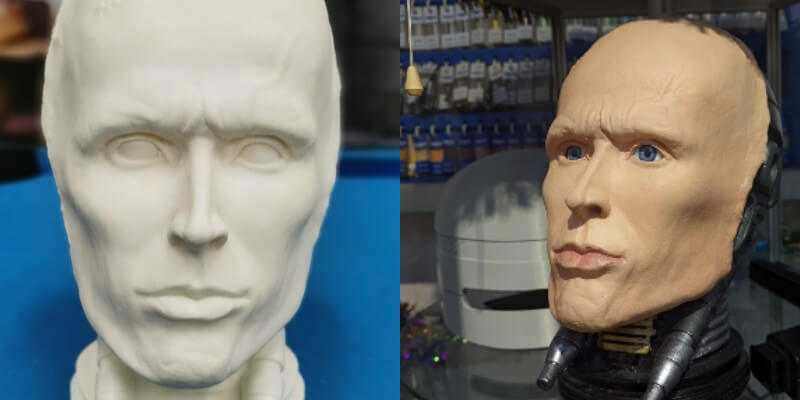
Front Of The Bust: You’ll have to Dremel out the eye sockets first and then fill the head cavity with newspaper. Again, clean and lightly sand the substrate first. Mask off the back of the helmet and move on to the front, where you then need to apply a White 2K Filler Primer all over and leave it to cure for again 1 hour.
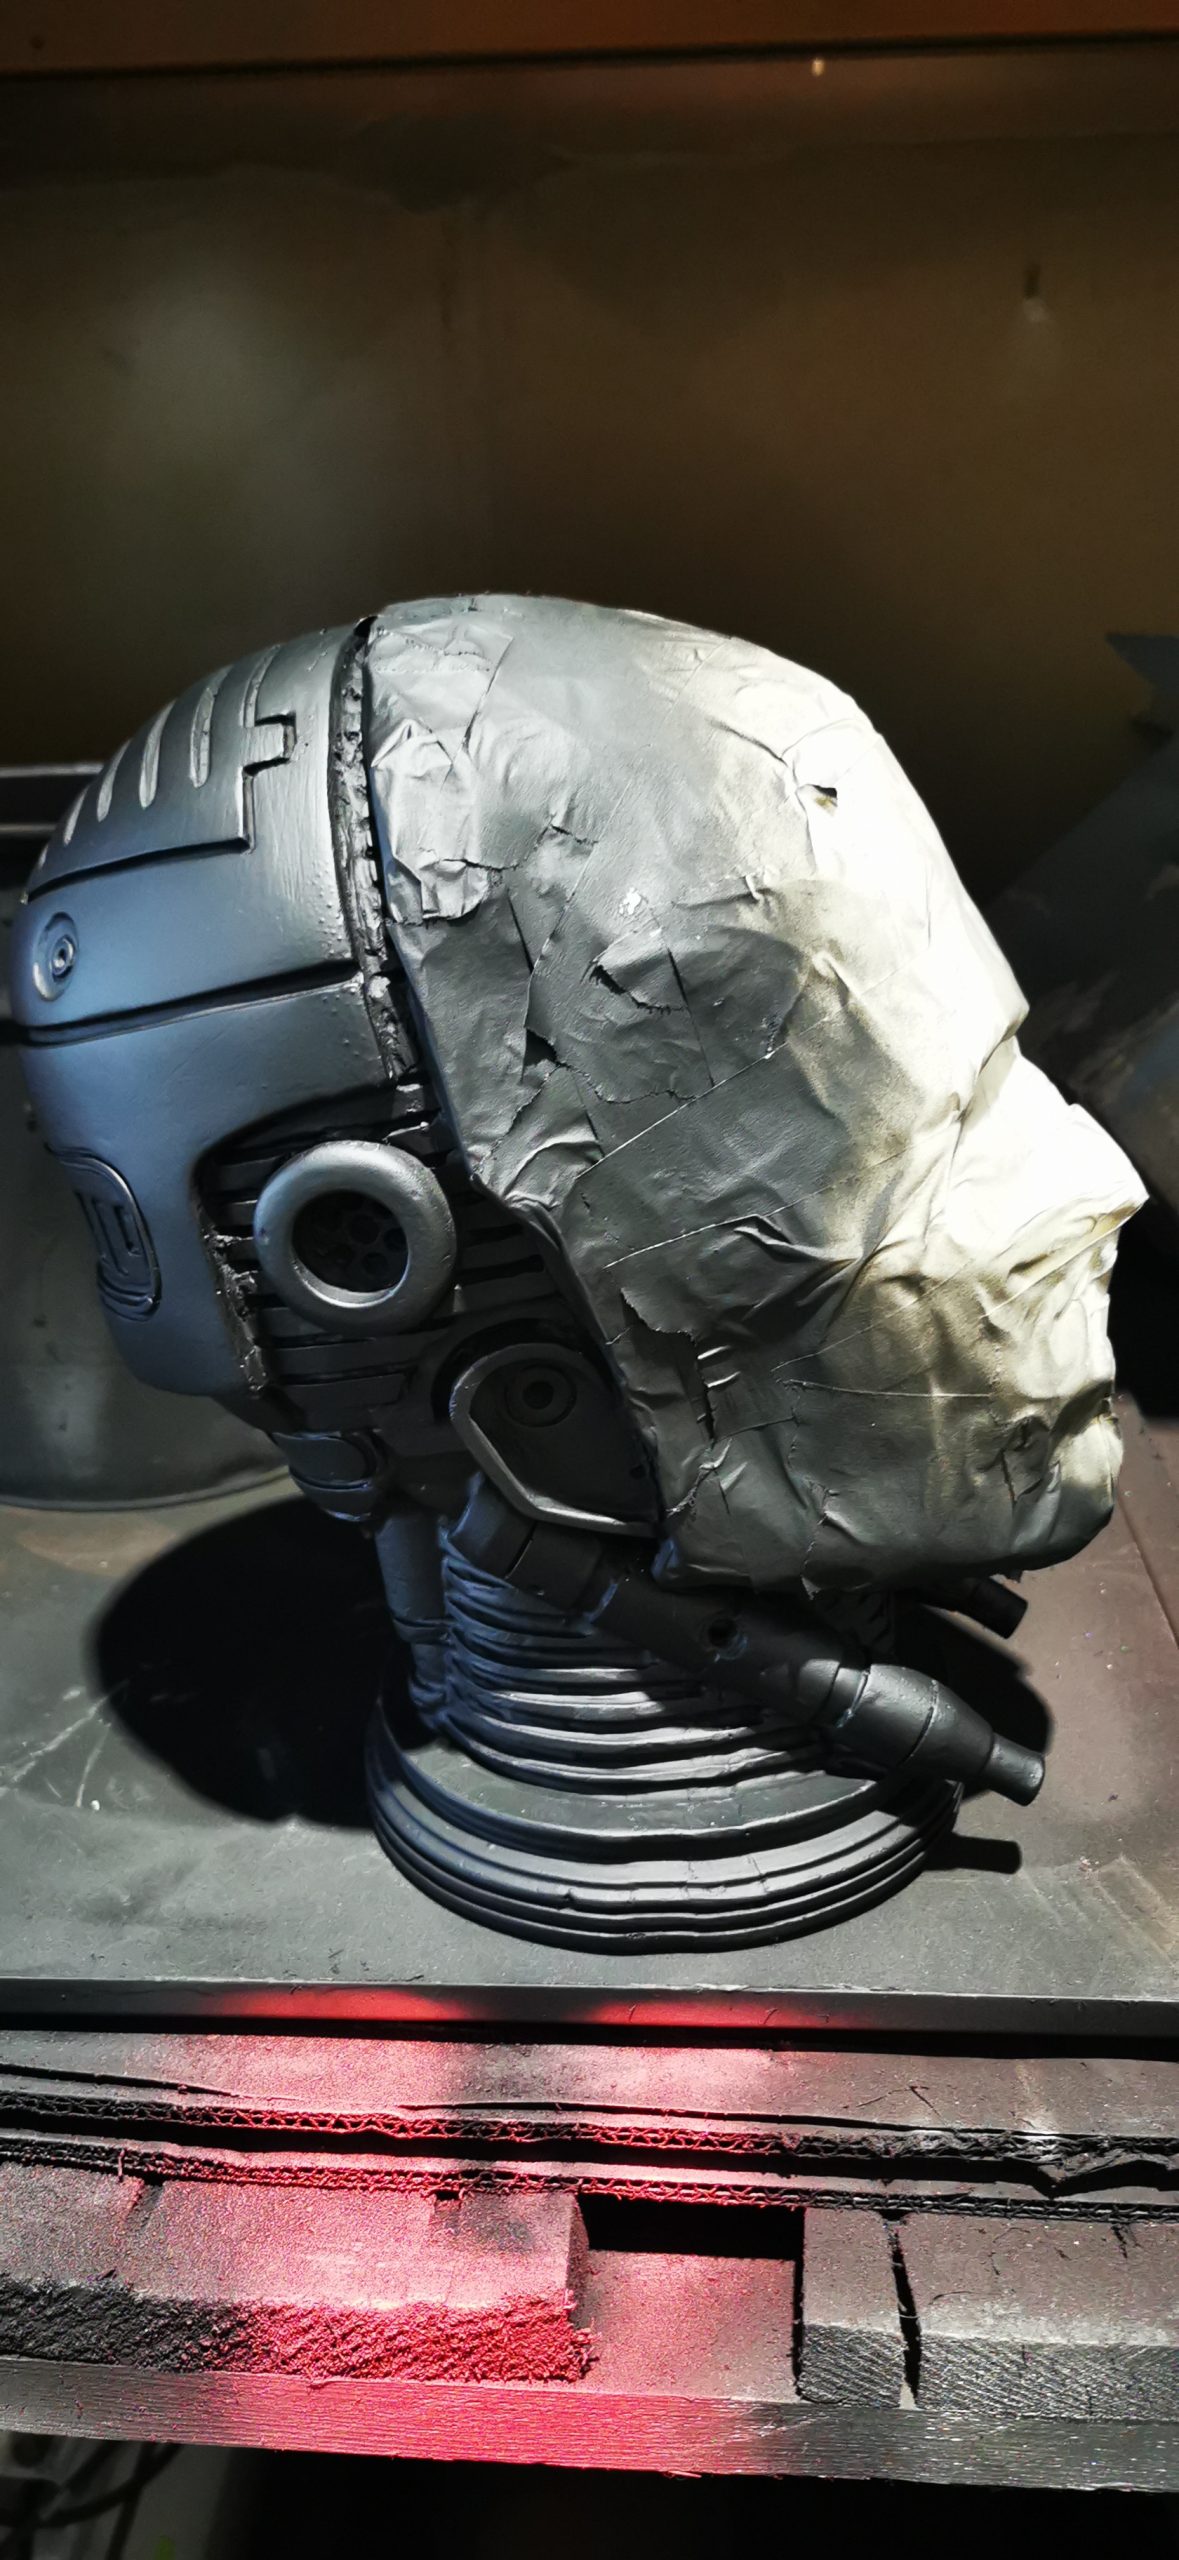
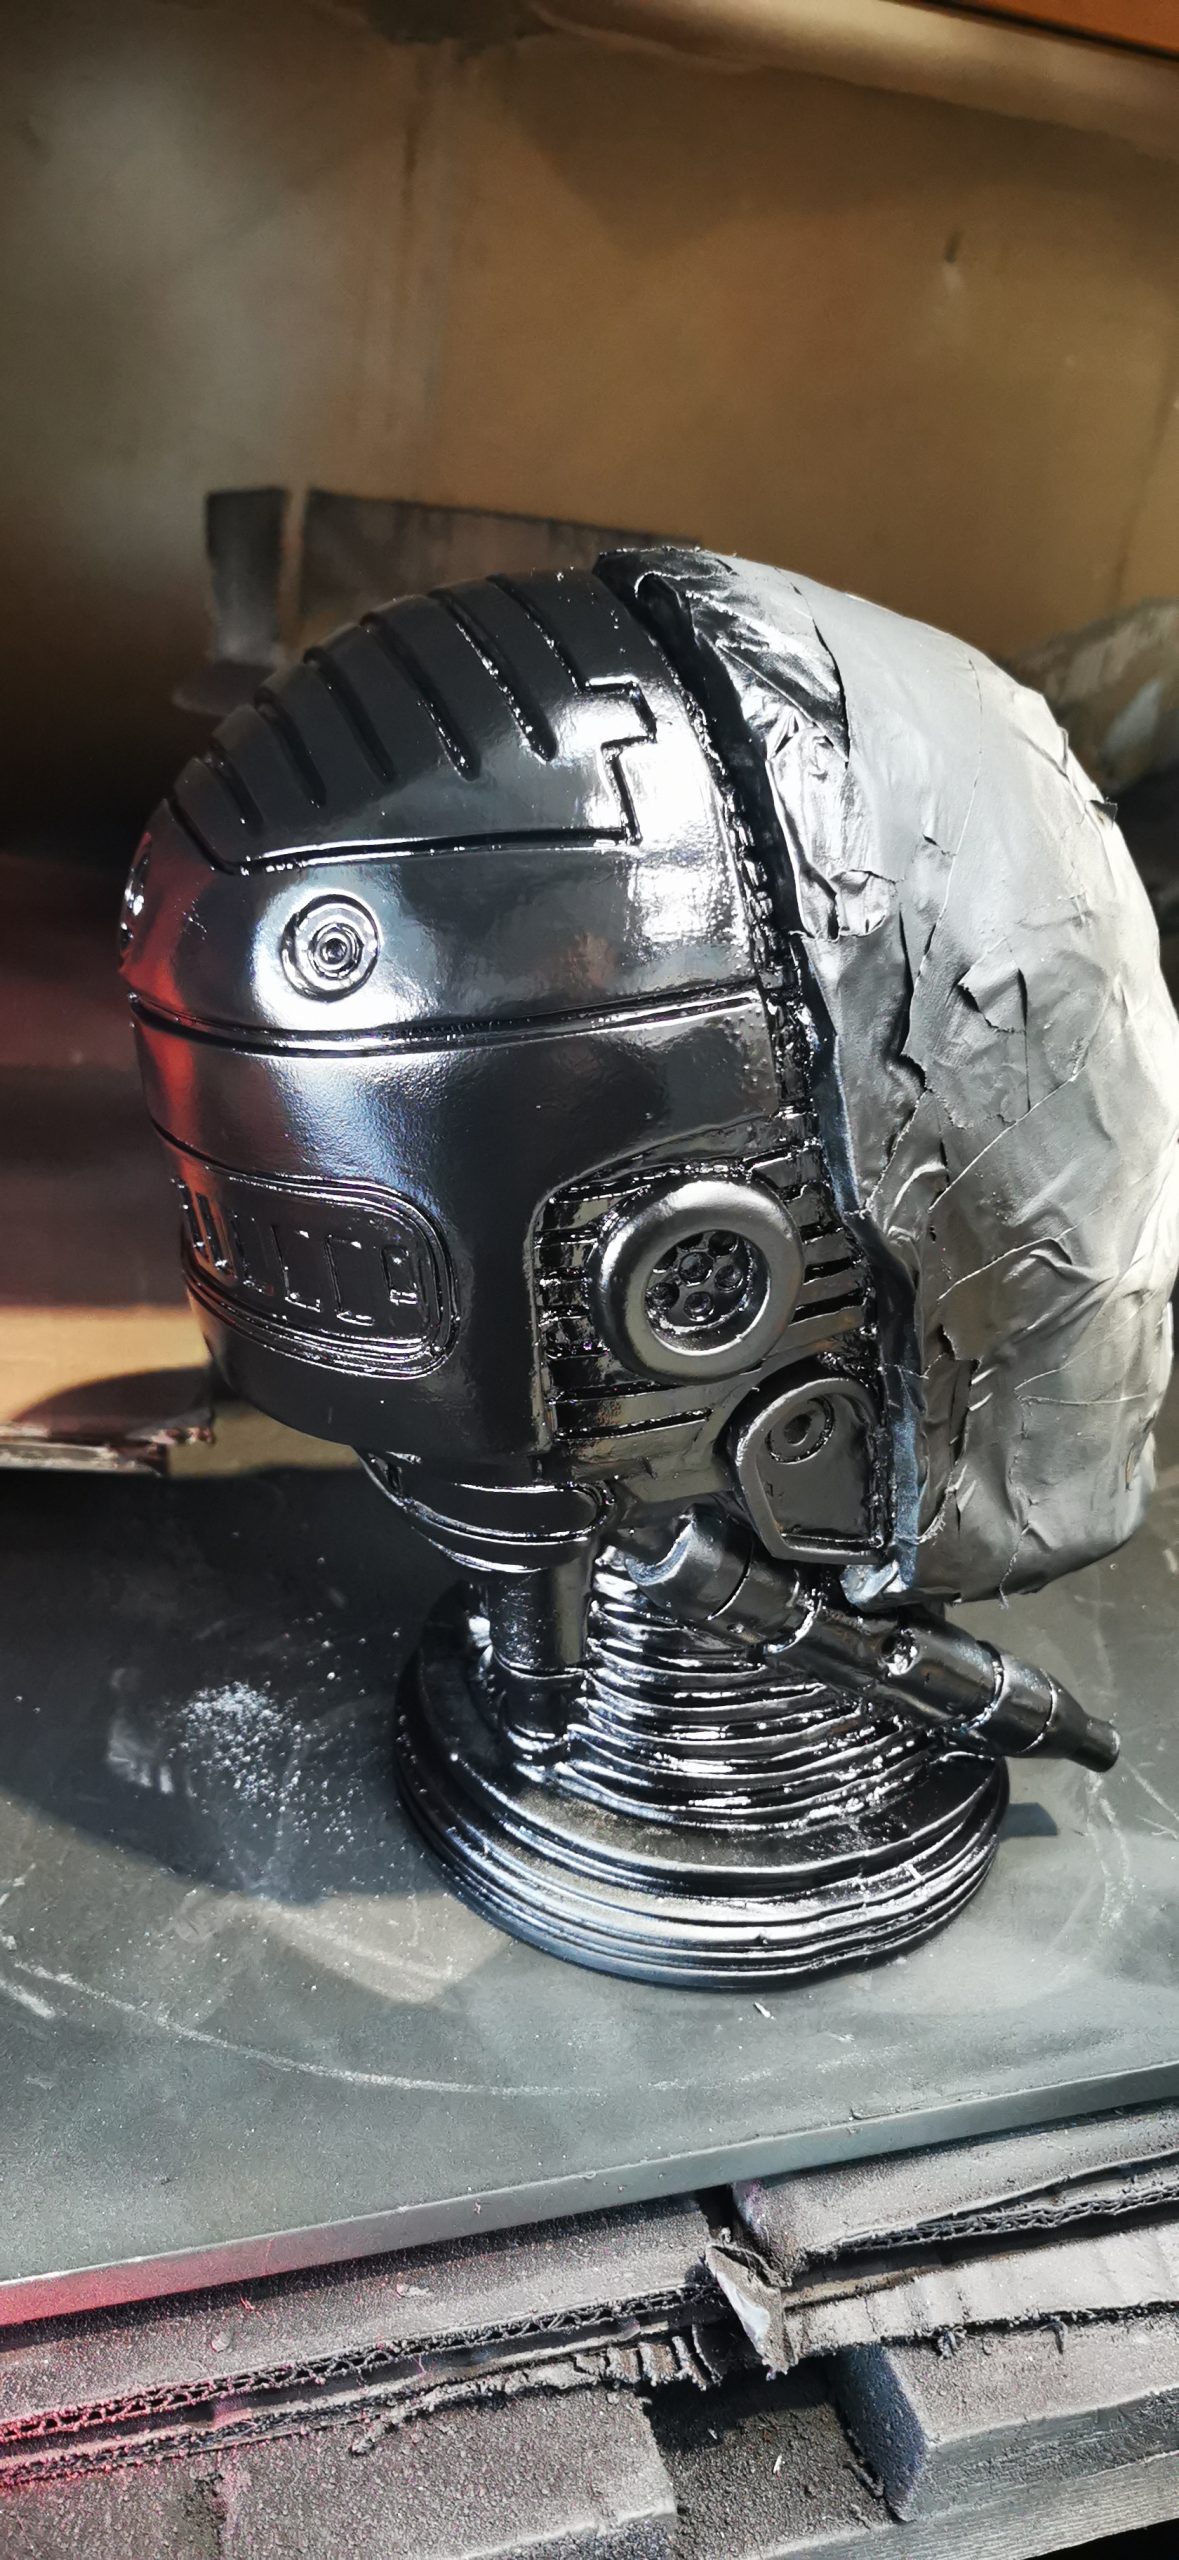
Base Colour Effects And Lacquer:
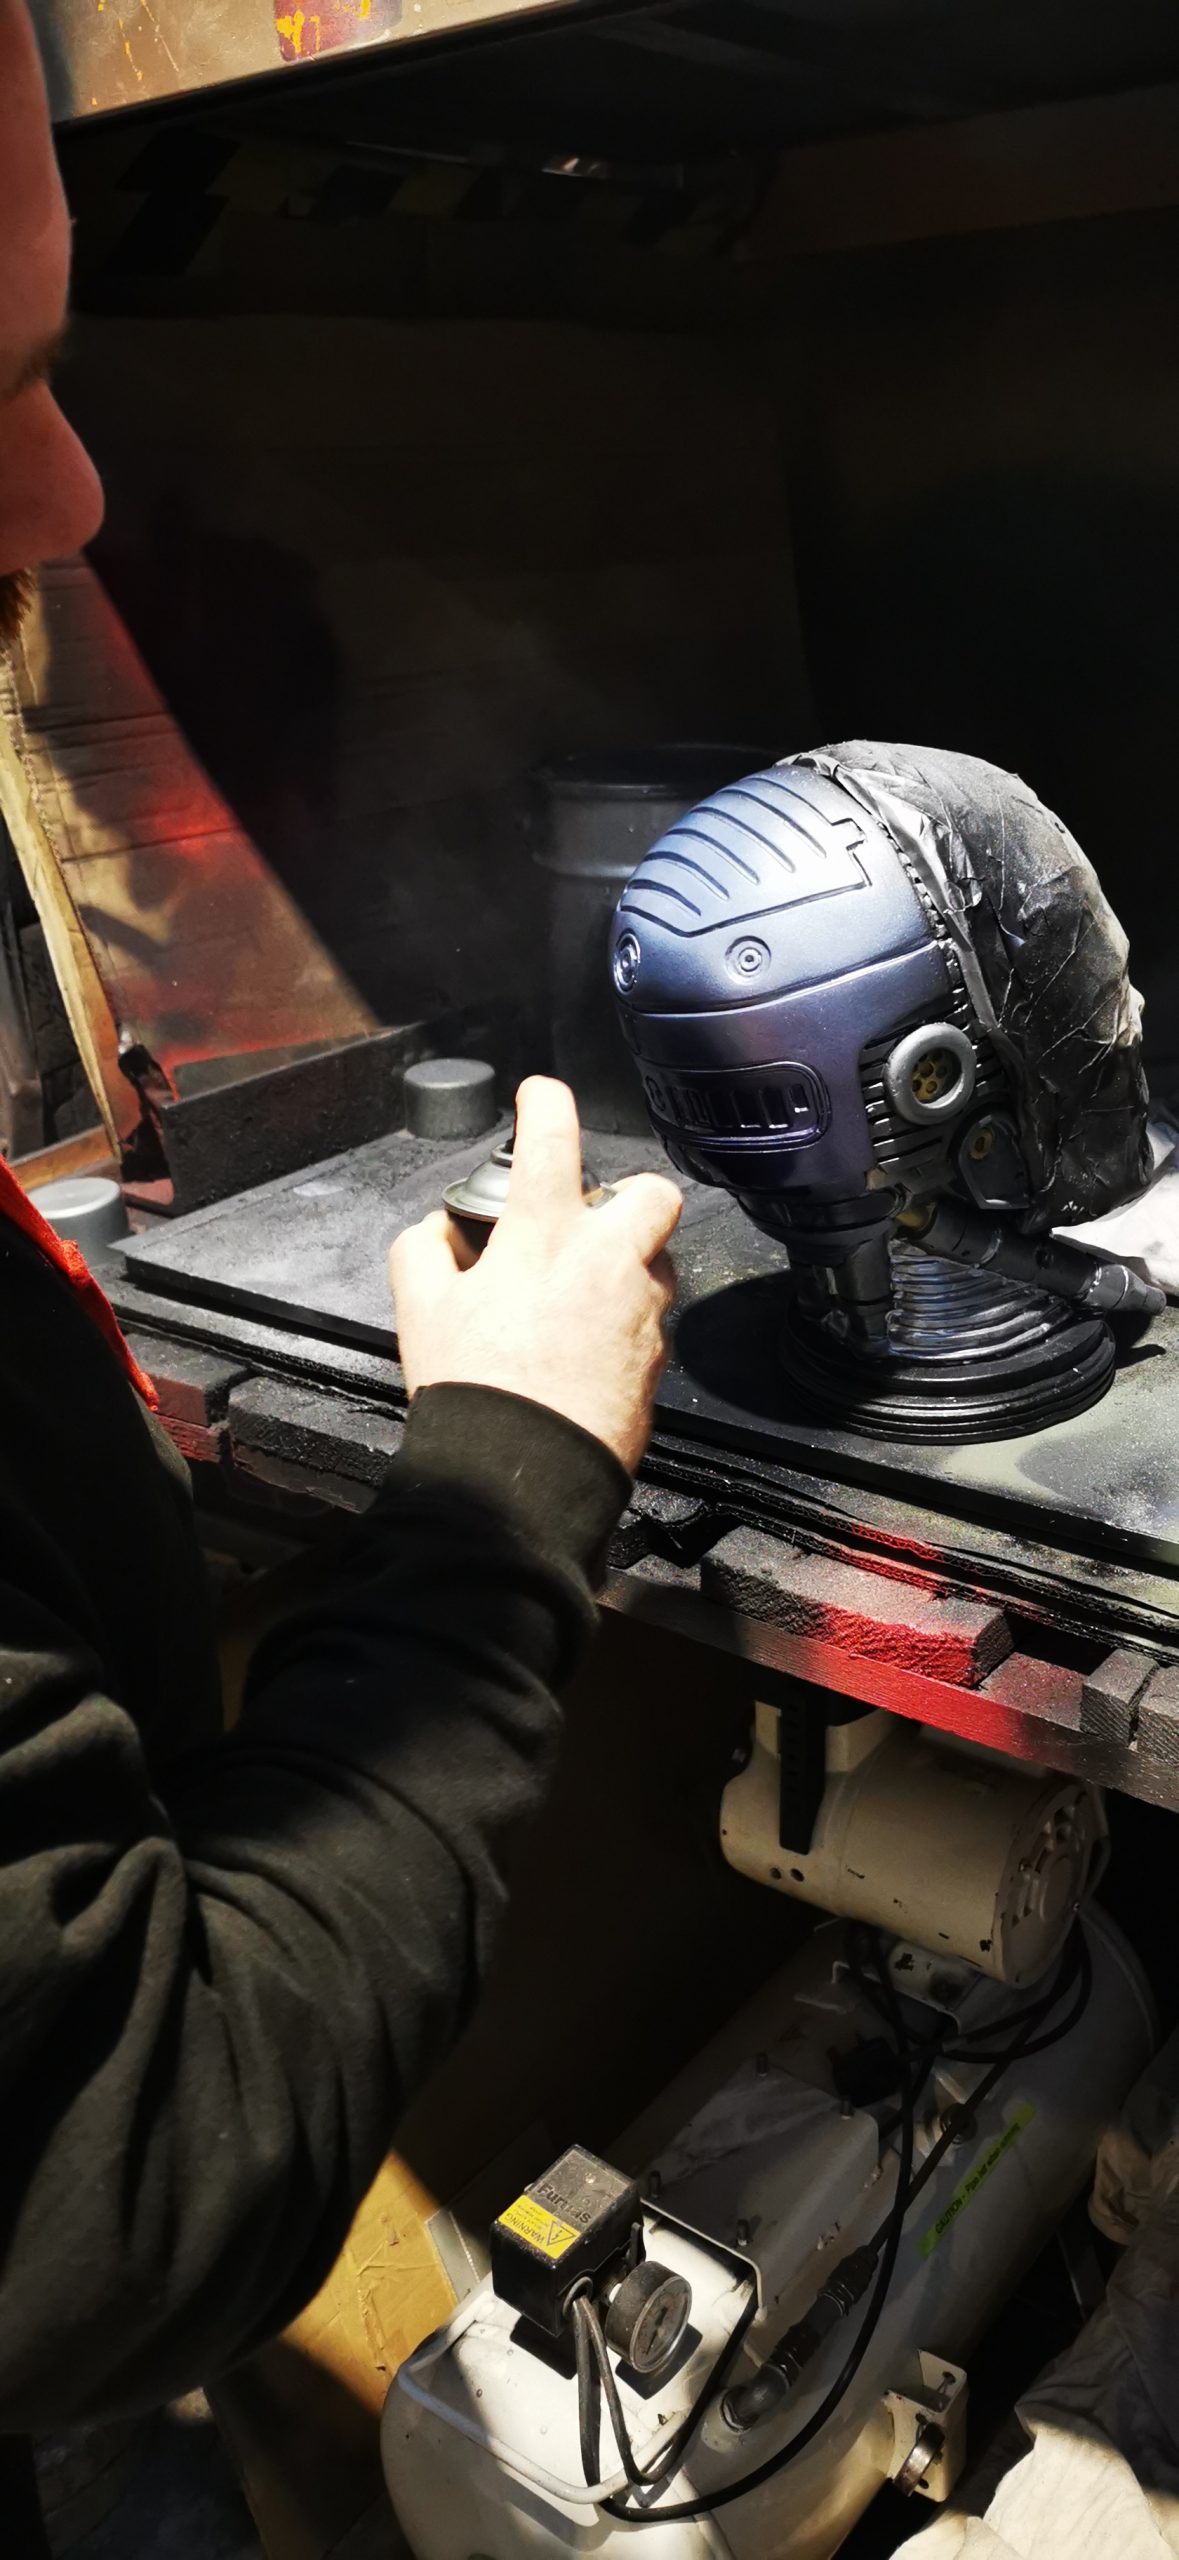
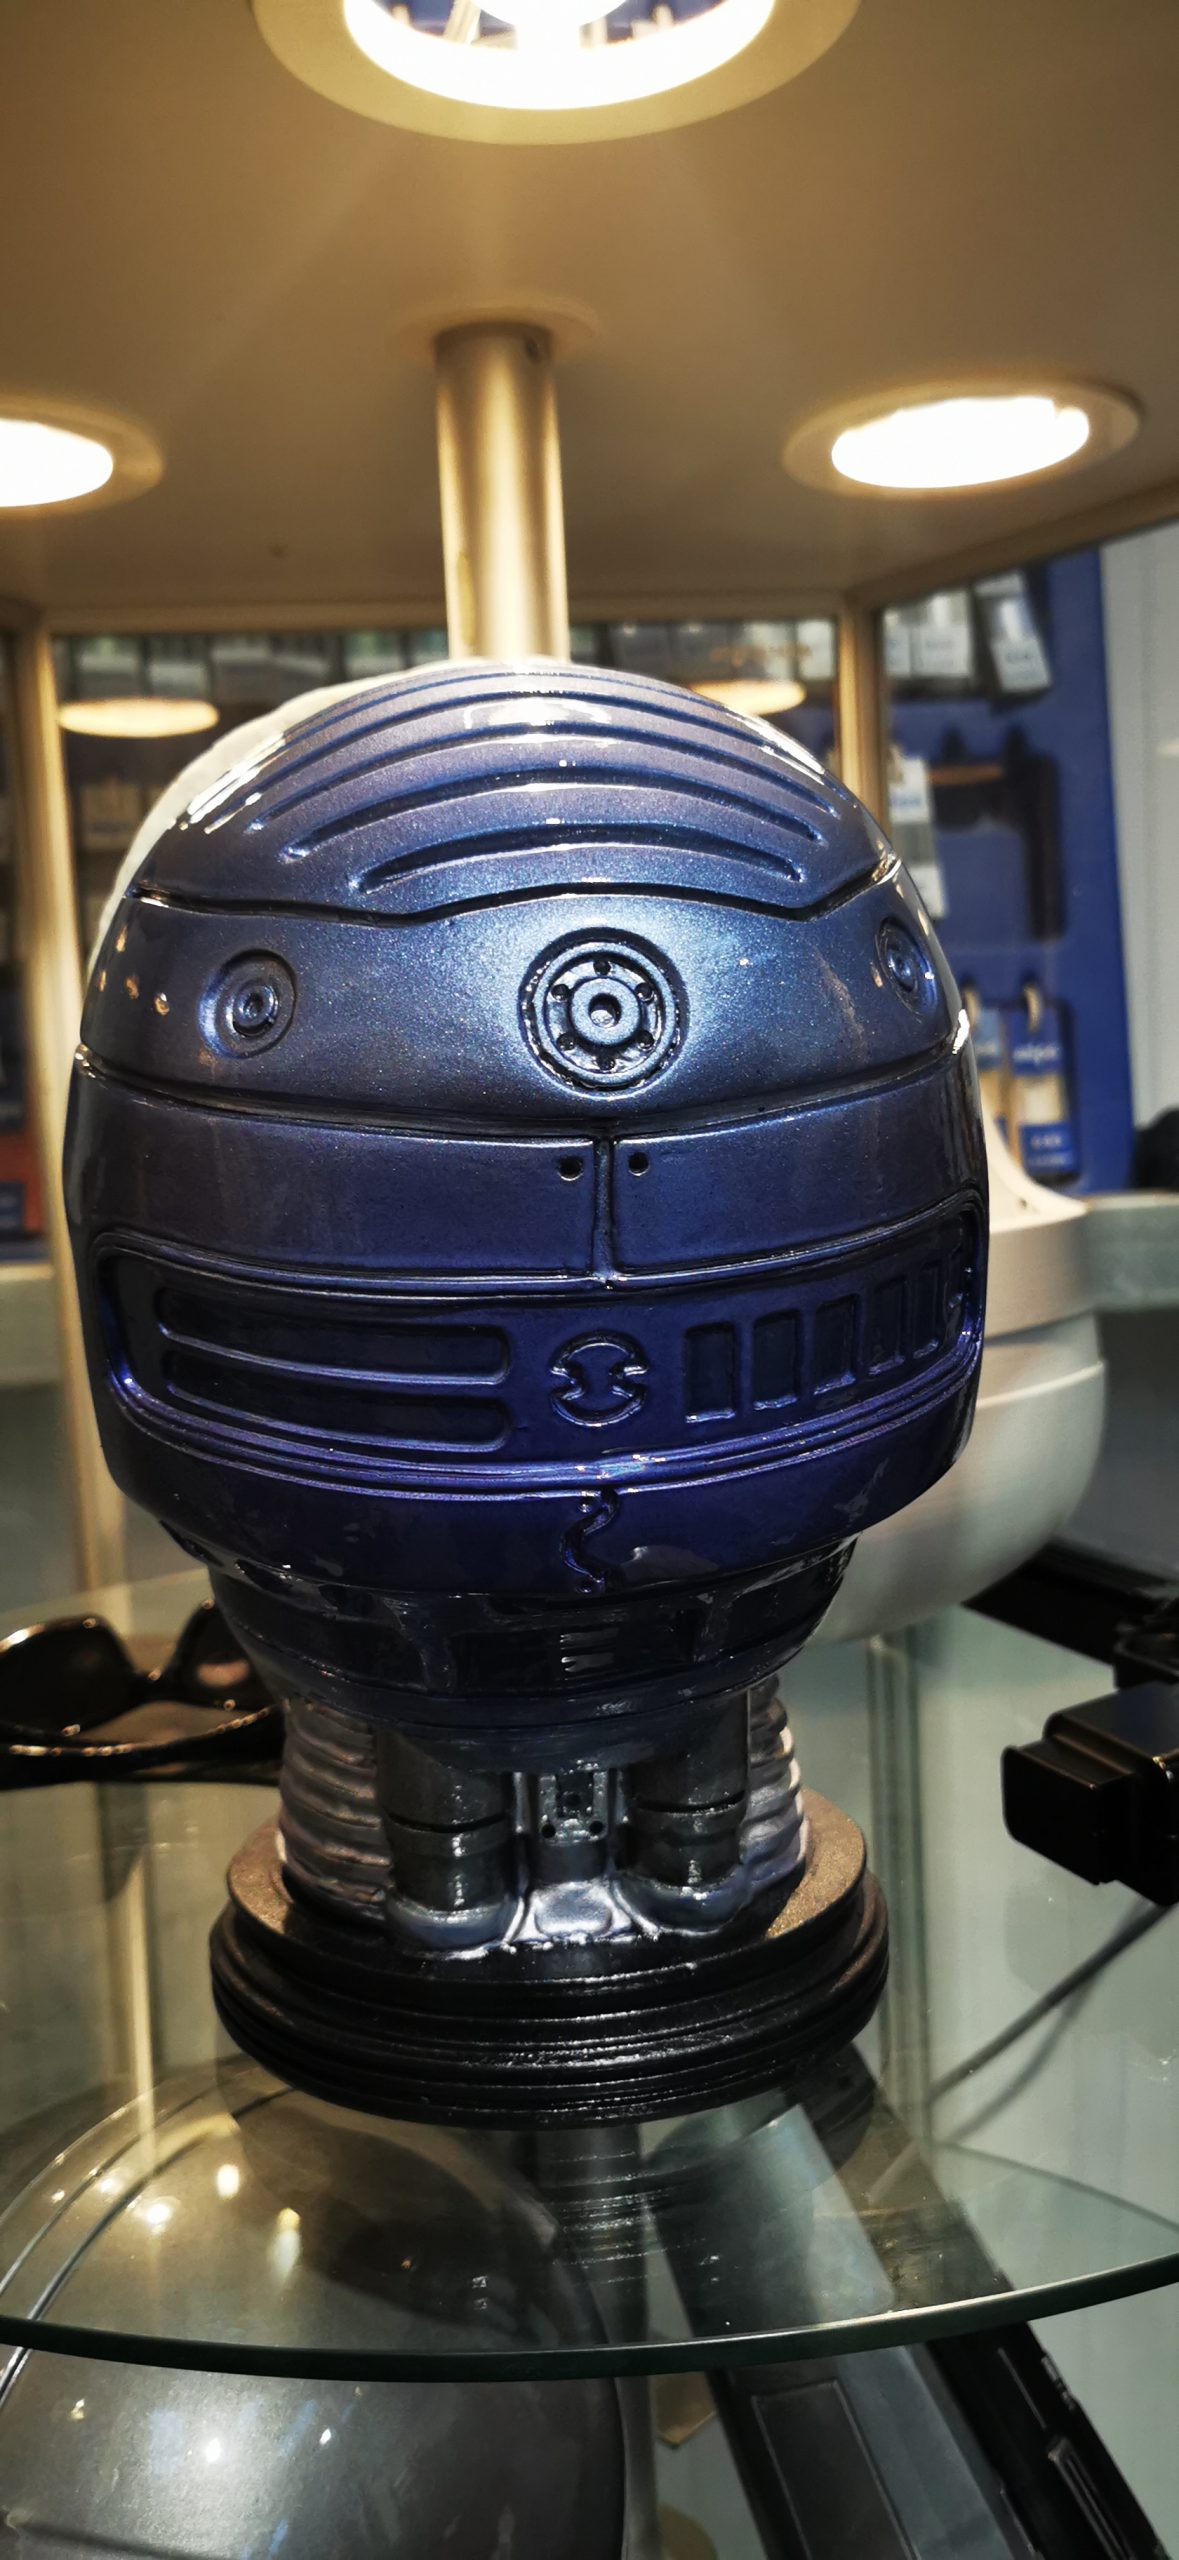
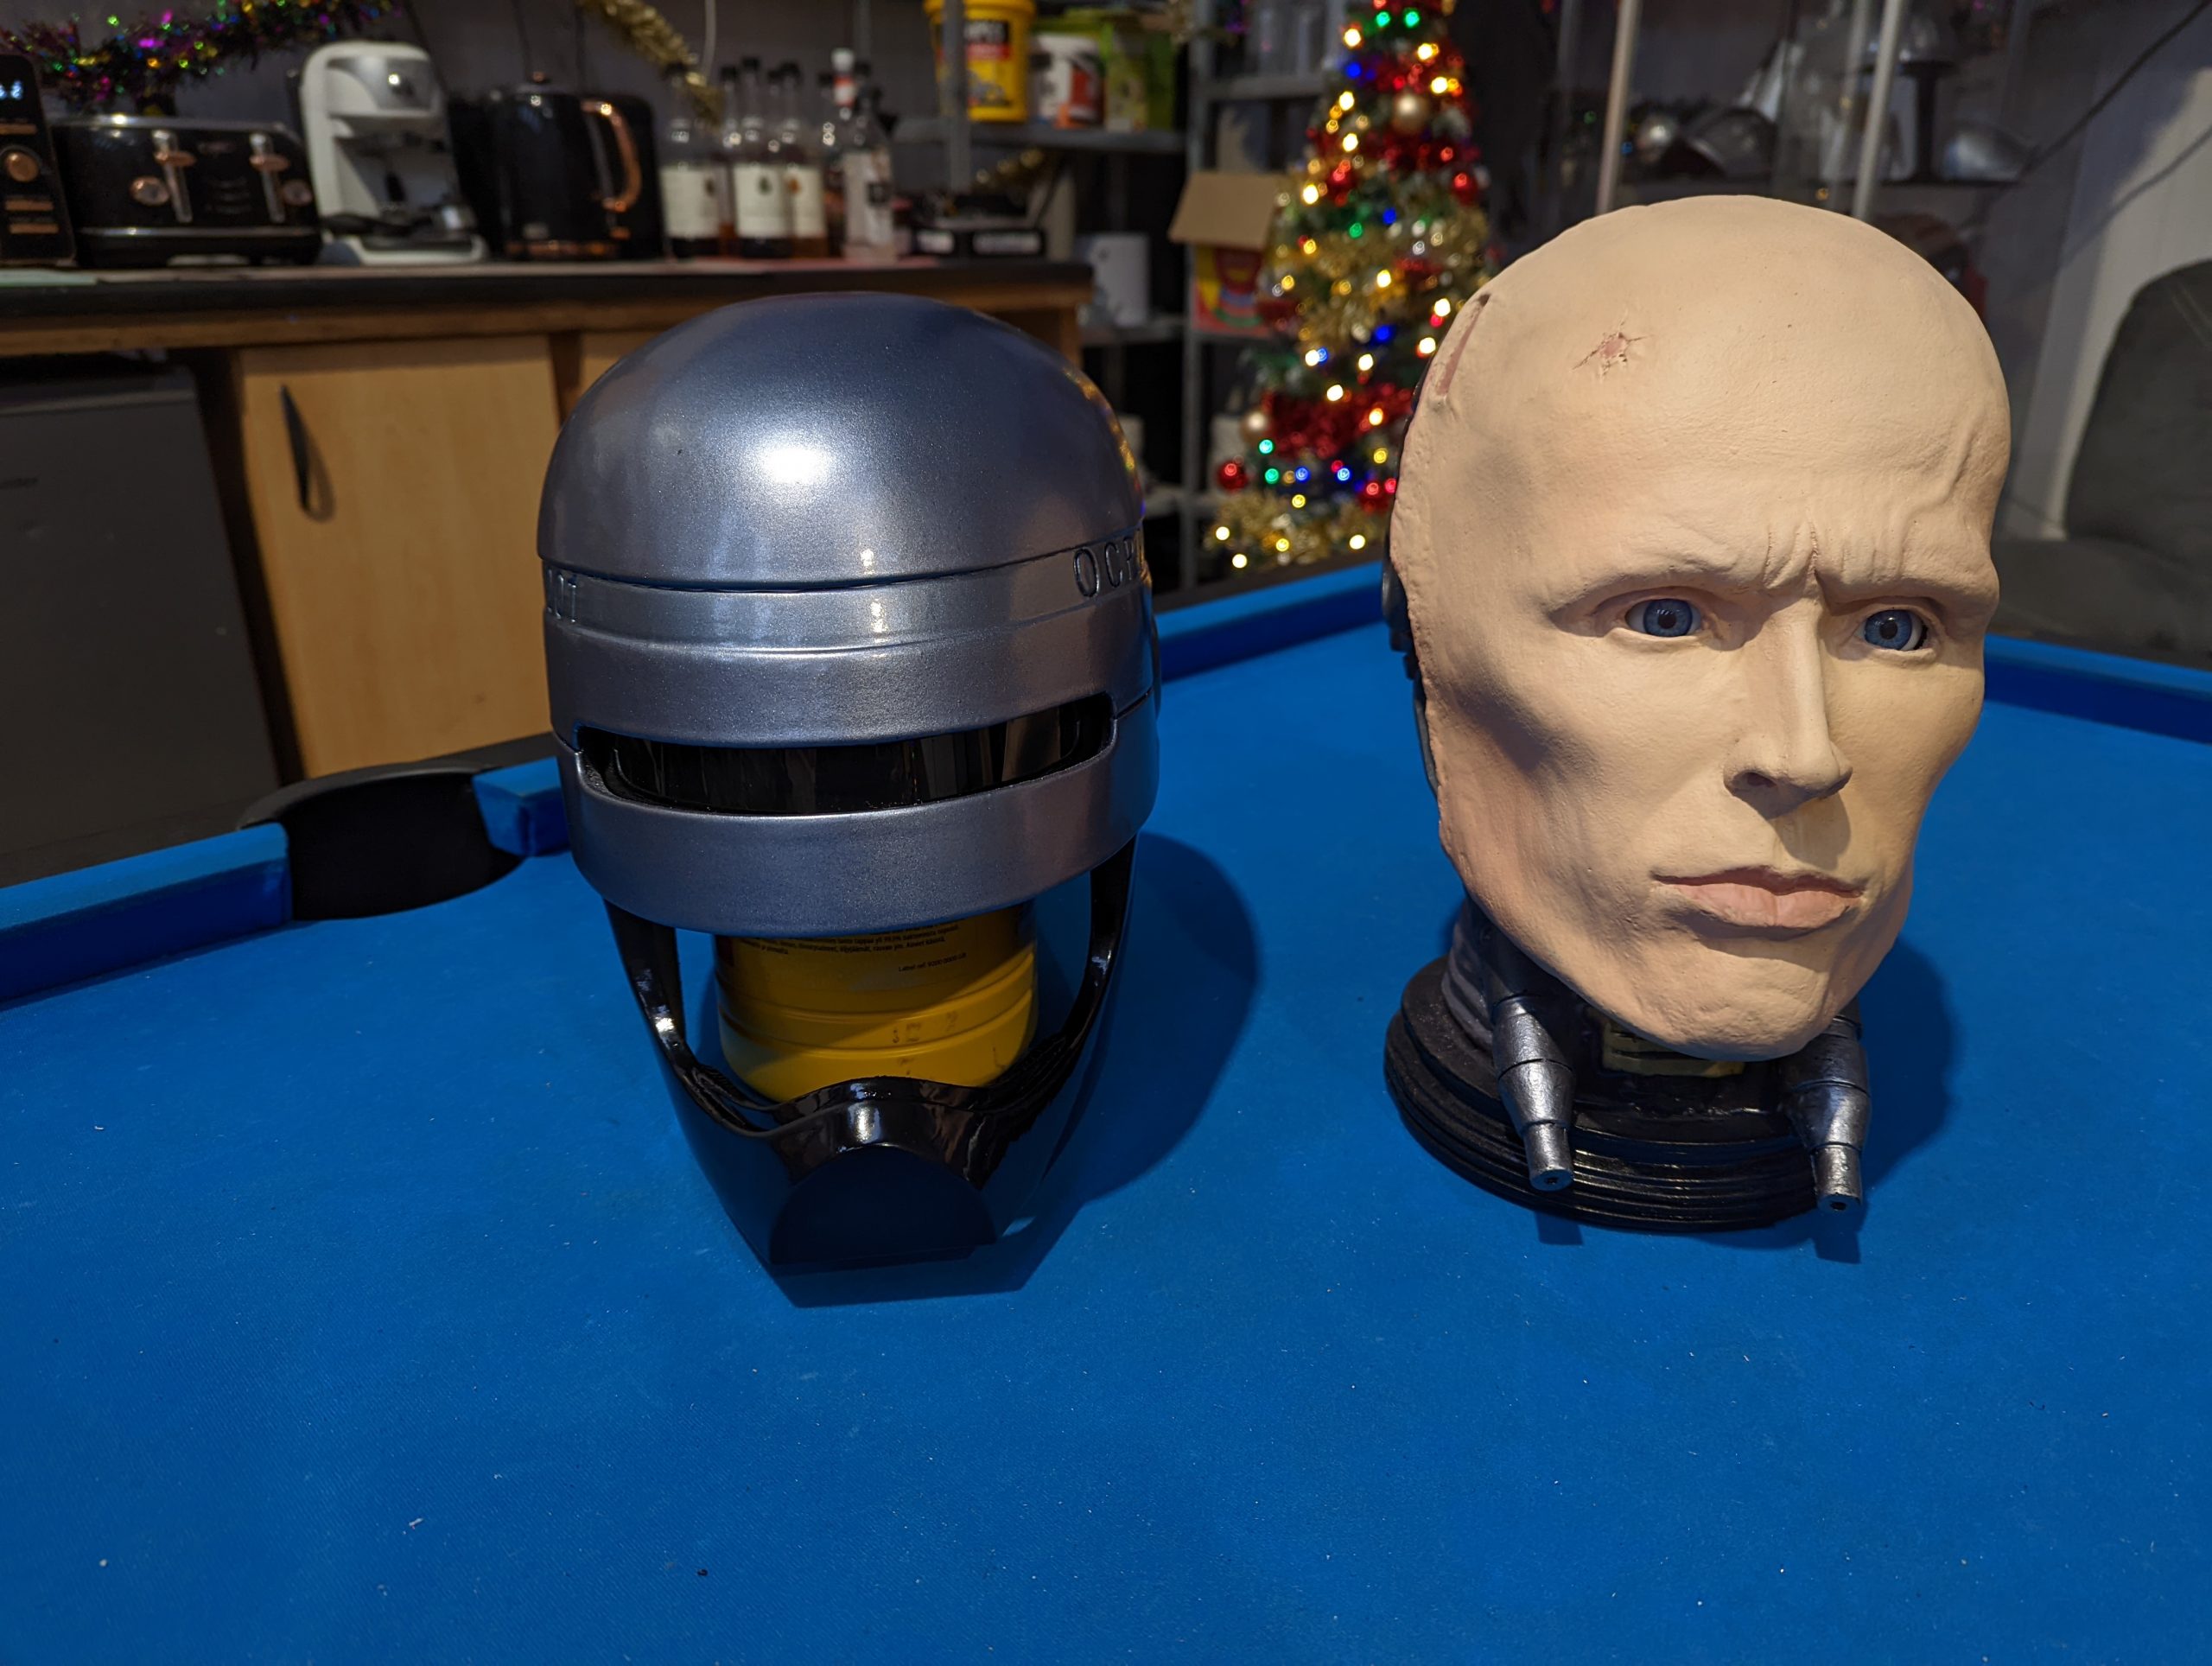
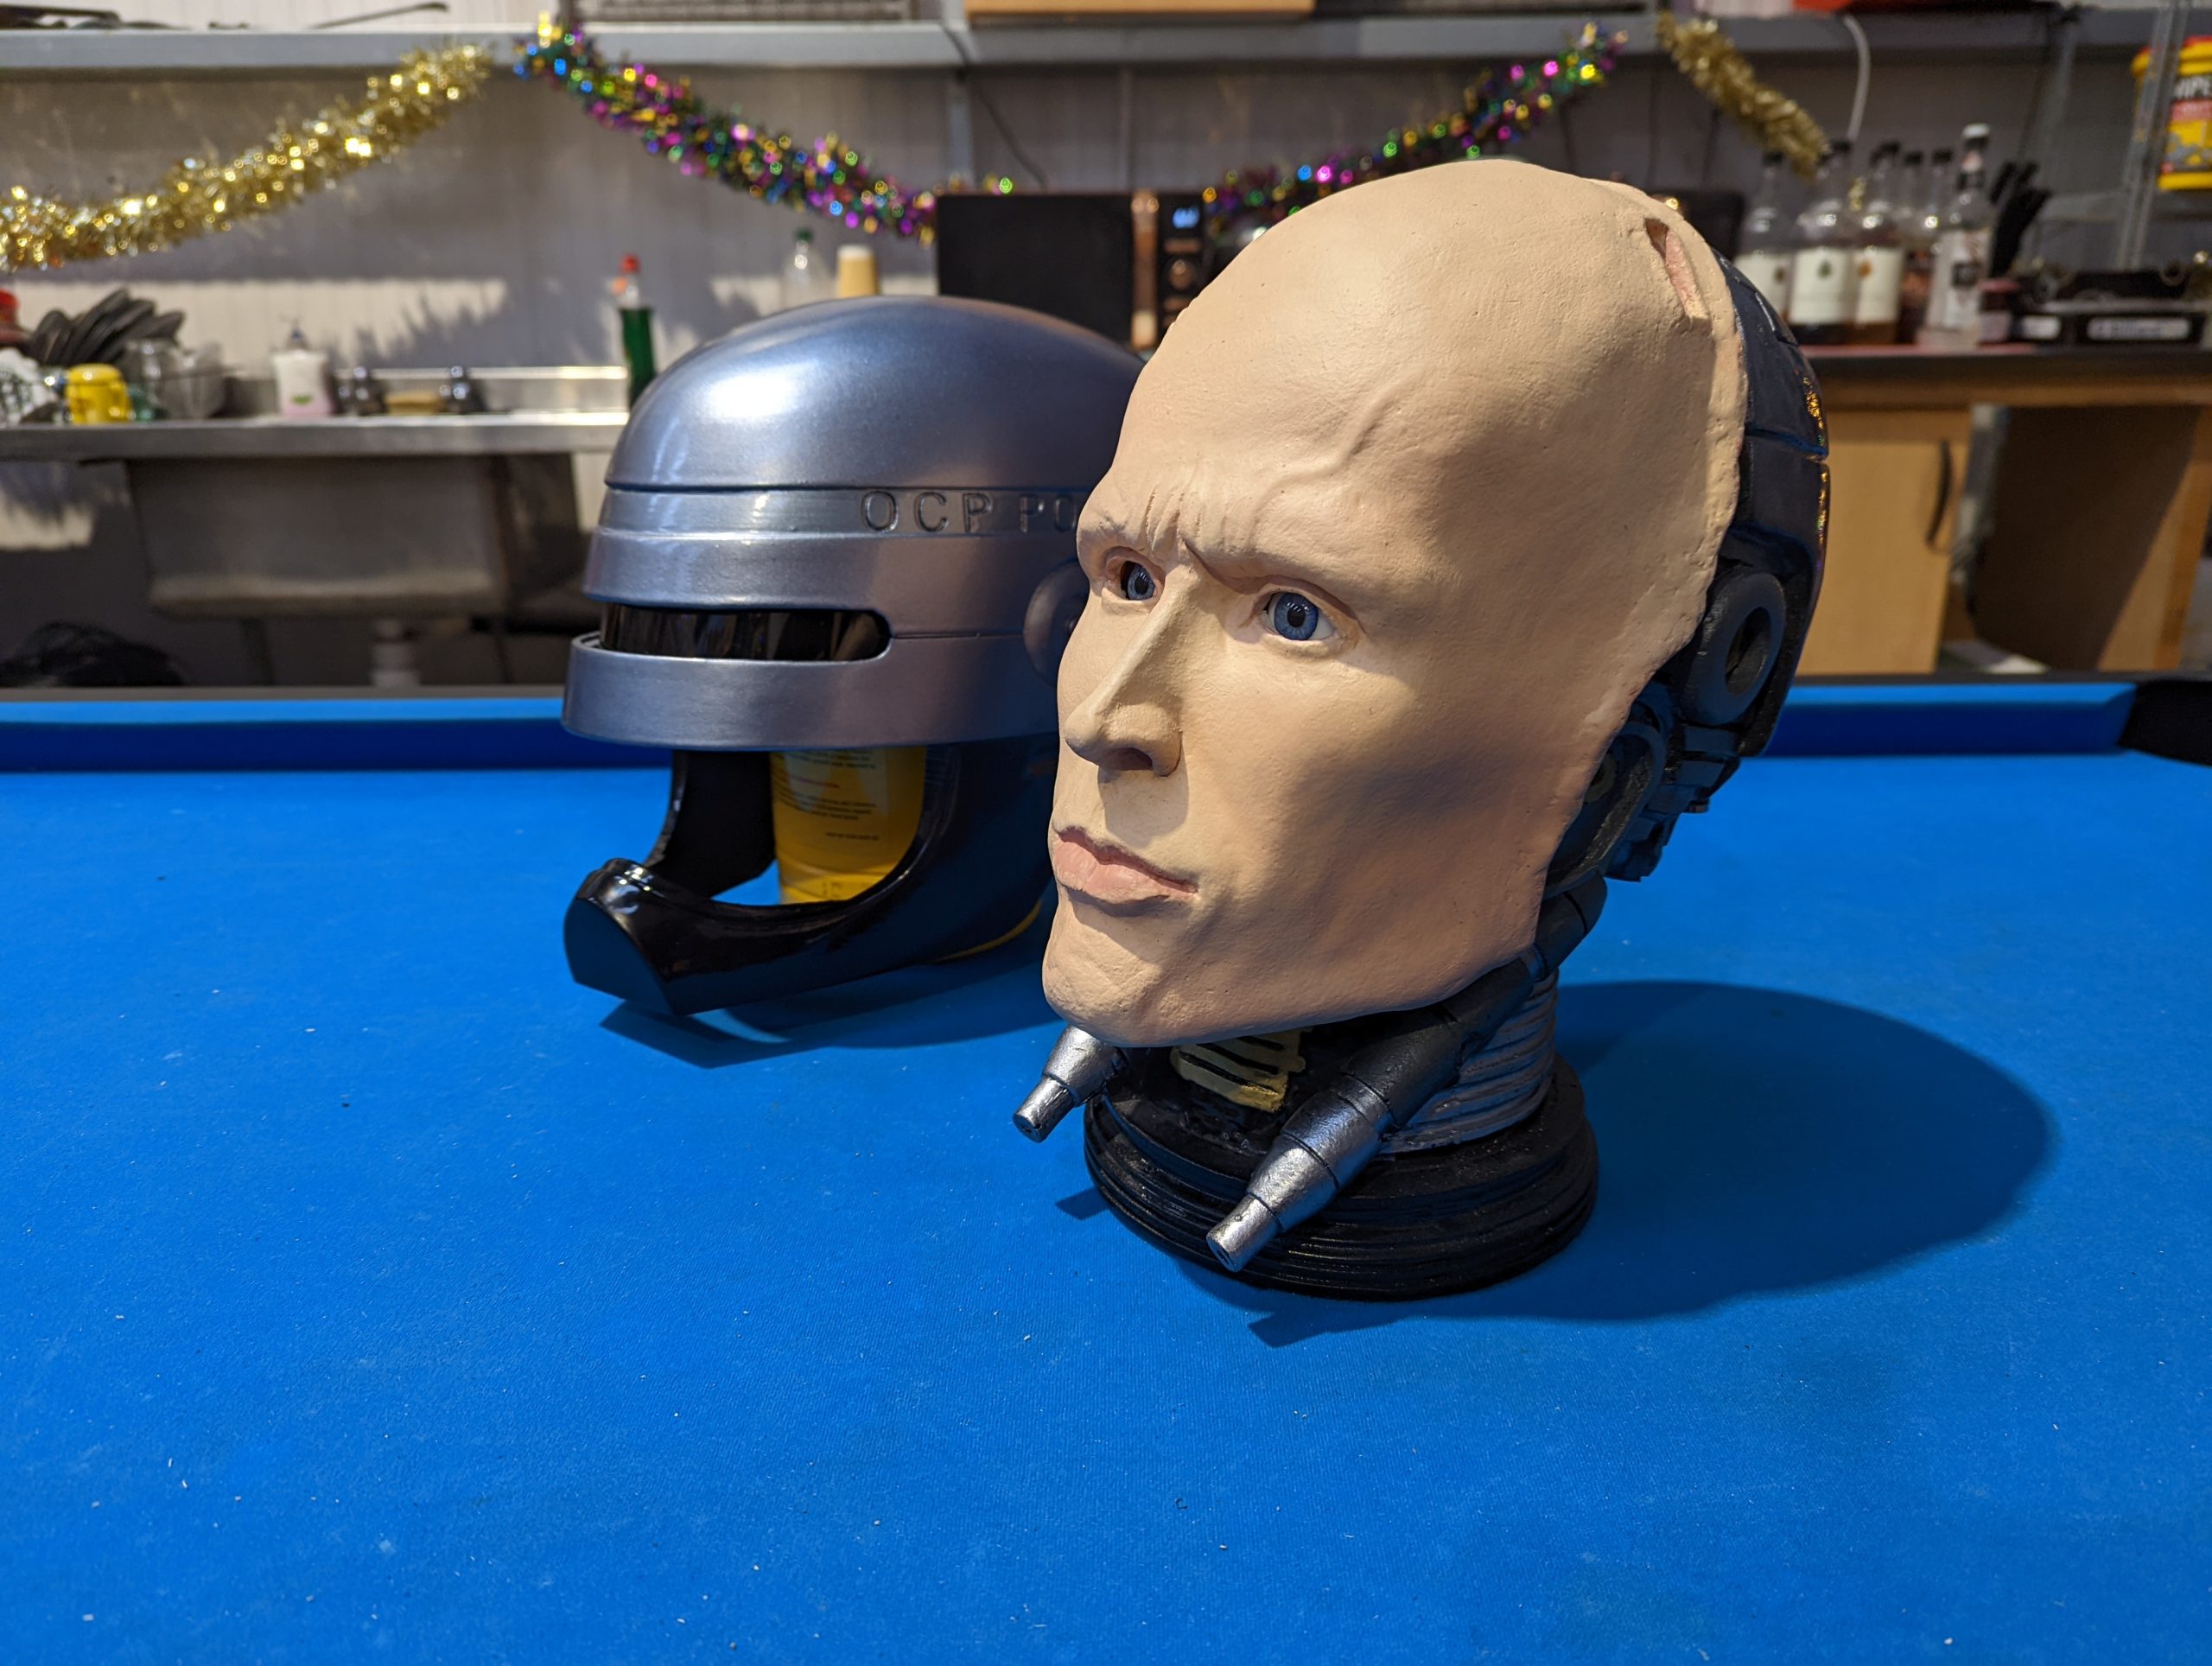
Rear Of The Bust: After reviewing the base material online, we needed to make 3 or 4 different RAL Metallic Colours for the rear of the bust. Mask up different parts that you want in different colours. For the harder-to-reach parts, spray the paint into the lid of the aerosol and use a fine paintbrush to apply it to difficult areas. Once that is completed, apply a 2K Gloss Lacquer to seal the finish, give real depth and make the paint look metallic.
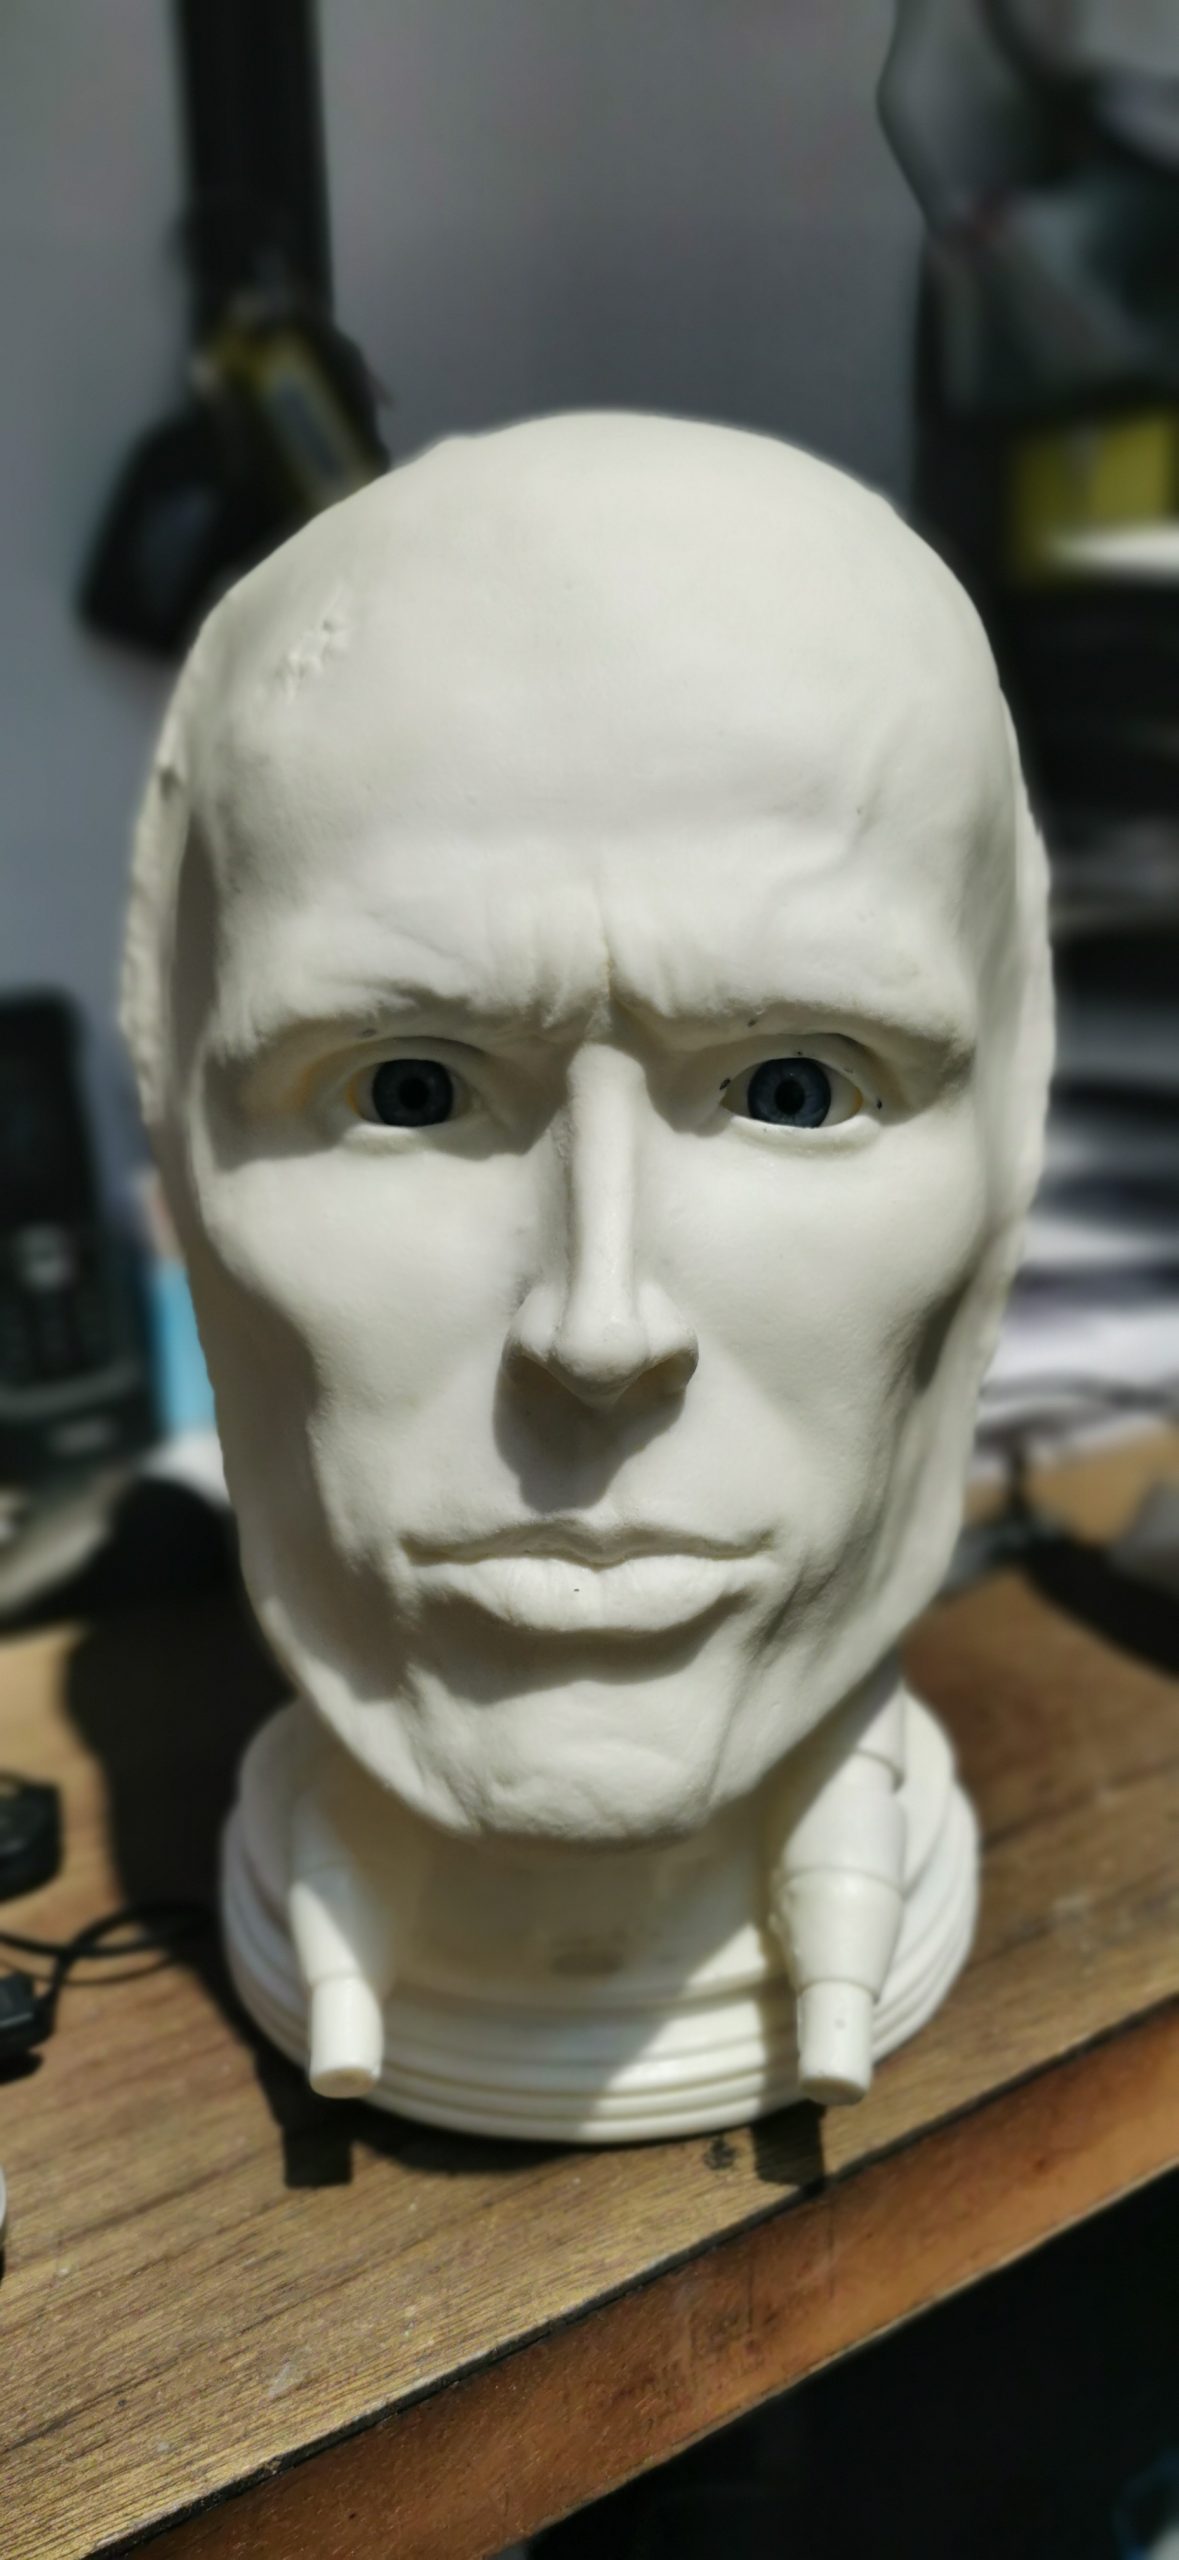
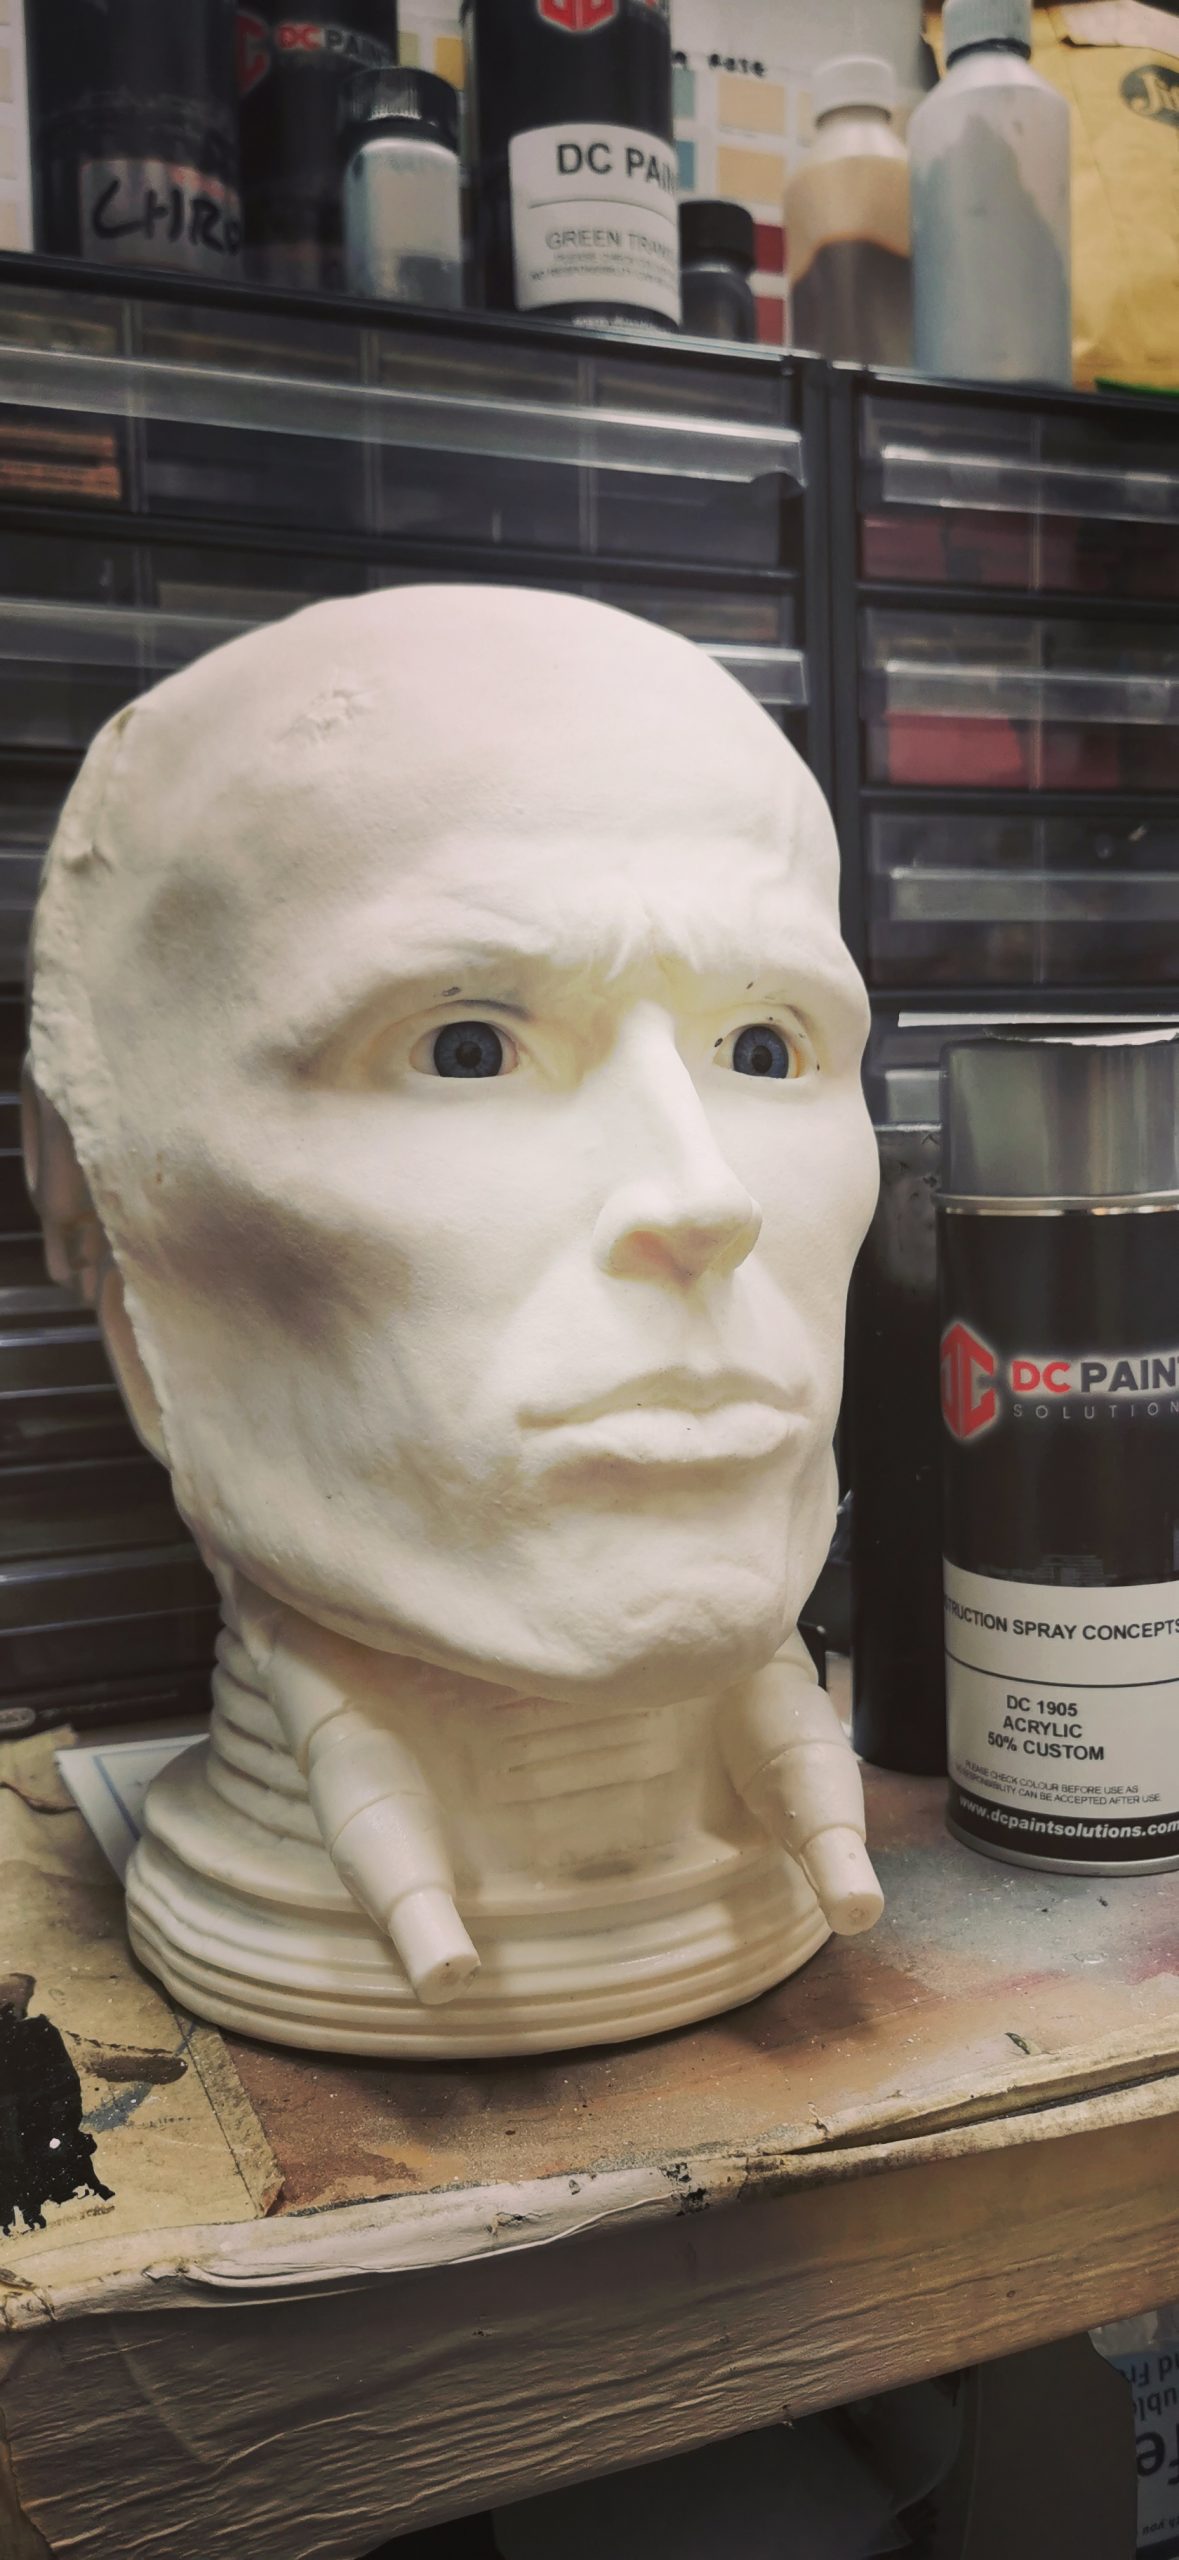
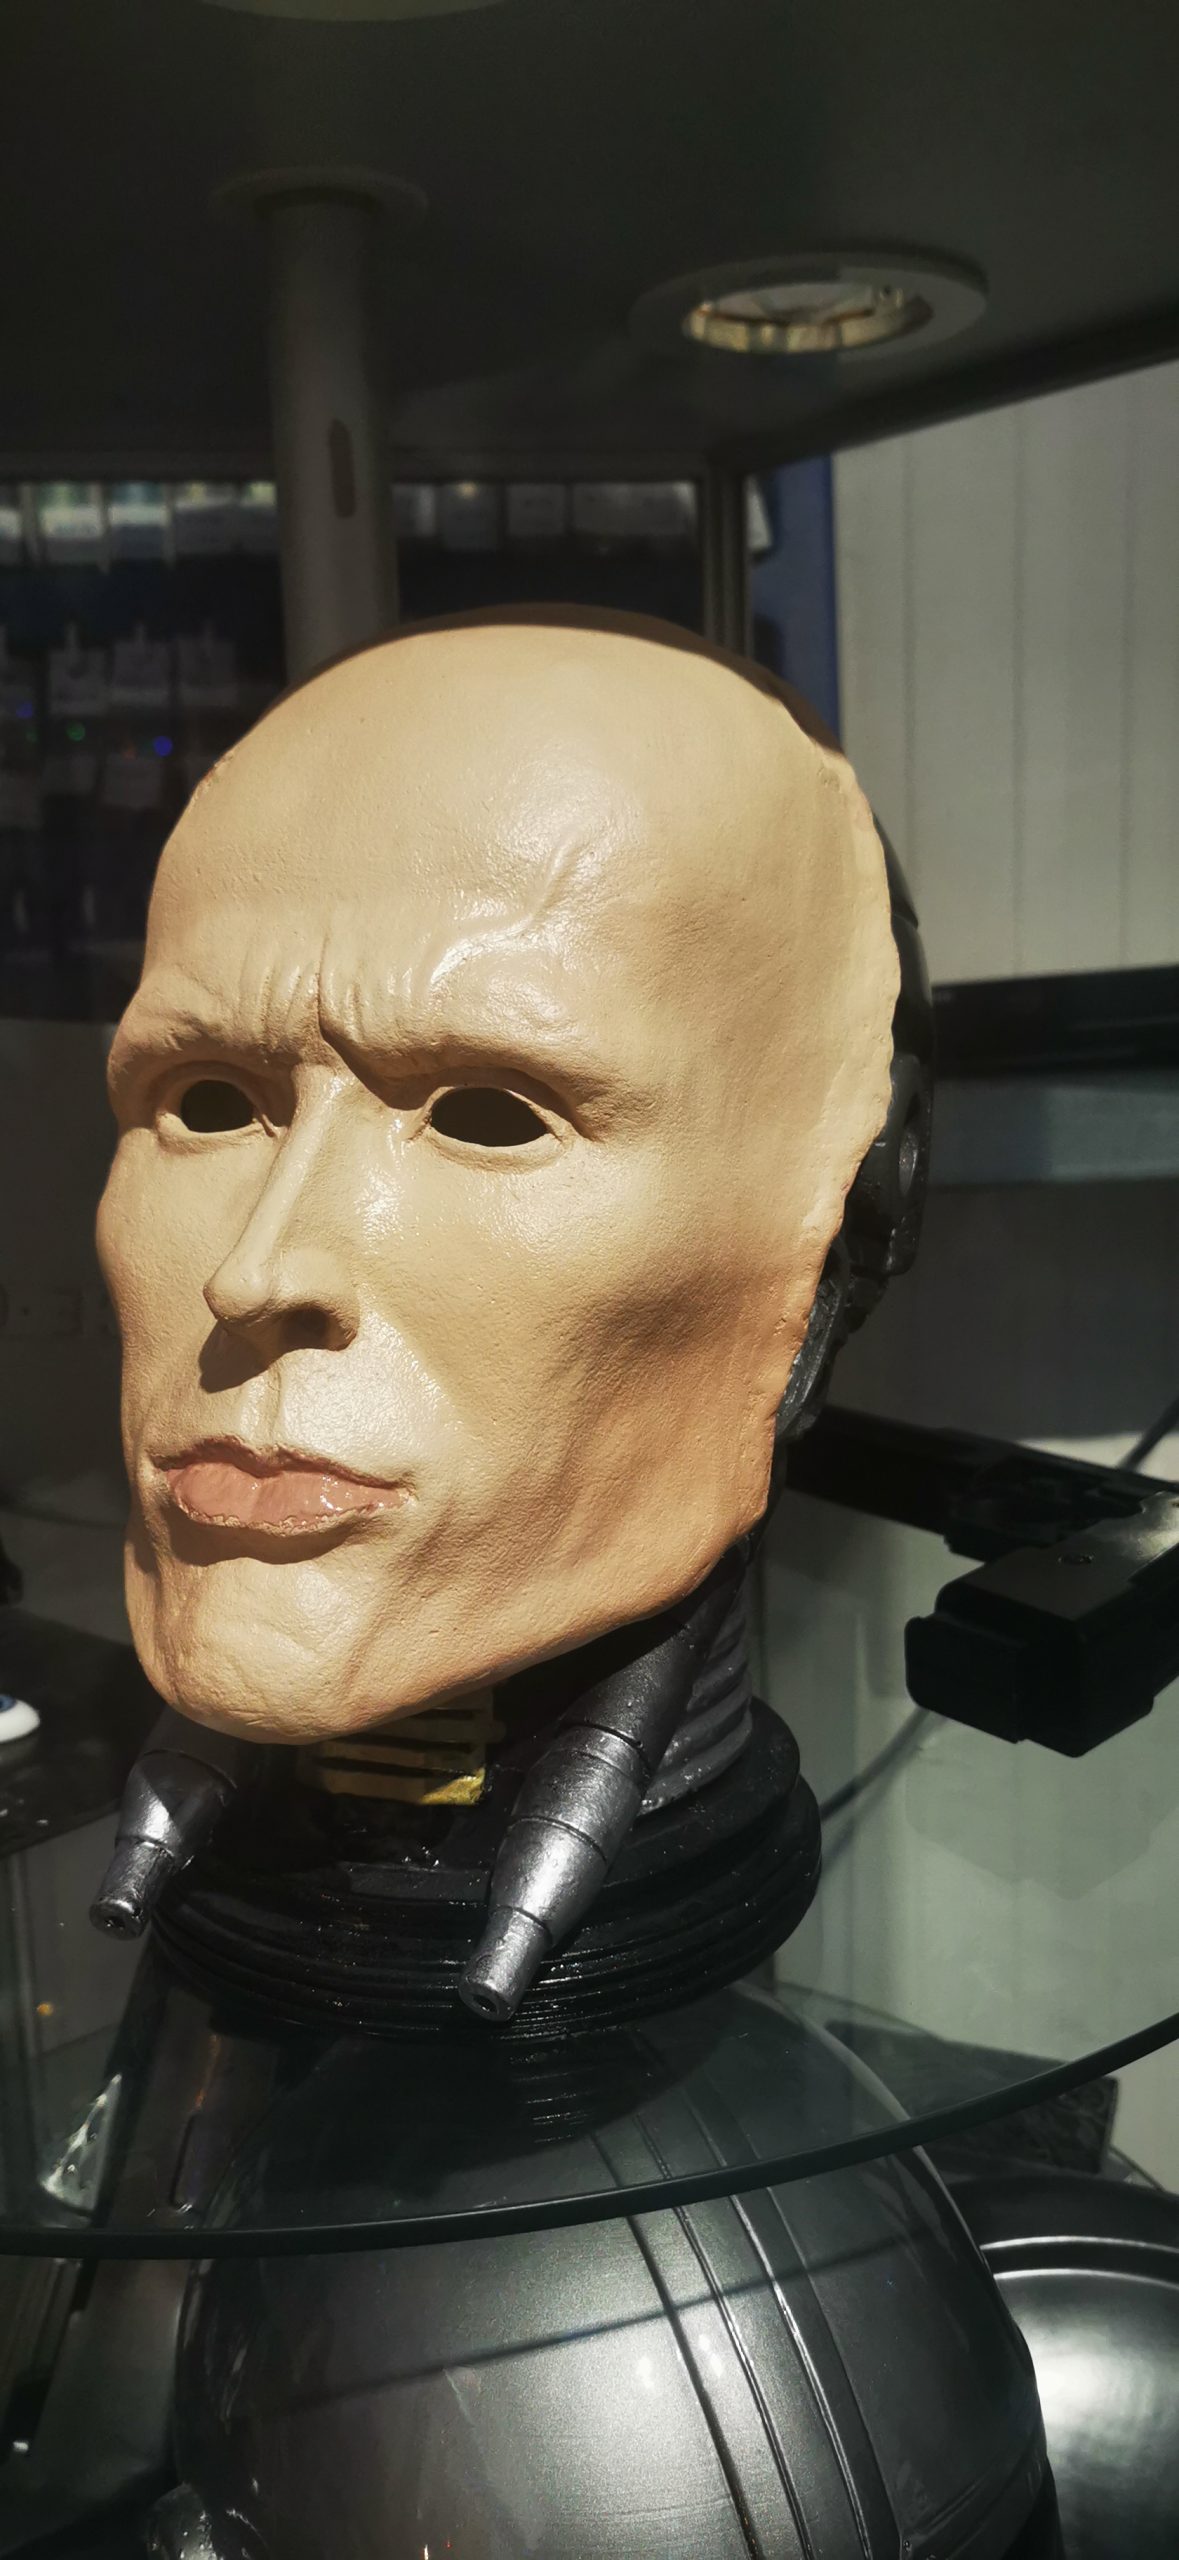
Front Of The Bust: This part of the job can be a little more complex as you may need to apply two different tones to the skin and one for the lips. As before, spray some into the aerosol cap and apply it with a brush. Once this had finished, we applied a new product we have been testing called 2K Soft Touch paint. When dried, this top coat gives the effect of a skin-like texture. To top it off, we bought some real glass eyes to bring the project to life.
Final Word:
This was only half of the project, and we will follow up with the actual Robocop Helmet we had custom-made for this project. This led us to try different paints and approaches to get the final product. Watch out for the second part of this project so you can see the final outcome!